How to Crochet the Basketweave Stitch Easily
This post includes affiliate links.
This is a free tutorial for creating the Basketweave crochet stitch. The tutorial has both photos and videos.
The art of weaving baskets is one that has left an impression on almost all, if not all, civilizations in human history. Unfortunately, due to the craft utilizing natural substances that decay without proper preservation, it is hard to know the exact origins of this craft.
The earliest record of basket weaving can be traced to Pre-Pottery Neolithic sites dating around 7500 to 5500 B.C. approximately. However, these traces can be seen through impressions left on floor surfaces rather than physical pieces of the baskets.
As one of the most widespread crafts, basket weaving continues to thrive in modern life across multiple mediums. Crochet is no exception.
If you are looking for a stitch that provides lots of texture without creating too much bulk or if you are in the mood for something traditional, please read the basketweave stitch tutorial below.

As a beginner or even as an advanced crocheter, we like to use basic crochet stitches and create beautiful textures with them. I feel like the Basketweave stitch has so much to offer that brings texture, style and even uniqueness that looks so real from far away.
Whether you like to crochet an actual basket with this stitch, a bag or even a blanket, it doesn’t matter.
I like using the basketweave stitch for bags and blankets for sure. In fact, it will be part of my next crochet along. Although, now, I even have a great basket idea with it. Maybe I’ll work on that tonight. Stay tuned 🙂
The Basketweave stitch is made up of double crochet stitches that are either made as a front post or as a back post.
It can be crocheted in rounds and in rows. It will create the same look no matter which way you crochet it.
You will just have to follow a few changes to make sure that both rows and rounds look the same. When you crochet the Basketweave stitch in rounds it is much easier and faster to learn it than in rows.
So to make it really clear, I have a photo and video tutorial below on how to crochet it in rows plus mentioned how you would do it in rounds if you choose to use that way.
How to Crochet the Basketweave Stitch – Photo Tutorial
To make it very clear to distinguish how to crochet the basketweave stitch in rows or rounds, I will make all the information needed for rounds in bold.
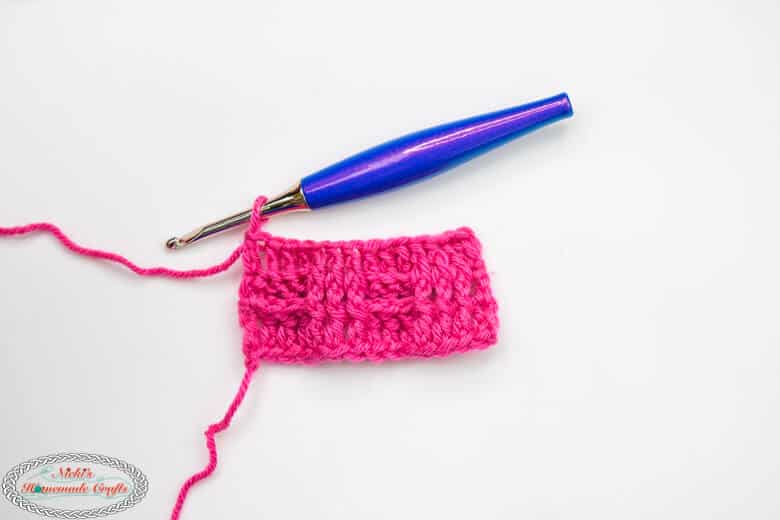
Chain a multiple of 6 plus 4 (counted turning chain) plus 1 (last stitch to make it look pretty and have an edge). For rounds: Just make a chain with a multiple of 6 plus 3 (not counted as turning chain). Starting from the 4th chain from the hook (3rd for rounds) crochet 1 double crochet in each stitch. Turn (or slip stitch to first stitch – for rounds).

Crochet an alternative turning chain or a chain of 3 (counted as double crochet) and skip the first stitch if you did the chain of 3. (Crochet a chain of 2 for rounds and start with the 1st stitch.) Now crochet *1 front post double crochet (fpdc) in the next 3 stitches.

Then 1 back post double crochet (bpdc) in the next 3 stitches.

Repeat from * until the end (for rounds) or there is 1 stitch left (rows) where you’ll crochet a normal double crochet (dc), turn (or slip stitch to the first stitch for rounds).

So, for rounds, you will simply repeat the previous round (which is round 2). You will need to rounds that look identical, so rounds 2 and 3.
For rows, you will need to replicate the look you see from the perspective when you turn your work. So, if you see a fpdc, you’ll make a fpdc and if you see a bpdc, you’ll make a bpdc. Let’s break this down for this example for rows:
Crochet an alternative turning chain or ch of 3, then *1 fpdc in the next 3 stitches, 1 bpdc in the next 3 stitches, repeat from * until you have 1 stitch left which will be a normal dc.
Now, the next 2 rows we will flip the stitches around.
For rounds: Ch 2, * 1 bpdc in the next 3 sts, 1 fpdc in the next 3 sts, repeat from * until the end, sl st to the 1st st.
For rows: 1 alternative turning chain or ch 3, * 1 bpdc in the next 3 sts, 1 fpdc in the next 3 sts, repeat from * until the last st, 1 dc, turn.

You will now repeat that row/round. So row/round 4 and 5 are the same.

In order to keep going, you will now repeat rows 2 to 5 to create a larger piece of the basketweave stitch. If the above photo tutorial was not clear or you are more of a visual learner, please check out my video tutorial below.
Crochet the Basketweave Stitch – Video Tutorial
This video will show you step by step how to crochet the Basketweave stitch.
Subscribe to my Youtube Channel here:
[youtube-subscriber channelID=”UCSI4OeQQnxVQEAwMGeTCn1Q” layout=”full” subscribers=”default”]
I hope you love this Basketweave stitch pattern as much as I do. If you love this pattern and technique, please use the social media share buttons above or below and share this pattern link with the world and your friends.
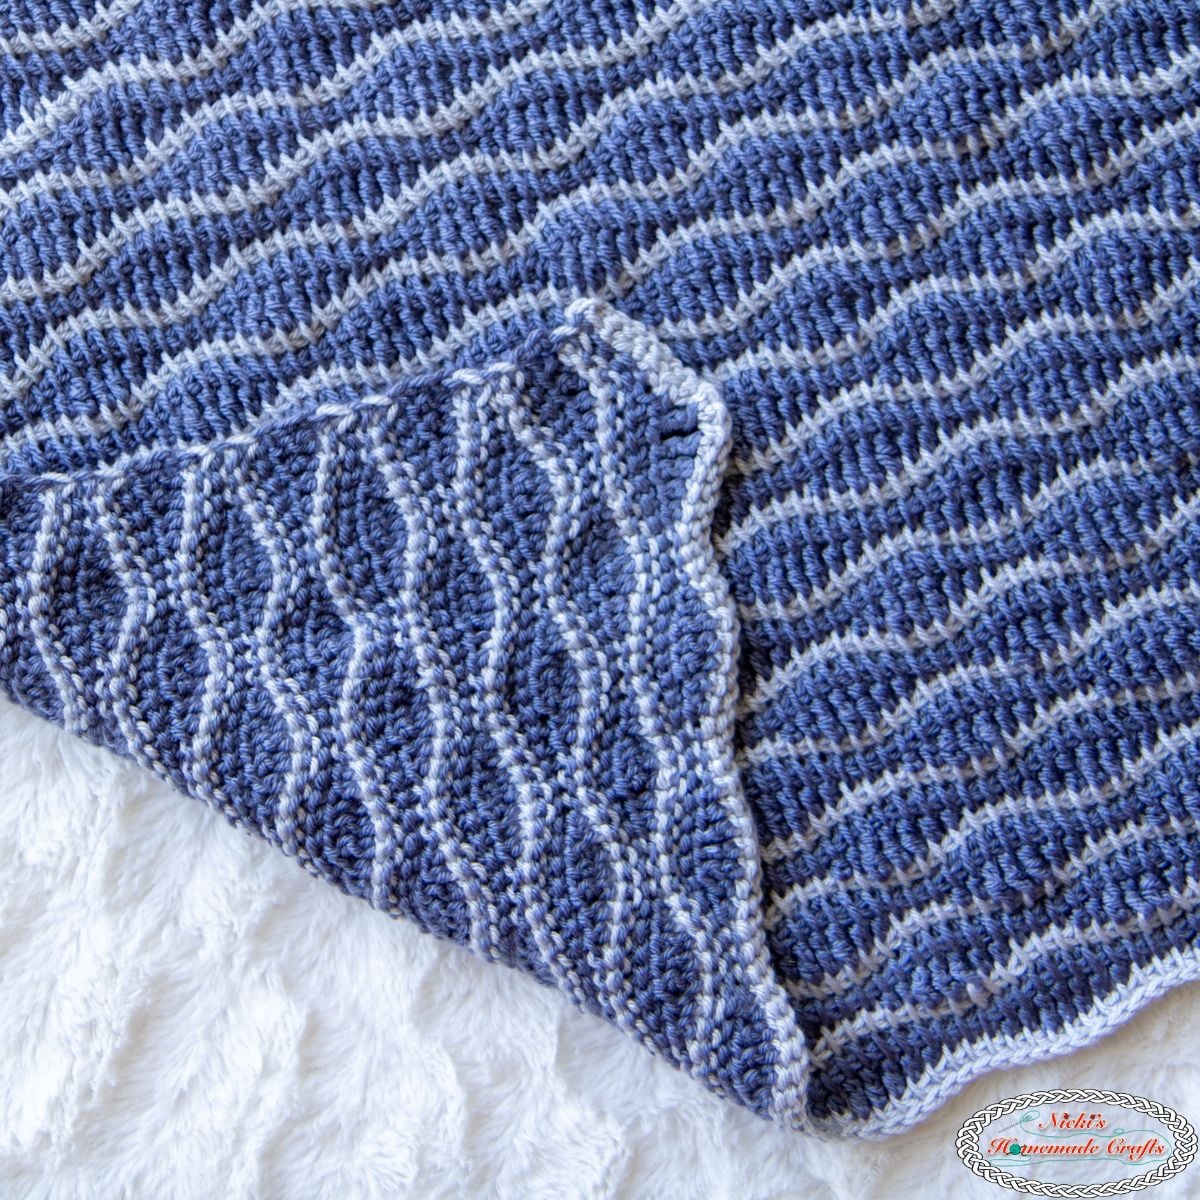
I also have more stitches you might want to learn. Check out my Ultimate List of Advanced Crochet Stitches for more inspiration. I must save that I love Jess’ Basketweave Blanket (Make and Do Crew). So if you need a blanket pattern with this stitch, check her’s out.
That way you will find it easily again when you need it and you also provide the world and your friends the ability to gain extra crochet knowledge as well. And to top it off, you help me as it allows me to create more content that you love already and want to see more of – free crochet patterns and tutorials. So, thank you for sharing.
If you love the way my crochet tutorials and patterns and the way I teach, I would suggest subscribing to my newsletter below as I share new patterns, tutorials, and special announcements often.


Hi Nicki, Are you going to put together an e-book with all your stitches and your tip on properly doing them?
I would love to see that and purchase it of course.
After asking in my Facebook Group, 100s of crocheters agree with you. So YES 🙂 Stay tuned