Crochet Knit Stitch Tutorial with Video – Day 1 of Advent Calendar MCAL 2024
This post includes affiliate links.
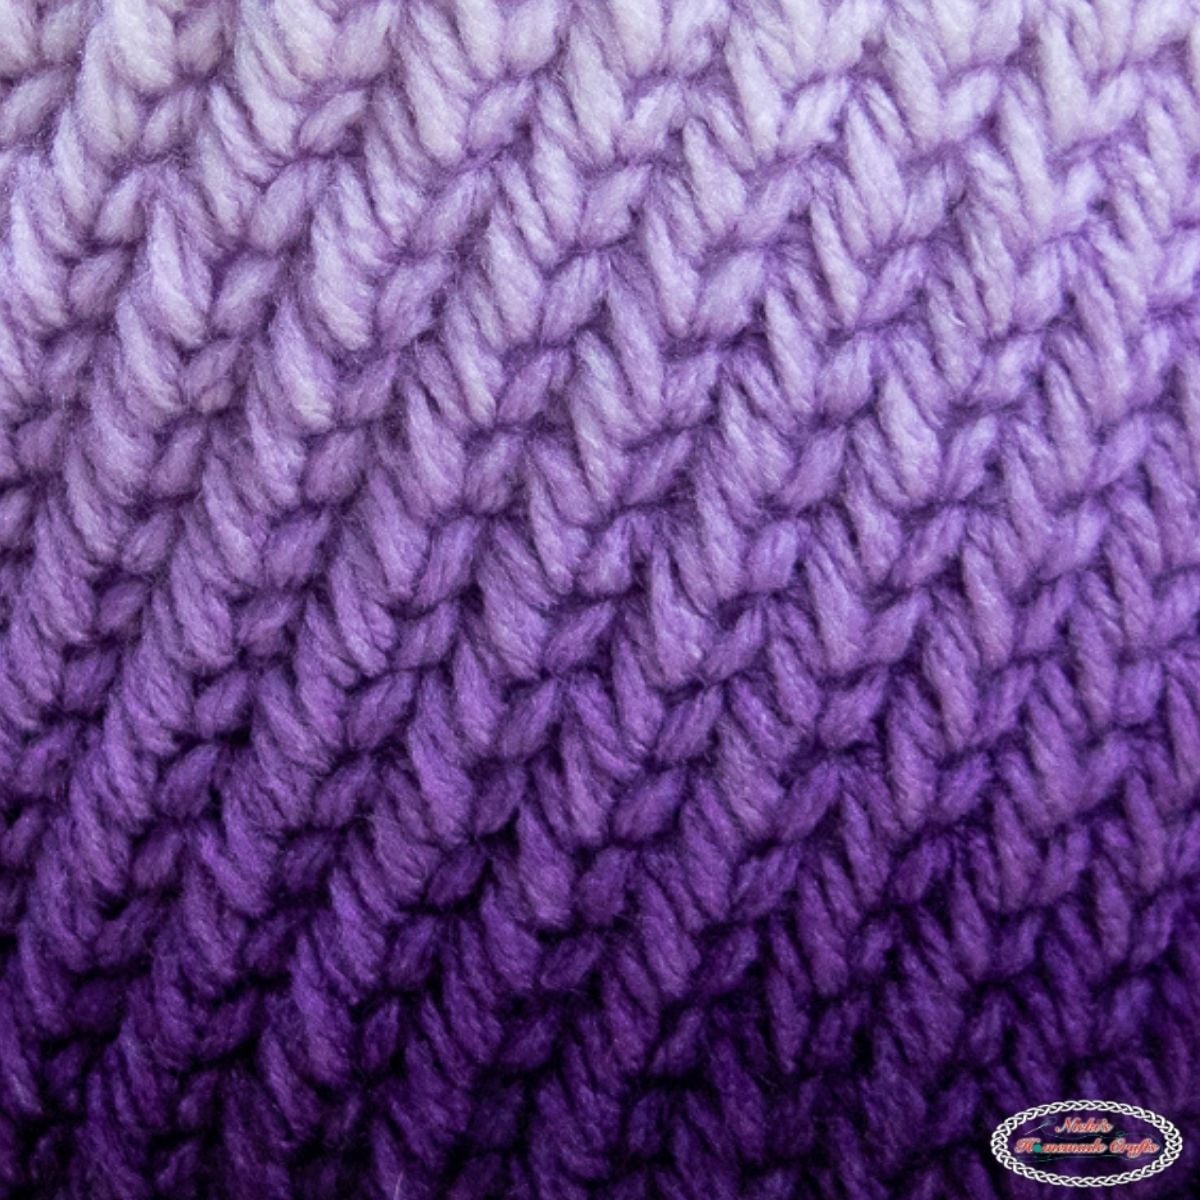
Learn how to create a knit look with the crochet knit stitch which is also known as the waistcoat stitch. This tutorial includes step-by-step pictures, written instructions, and a video tutorial.
It’s time to kick off this year’s Advent Calendar Mystery Crochet Along. Each day, from today until December 24th, I’ll release one stitch tutorial on all odd days and 1 free pattern on all even days for Christmas gifts right here on my blog. Each day will be a fun holiday surprise for yarn lovers!
This year, we’re starting with a fun and fabulous stitch tutorial. The crochet knit stitch has many names. It is also known as the waistcoat stitch (wst as the appreciation) and the split single crochet or the center split single crochet. But regardless of what you call it, it’s crocheted the same way and creates a beautifully thick and sturdy texture, and of course looks like it was knitted when it really was crocheted.

Although the stitch is fairly easy to understand, sometimes crocheters have trouble crocheting the stitch if they have tight tension, so make sure to loosen your tension when you crochet it.
Furthermore, it’s also important to learn how to change colors with this stitch, especially because tomorrow’s Advent Calendar Mystery CAL pattern will include not only this crochet knit stitch but also include color changes. You’ll either get free-to-view access to the Reindeer Mug Rug or the Joy Wine Bottle Holder. If you want BOTH, grab the ebook here to get all 24 patterns with the 12-stitch tutorials instantly.
All Advent Calendar Mystery CAL Stitches + Patterns
This Holiday Season is very special! The Advent Calendar Mystery Crochet Along includes 12 free stitch tutorials (with videos) and 12 free crochet gift patterns. But there are actually 24 patterns. But you don’t know which odd day each stitch tutorial and which 1 of 2 stitch-related patterns gets published on the following even days.
But you can get all of them (12 stitches and 24 patterns) with instant access right now as an AD-FREE and PRINTER-FRIENDLY ebook. Use the code GIFTS10 to save $10 until December 24th, 2024 HERE!!!
Now let’s start this fun crochet knit stitch tutorial with a video tutorial, written instructions and step-by-step pictures.
Video Tutorial of the Crochet Knit Stitch

Subscribe to my Youtube Channel here:
[youtube-subscriber channelID=”UCSI4OeQQnxVQEAwMGeTCn1Q” layout=”full” subscribers=”default”]
Crochet Knit Stitch Written Tutorial
Do NOT like ADS? No worries! I have got a solution for you!
You can also get THIS stitch tutorial plus 11 extra stitch tutorials and 24 GIFT crochet patterns plus 12+ video tutorials in 1 ebook with NO ADS and printer-friendly!
Get the “Last Minute Crochet GIFTS Made Easy Vol 3” Ebook HERE
Instructions for the Crochet Knit Stitch
Before you start crocheting the Reindeer Mug Rug or the Joy Wine Bottle Holder (only ONE of these two will get published for FREE tomorrow via the Advent Calendar MCAL), let’s first go through the stitch tutorial and learn how to change colors with this stitch.
Row 1 – Foundation
To make a swatch to practice this stitch, make any number chain, start from the 2nd chain from the hook, 1 LOOSE sc st per st (you may even use a bigger hook for R1 then the rest of the rows/rounds).

It should look like the image above. Now check out the arrows I added. The top arrow is pointing to the TOP V of an sc st and the bottom arrow is pointing at the FRONT V of an sc st.
When you crochet sc sts you typically go in the SPACE below the TOP V (shown by the middle arrow).
Rows 2 – Starting the Crochet Knit Stitch
But for the wst st (waistcoat stitch, aka crochet knit stitch) you’ll insert your crochet hook through the FRONT V, then pull up a loop and finish it like a regular sc st. The location of where you insert your hook makes the stitch look different in the end.
Furthermore, to keep the look the same throughout, it is best to cut your yarn after each row and start over at the beginning (above the first st). You’ll have fringe on both sides, that can be cut all evenly neatly, braided, woven in, brushed out or whatever you want to do with it.
For rounds you’ll just make a slip stitch after each rounds (I recommend invisible slip stitches – you can learn them here) when images and color changes are included in the design, but plain solid designs using the stitch, one can crochet in continuous rounds if preferred. However, if the design is not all round (like the joy wine bottle holder) you can also use continuous rounds without slip stitches.
Once you finished the next row it will look like this:

Crochet Knit Stitch with Color Changes
Now let’s go to the next row of our swatch and crochet with color changes.
There are 2 ways to change colors with the stitch. I prefer the 2nd option as it looks like it was sewn on and has no peek-a-boos.
Remember to carry the 2nd color from the beginning (of the row) for a cleaner look and even tension.

First method of color changing
Looking at the right arrow, you’ll see that the darker color is shown on the top. To create that effect, you’ll change colors during the last yarn over and pull through of the previous st. Then you’ll crochet the wst st in the new color (darker color), but finish it the last yarn over and pull through with the lighter color for the following st (for this example).
This method creates a st (top and front V’s) that has the same color all around.
However, the top V’s color will peek through when you crochet a stitch on top in the following rows or rounds.
Second method of color changing
Looking at the image above, check out the left arrow. The top V has a different color (the main color – the lighter color).
The create this effect, you’ll always keep the main color on your hook (last yarn over and pull through for ALL stitches).
Only the first yarn over and pull through after inserting the hook into the stitch is made with the darker color.
That will make your project look more knit-like and also makes it look like your dark stitches were sewn on top of the project creating a cleaner look.
Let me show you the comparison between these 2 color changing methods by adding one row using on the lighter color.

Looking at the image above. You can see the darker color peeking through (2 right arrows) – first color changing method.
But you actually do not see any color peeking through when color changing with the second method.
Now practice both versions and see which one you prefer. That way you are ready to crochet one of these patterns (get both in the ebook here) published for free as part of the Advent Calendar Mystery CAL. You now have access free-to-view to the Reindeer Mug Rug Here.


Be sure to join my Crochet Facebook Group and show off your crochet creation using the hashtag #AdventMCAL2024. I would love to admire them and cheer you on as you’re working on creating it and after you finish it.
I’m also always here to support you through this and any other pattern and tutorial. Simply ask in my group and me and other amazing and kind crocheters will help you along.
If you love this tutorial, please use the social media share buttons above or below and share this pattern link with the world and your friends.
If you like fun Crochet Stitch Tutorials, you might like these also:


- Waffle Stitch Tutorial
- Diagonal Chevron Stitch Tutorial
- Trinity Stitch Tutorial
- Fall Leaf Stitch Tutorial

That way you will find it easily again when you need it and you also provide the world and your friends with the ability to gain extra crochet knowledge as well. And to top it off, you help me as it allows me to create more content that you love already and want to see more of – free crochet patterns and tutorials. So, thank you for sharing.
If you love my crochet patterns and the way I teach, I would suggest subscribing to my newsletter below as I share new patterns, tutorials, and special announcements often.