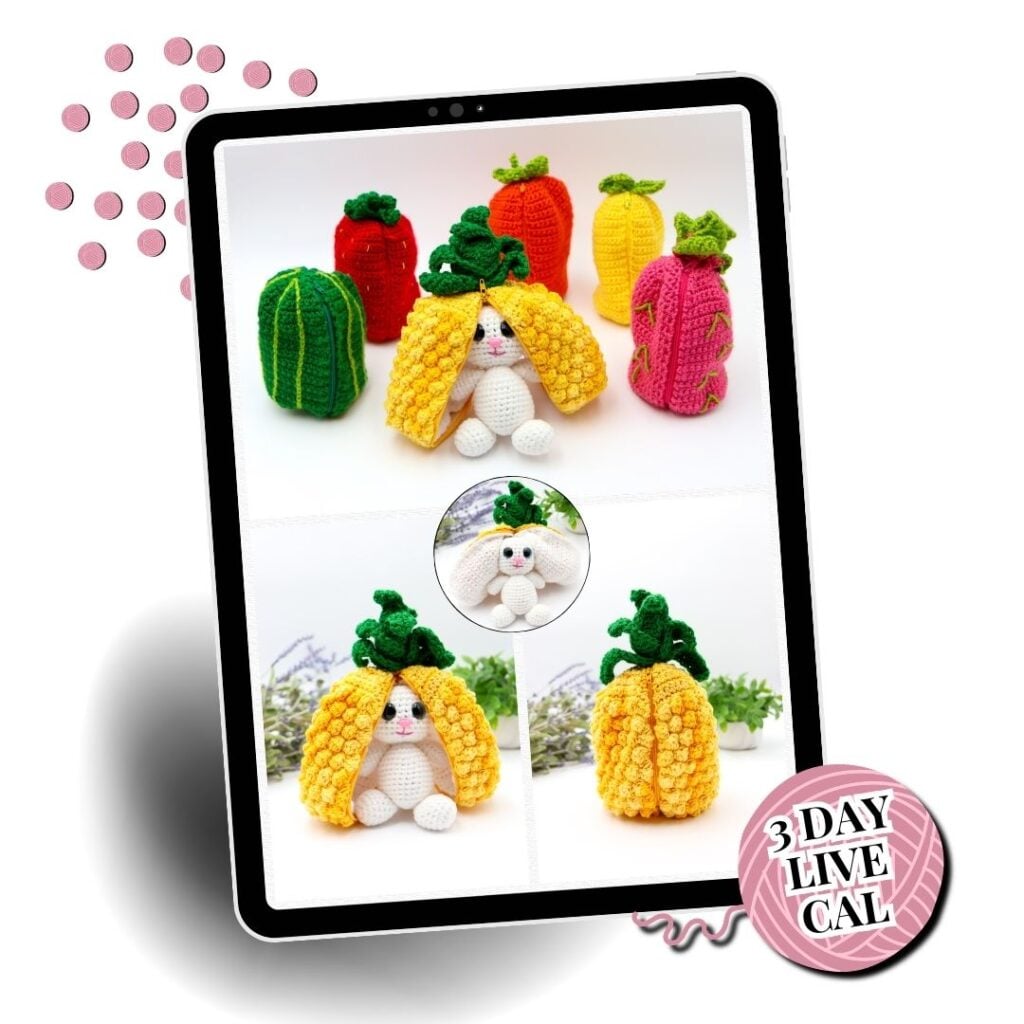
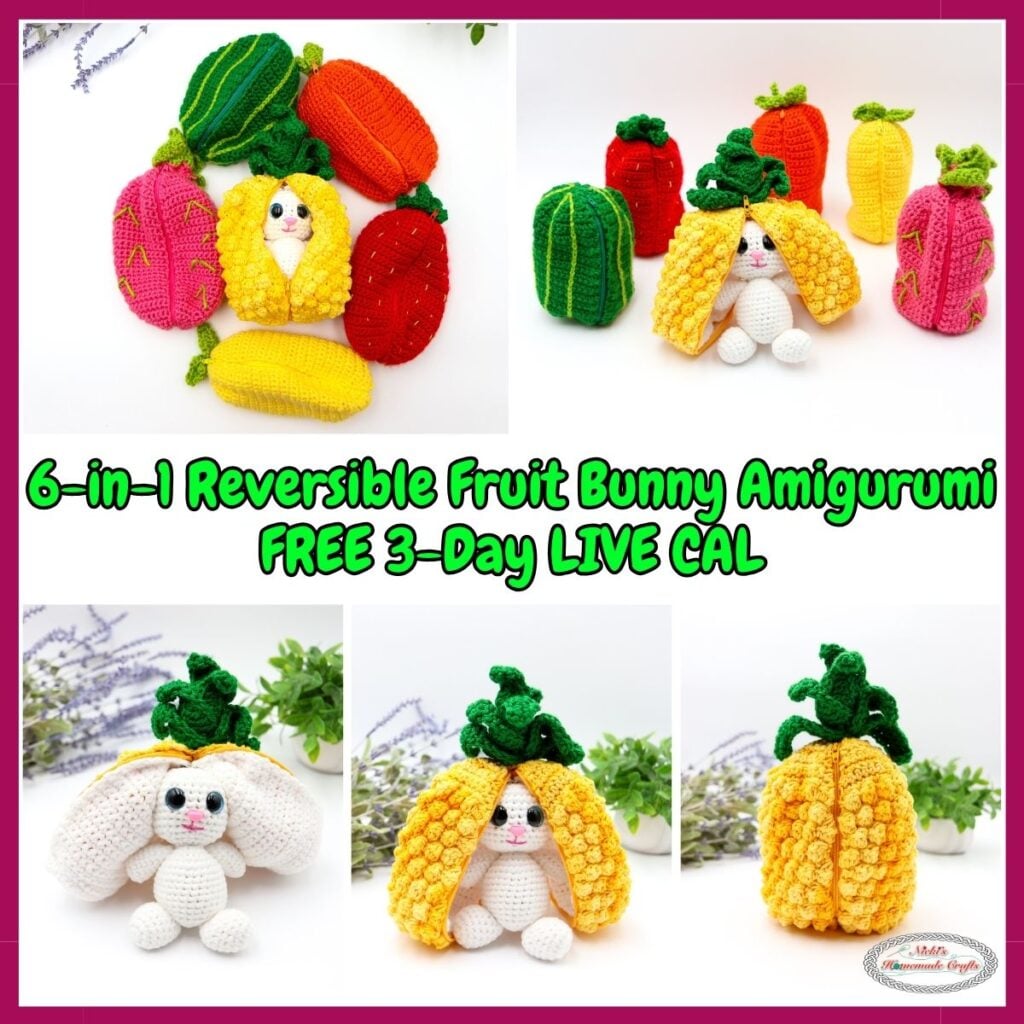
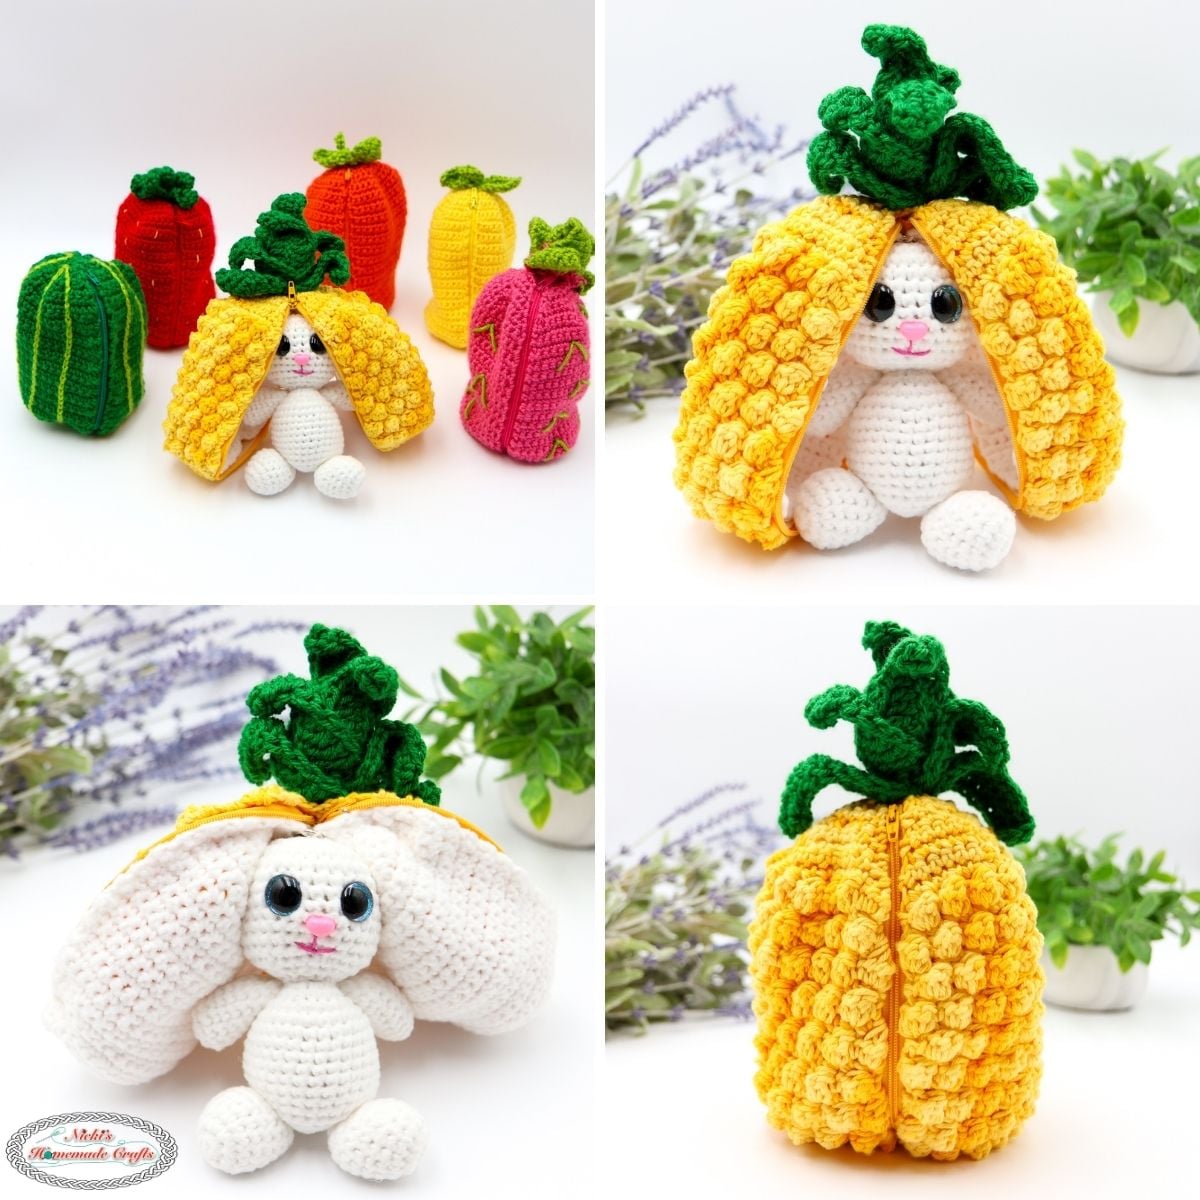
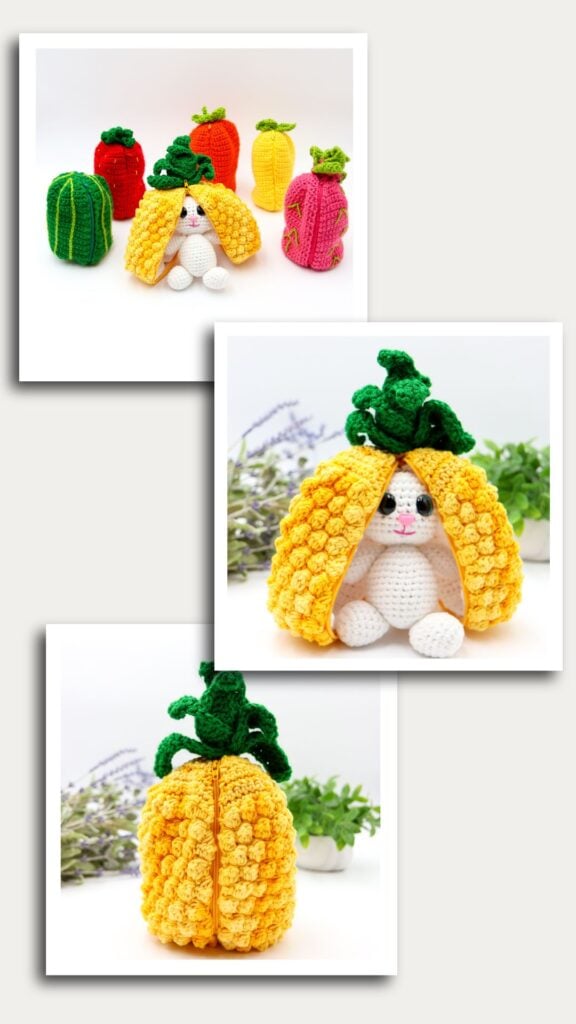
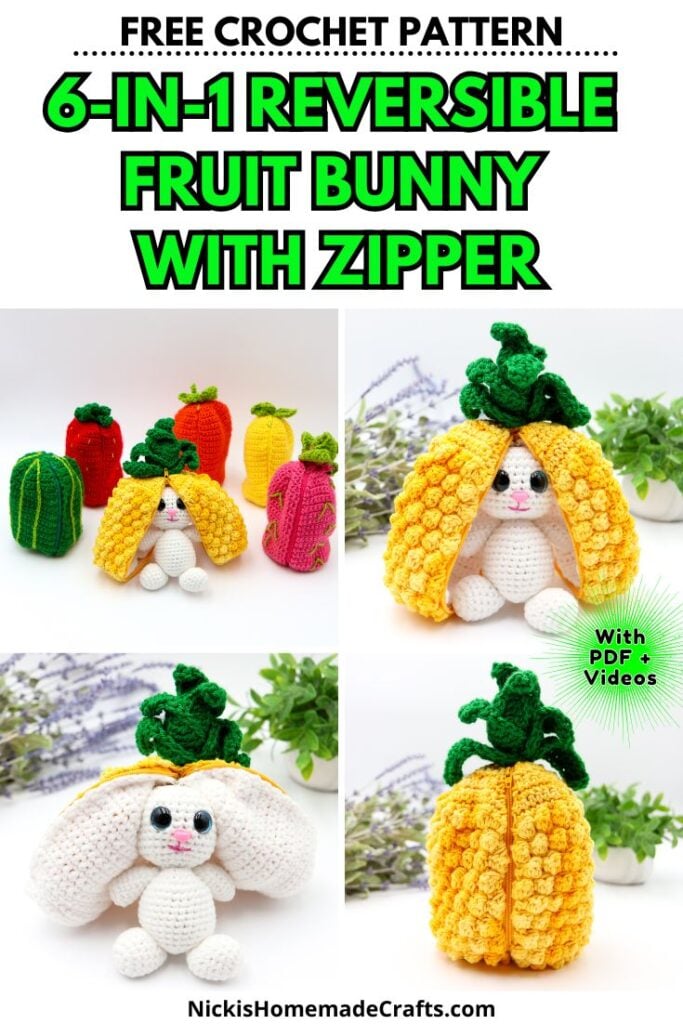
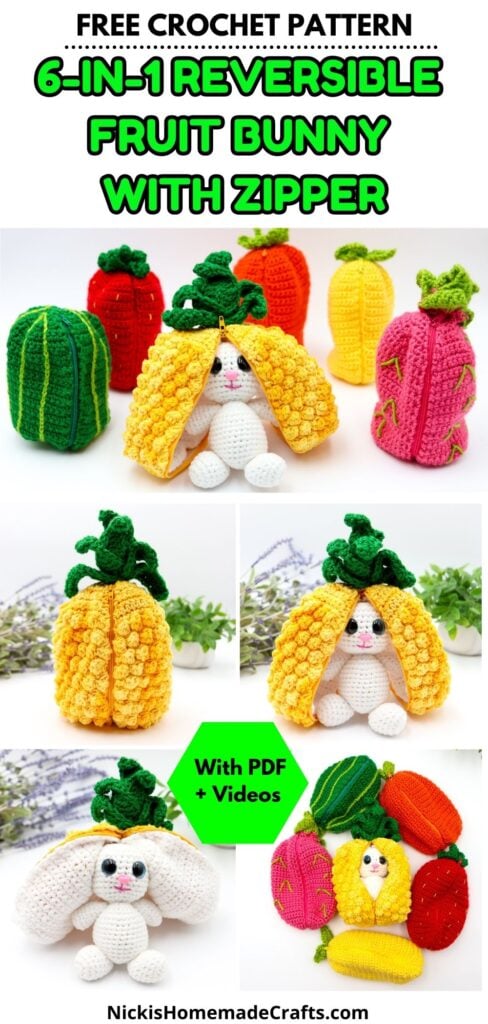
Free Crochet Reversible Fruit Bunny Amigurumi with Zipper – 6-in-1 Pattern – 3-Day LIVE Crochet Along
This post includes affiliate links.
Crochet Alongs are super fun. But Quick LIVE Crochet Alongs are more interesting, and exciting and allow you to take your time finishing one large project without overwhelm and YOU get LIVE Tutorials and LIVE Support with a Community at the same time.
This free crochet pattern for a 6-in-1 Reversible Fruit Bunny Amigurumi with Zipper Crochet Pattern is broken up into 3 quick parts with a GIVEAWAY at the end.
Have you ever wanted to be part of a REALLY Fun CAL (crochet along) that includes LIVE Videos, Support, and a Community? Well, with this CAL you get all that. We’ll be making an extremely fun and adorable 6-in-1 Reversible Fruit Bunny Amigurumi with a zipper for Easter and beyond as a toy and gift.
Join the 3-Day LIVE
6-in-1
Reversible Fruit Bunny Amigurumi with Zipper
Free Crochet Along
Learn LIVE with Support
and Community – All At Once!
Be part of this Unique and Special CAL, and experience like no other!
Get a head start with the PDF Now:
FREE CAL Sign Up – Early Access the Evening Before & Be Entered into the Giveaway
You can join the CAL for FREE and you’ll get access to the pattern in parts – 1 part per day – with ads Right HERE:
Sign up form takes a second to load! Wait for it and sign up ❤️
YOU CAN ALSO CLICK HERE to SIGN UP FOR FREE (if you have any problems with the form above)
You just need to decide if you want to get instant access to the PDF right now and work at your own pace (VIP access) or join the FREE CAL (with ads) and get access to each part of the pattern one day at a time.
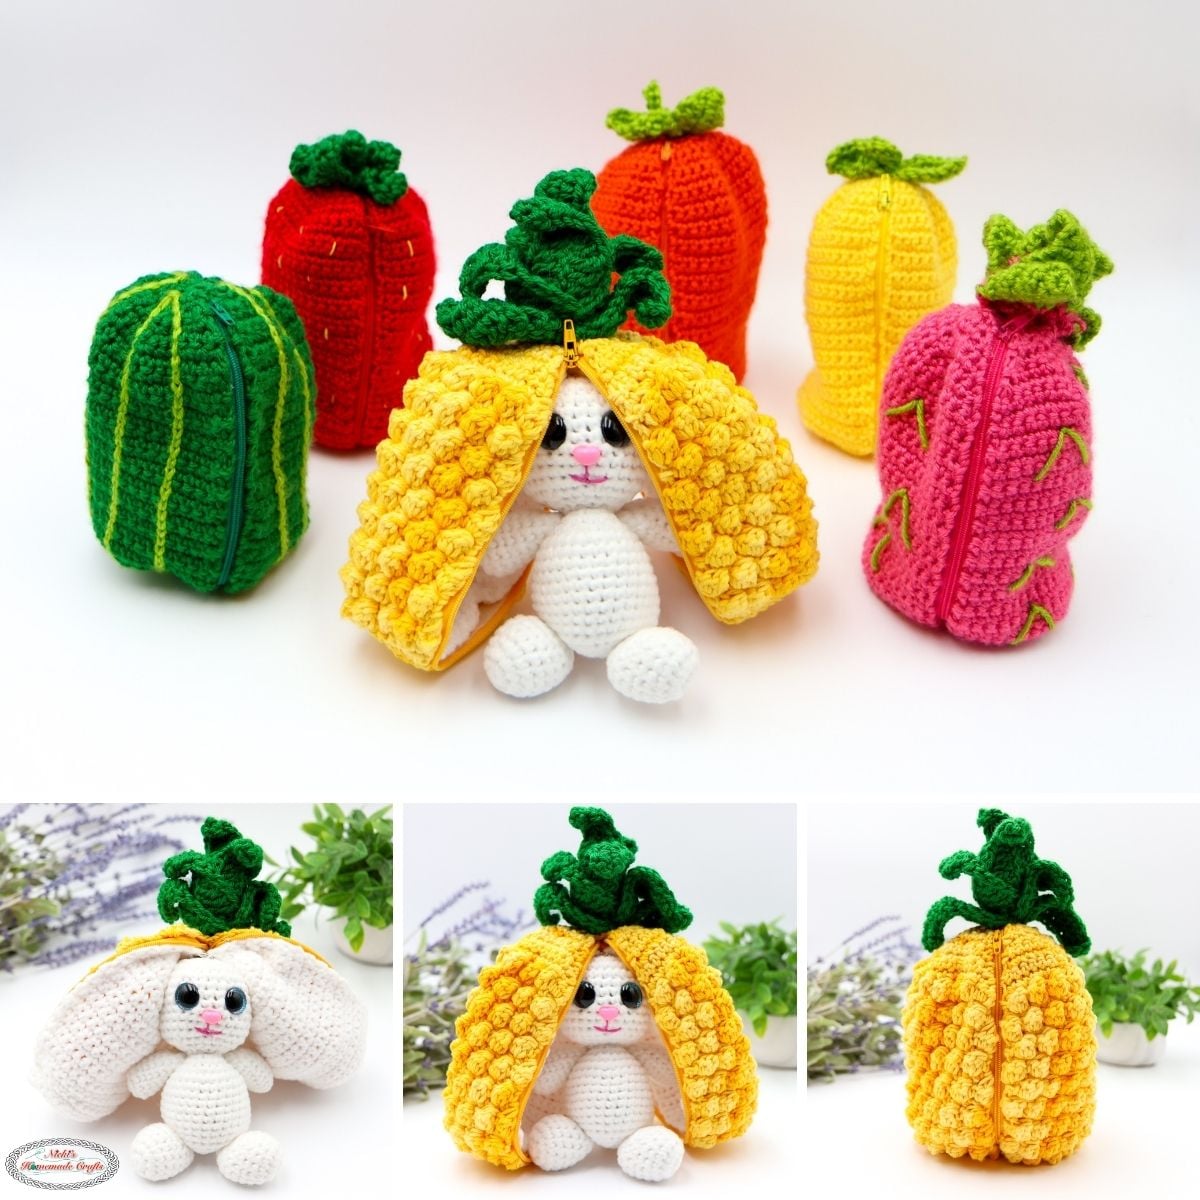
This 6-in-1 Reversible Fruit Bunny Amigurumi with a zipper Crochet Pattern uses only worsted yarn from different yarn companies, depending on the fruits themselves. All the details on the colors per crochet pieces are broken down in the material section below.
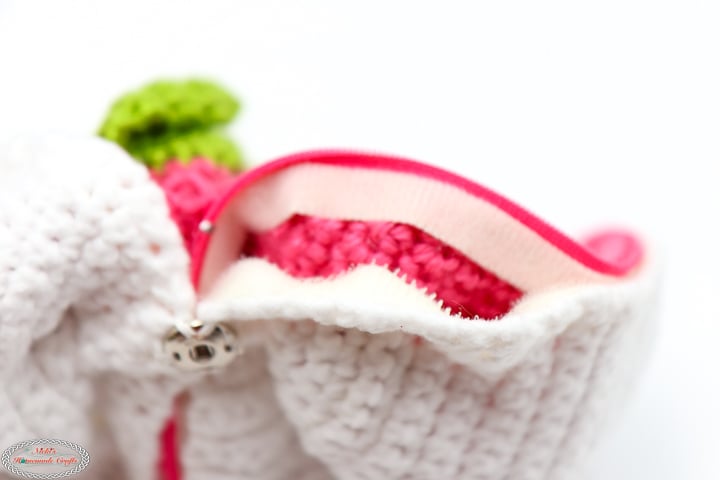
And not only will you be able to make a 6-in-1 Reversible Fruit Bunny Amigurumi with a zipper in this LIVE CAL, but you can also switch the bunny between different fruits if you follow the pattern the way I did, plus the bunny can be removed (so you can use the zippered shell as a pouch.
Sign up for the Crochet Along Pattern
There are 3 ways to join this exciting, quick 3-day LIVE crochet along to make this 6-in-1 Reversible Fruit Bunny Amirgumi with a Zipper Crochet Pattern.
- You can join for FREE and get access to the pattern 1 day at a time (with ads) – one part of the pattern is already available (3 will be published later)
- OR you can get the ad-free PDF now and get access to the entire pattern instantly.
- OR if you are part of The Crochet Club Membership then you get also access to the entire pattern at once ad-free.
Regardless of which option you pick, the LIVE Tutorials for each part will be at 12pm, PT on April 1st (part 1), April 3rd (part 2), and April 5th (part 3) on Youtube. Links to those LIVE Tutorials will be sent via email the evening before!
VIP Access to the Ad-Free PDF
Or you can get VIP Access to the entire pattern right away in a PDF – all ad-free.
See the breakdown below to make an informed decision on what will work best for you.
How to Join 3-Day LIVE Crochet Along for the
6-in-1 Reversible Fruit Bunny with a Zipper Pattern
FREE CAL
VIP Access
If you are a FULL MEMBER of THE CROCHET CLUB, you will NOT need to purchase the VIP ACCESS PDF! You, TCC Members, automatically get the FULL AD-FREE WRITTEN Pattern HERE (not the 3 LIVE Tutorials videos yet), starting March 25th!
You’ll also get access to the LIVE Tutorials as they are being published!
You can also purchase the PDF via Ravelry and Etsy but it will cost more than if you purchase it on my website (just $12).
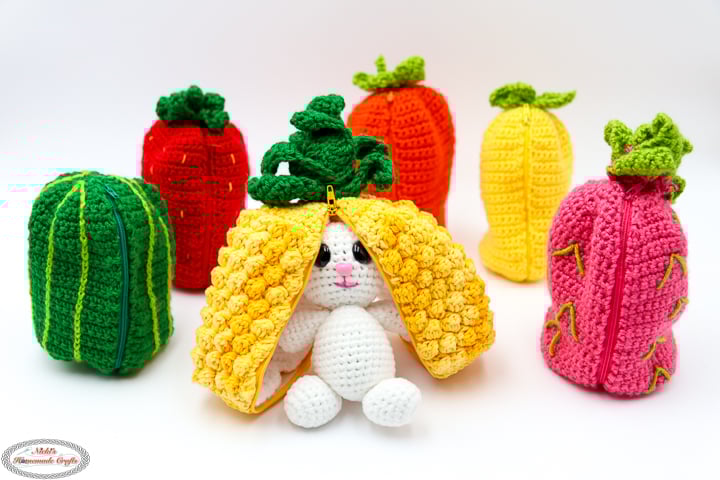
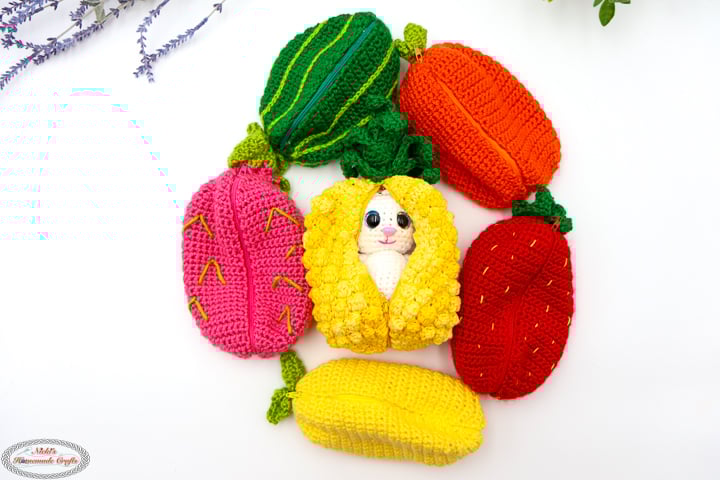
This 6-in-1 Reversible Fruit Bunny with a Zipper includes the following fruit patterns
- Pineapple
- Strawberry
- Lemon
- Orange
- Dragonfruit
- Watermelon
Learn how to Crochet this 6-in-1 Reversible Fruit Bunny with a Zipper Pattern via a LIVE Crochet Along with Support and Community
This CAL will be quick, finished within 3 days as we’re using worsted yarn, and it will be as a written pattern, as well as LIVE Video Tutorials with extra support and a fun community!
If you’ve ever tried Crochet Alongs and Fruit Bunny Patterns before and…
How will this CAL work? Any Support?
Easy. You simply will follow each part once released – you have 1 day to complete each section of the pattern. The schedule is broken down below.
I’ll be crocheting each piece of the 6-in-1 Reversible Fruit Bunny with a Zipper on camera according to the schedule below.
Make sure to sign up for early release emails above and of course, join my Facebook group for release info and to show off your creations.
While you work on the parts of the pattern, I encourage you to share your progress pictures in my Facebook group using the hashtag #LIVECALAPR26
And if you need any support or help during the Crochet Along, please tag me in my Facebook group so I can find and answer your question(s). PLUS you also get support during the LIVE Tutorials.
You have until 4/6/26 to finish the pattern, post the image of the final product plus using the hashtag #LIVECALAPR26 in my Facebook group (directly post into my group) to qualify for the Giveaway! The giveaway is optional. If you need more time, you take your time.
How do you have a chance to win in the Giveaway?
It’s very easy. But remember you don’t need to be part of it and can simply take your time for the pattern.
But here is how you qualify to be entered in the Giveaway:
- Join my newsletter (the sign up box above)
- Follow me on at least 2 of these social media platforms: Youtube, Facebook, Instagram, and TikTok
- Post the image of your final product in my Facebook group
- Use the hashtag #LIVECALAPR26
- Post into my Facebook group with the image and hashtag no later than 4/6/26 10am, PT
- JOIN the PARTY! We pick 3 additional winners to win something!
- Optional: Share this link with your crochet bestie on social media and tag me!
I will pick 12 winners to each win a $30 valued crochet surprise. The Giveaway Winner announcement will take place on my Facebook page and my Youtube Channel on 4/6/26 at 12pm, PT (3pm, ET).
So we will have 12 WINNERS:
- 3 for signing up for the LIVE CAL for free
- 3 for commenting on the Video Tutorials (1 winner per video)
- 3 for finishing the LIVE CAL (as mentioned above)
- and 3 for showing up for the Party!

What will you need for the 6-in-1 Reversible Fruit Bunny with a Zipper Crochet Pattern LIVE Crochet Along?
Click the links below to see which materials I used exactly! 1 Skein or less per color
- Herrschners Worsted Supreme Yarn:
- tangerine (orange)
- limeade (leaves and accent)
- really red (strawberry)
- geranium (dragonfruit, mouth)
- WeCrochet Dishie Yarn (worsted, 100% cotton, 190yd/100g)
- sunshine multi (pineapple)
- WeCrochet Brava Worsted Yarn (100% acrylic, 218yd/100g)
- grass (watermelon, leaves)
- WeCrochet Mighty Stitch Worsted Yarn (100% acrylic, 218yd/100g)
- sunflower (lemon, seeds)
- Loops & Threads Brushed Rainbow Worsted Yarn (100% polyester, 364yd/150g) from Michaels
- snow white (bunny)
- 4mm hook
- scissors
- tapestry needle
- Polyfill
- white thread to sew on the SNAPS!
- Plastic Eyes (16mm)
- Plastic Nose
- Zipper Set (15 inches each)
- Snaps (13mm, at least 2 sets if you make more than 1)
- optional: white velcro to attach & detach
- Hot glue (or thread) to attach the zipper
Can I use a different yarn?
Yes, you can switch to a different yarn brand, even a different fiber if you prefer.
I recommend any worsted yarn for this project. Pick from your yarn stash if you want, BUT I highly recommend the yarns mentioned above.
But it’s an ideal project as a yarn stash buster. Use leftover yarn if you have any. I would recommend sticking with either of my above recommendations.
What colors should I pick?
I recommend any of the mentioned solid colors.
Either stick with the colors I picked or pick your favorite colors for your favorite pieces.
Can I use a different hook size?
Yes, you can pick a different size. Just remember the pattern will be a bit smaller or larger unless you focus on the gauge provided.
More Details about the Pattern
Gauge
5 sc sts x 6 sc rows = 1 square inch
Finished Size
~6 x 4.5 inches (without measuring any leaves)
Stitches and Abbreviations (US Terms)
Learn all the basic crochet stitches HERE
- st/sts = stitch/stitches
- ch = chain
- sk = skip
- sl st = slip stitch (or invisible sl st – see video)
- inc = increase
- sc = single crochet
- hdc = half double crochet
- dc = double crochet
- tr = treble crochet
- ATC = Alternative Turning Chain
- BLO = back loop only
- FLO = front loop only
- inv sc dec (rounds) or regular sc dec (rows)
- 3 dc bobble st (3 unfinished dc sts, yarn over and pull through all loops)
When does the Crochet Along start?
The Crochet Along will be broken up into 3 Parts and starts April 1st, 2026.
You will simply need to decide whether to join the CAL for free or get VIP Access (The Crochet Club Members get VIP Access in the Vault automatically).
We are pretty sure you will all like this Quick 3-Day LIVE Crochet Along to make a 6-in-1 Reversible Fruit Bunny with a Zipper Crochet Pattern as much as we do. Be sure to share this post with your crochet friends so they all can join in.
Are you excited yet? Let’s grab or order your materials, and then we will get started on April 1st, 2026 with Part 1.
LIVE Crochet Along Pattern Parts
Remember, you can get the PDF of this pattern if you don’t like ads or want to work ahead:
Be sure to share your progress pictures in our Facebook group using the hashtag #LIVECALAPR26 so we can celebrate you.
Each LIVE Tutorials for Parts 1-3 starts at 12pm, PT (3pm, ET).
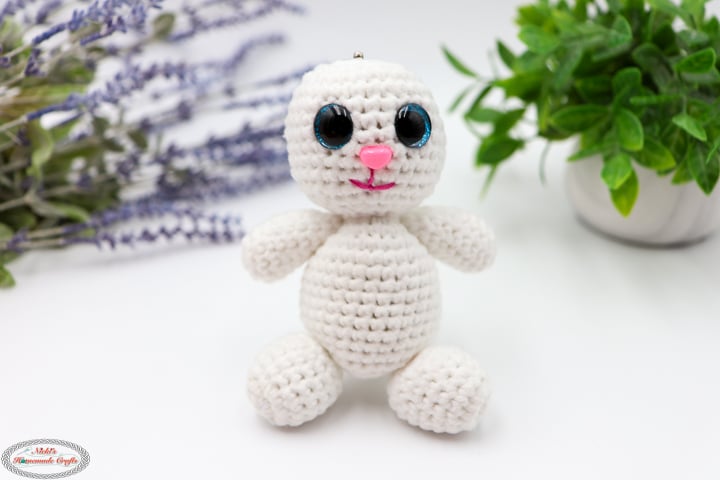
Part 1: Bunny
LIVE Tutorial starts 12pm, PT on April 1st, 2026. The LIVE Tutorial Replay will be available after HERE on Youtube.
Written Pattern
Crochet in continuous rounds (use a stitch marker) unless otherwise mentioned (with sl sts).
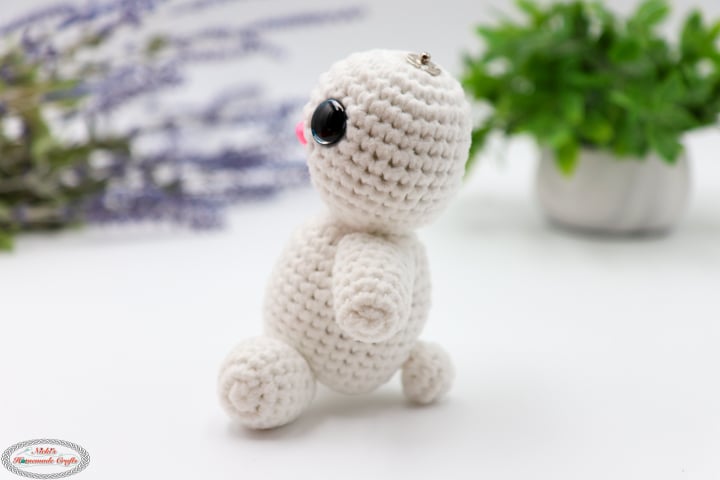
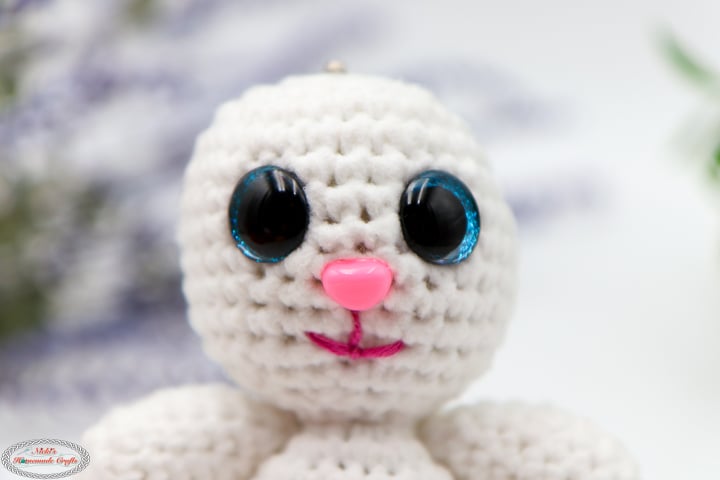
Bunny Head and Body
White
R1: MR, 8 sc, close the circle, use a stitch marker for continuous rounds
R2: 2 sc per st
R3: (1 sc, 2 sc) x 8
R4: (1 sc in 3 sts, 2 sc) x 6
R5-12: 1 sc per st
Add eyes 3 sts apart 6 rds from the top, then add nose centered right below
R13: (1 sc in 3 sts, 1 inv sc dec) x 6
R14: (1 sc, 1 inv sc dec) x 8
Stuff with polyfill
R15: 8 inv sc dec
R16: 2 sc per st
R17: (1 sc, 2 sc) x 8
R18: (1 sc in 3 sts, 2 sc) x 6
R19-28: 1 sc per st
R29: (1 sc in 3 sts, 1 inv sc dec) x 6
R30: (1 sc, 1 inv sc dec) x 8
Stuff with polyfill
R31: 8 inv sc dec
Weave through front loops, cinge, then fasten off, weave in ends
Sew on the pink mouth
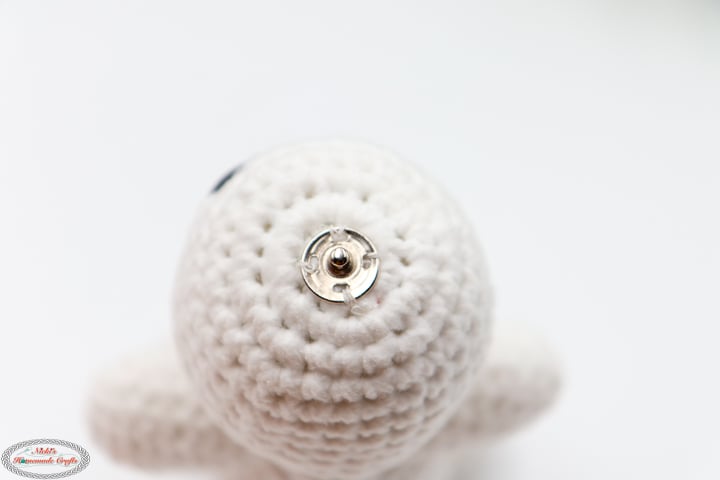
Sew on the snap (the flatter piece)
2 Arms
white
R1: MR, 6 sc, close the circle, use a stitch marker for continuous rounds
R2: 2 sc per st
R3-10: 1 sc per st
Stuff with polyfill
R11: 6 inv sc dec
Weave through front loops, cinge, then fasten off, do NOT weave in ends
2 Legs
white
R1: MR, 8 sc, close the circle, use a stitch marker for continuous rounds
R2: 2 sc per st
R3-8: 1 sc per st
Stuff with polyfill
R9: 8 inv sc dec
Weave through front loops, cinge, then fasten off, do NOT weave in ends
Assembly of the limbs
The idea is for the limbs to MOVE (if you like that), so weave the yarn end (from one arm) from one side of the other side (where the other arm will be attached), pull, hold tight, and sew back to the arm, and back one more time, then fasten off. That allows the arm to move up and down. But you can also sew it on in a circle on the body to be stationary.
Repeat with the other arm.
Next, do the same with the legs, but this time the endpoint of the weaving of the yarn end is the adjacent arm. Again, that should allow you to move the legs if you want them to move.
Tail
white
R1: MR, 8 sc, close the circle, use a stitch marker for continuous rounds
R2: 2 sc per st
R3-4: 1 sc per st
Stuff with polyfill
R5: 8 inv sc dec
Weave through front loops, cinge, then fasten off, do NOT weave in ends
Sew on the tail on the back of the bunny.
Don’t forget to use the hashtag #LIVECALAPR26 and post your progress picture in the FB Group “Crocheting with Nicki” so you can qualify for the giveaway!
Part 2: Bunny Ears and Fruit Shells
LIVE Tutorial starts 12pm, PT on April 3rd, 2026. The LIVE Tutorial Replay will be available after HERE on Youtube.
Written Pattern
2 Bunny Ears (inside of the pouch)
white
R1: MR, 6 sc, close the circle, turn
R2: (1 sc, 2 sc) x 3, turn
R3: (1 sc in 2 sts, 2 sc) x 3, turn
R4: (1 sc in 3 sts, 2 sc) x 3, turn
R5: (1 sc in 4 sts, 2 sc) x 3, turn
R6: (1 sc in 5 sts, 2 sc) x 3, turn
R7: (1 sc in 6 sts, 2 sc) x 3, turn
R8-29: 1 sc per st, turn
R30: (1 sc in 6 sts, 1 sc dec) x 3, turn
R31: (1 sc in 5 sts, 1 sc dec) x 3, turn
R32: (1 sc in 4 sts, 1 sc dec) x 3, turn
R33: (1 sc in 3 sts, 1 sc dec) x 3, turn
R34: (1 sc in 2 sts, 1 sc dec) x 3, turn
R35: (1 sc, 1 sc dec) x 3, turn
R36: 6 sc tog, fasten off, weave in ends (besides one of them)
Lay the pieces such that the last (or first) rows touch, then sew 1/2 inch of the touching area together FLAT.
Sew on the other side of the snap (the thicker one) to the 1/2 inch area that was connected.
Test out that the snap works.

2 BASE Shells (works for Lemon, Orange, Strawberry, and Dragonfruit)
Yarn for Lemon: Sunflower
Yarn for Orange: Tangerine
Yarn for Strawberry: Really red
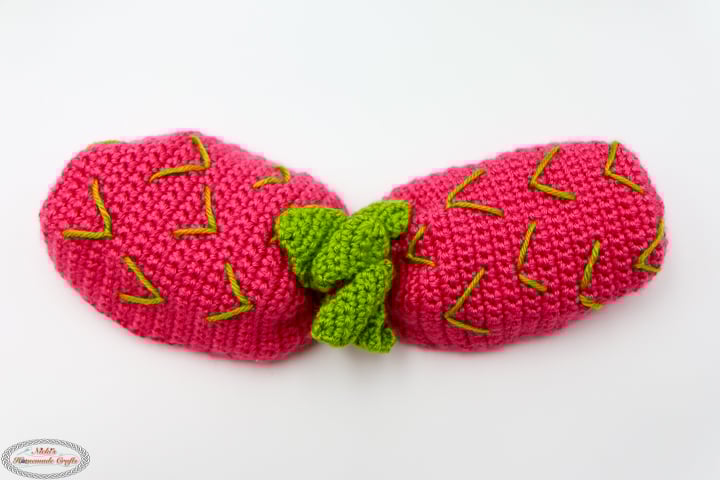
Yarn for Dragonfruit: Geranium
R1: MR, 6 sc, close the circle, turn
R2: (1 sc, 2 sc) x 3, turn
R3: (1 sc in 2 sts, 2 sc) x 3, turn
R4: (1 sc in 3 sts, 2 sc) x 3, turn
R5: (1 sc in 4 sts, 2 sc) x 3, turn
R6: (1 sc in 5 sts, 2 sc) x 3, turn
R7: (1 sc in 6 sts, 2 sc) x 3, turn
R8-33: 1 sc per st, turn
R34: (1 sc in 6 sts, 1 sc dec) x 3, turn
R35: (1 sc in 5 sts, 1 sc dec) x 3, turn
R36: (1 sc in 4 sts, 1 sc dec) x 3, turn
R37: (1 sc in 3 sts, 1 sc dec) x 3, turn
R38: (1 sc in 2 sts, 1 sc dec) x 3, turn
R39: (1 sc, 1 sc dec) x 3, turn
R40: 6 sc tog, fasten off, weave in ends (besides one of them)
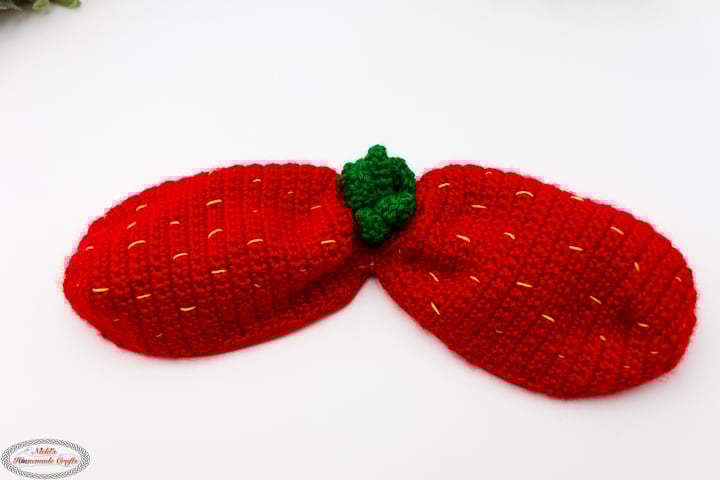
For the strawberry: Using the sunflower yarn, embroider on the seeds of the strawberry shells.
For the Dragonfruit: Using the limeade yarn, embroider on the up and down lines (like an arrow) randomly on each shell.
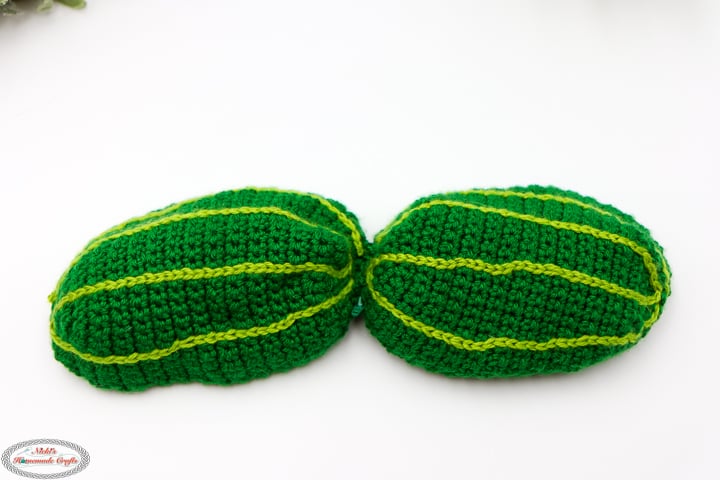
2 Watermelon Shells
Grass
(Be aware this yarn is THICKER (but still worsted) than Herrschner’s yarn, so it needs fewer rows)
R1: MR, 6 sc, close the circle, turn
R2: (1 sc, 2 sc) x 3, turn
R3: (1 sc in 2 sts, 2 sc) x 3, turn
R4: (1 sc in 3 sts, 2 sc) x 3, turn
R5: (1 sc in 4 sts, 2 sc) x 3, turn
R6: (1 sc in 5 sts, 2 sc) x 3, turn
R7: (1 sc in 6 sts, 2 sc) x 3, turn
R8-29: 1 sc per st, turn
R30: (1 sc in 6 sts, 1 sc dec) x 3, turn
R31: (1 sc in 5 sts, 1 sc dec) x 3, turn
R32: (1 sc in 4 sts, 1 sc dec) x 3, turn
R33: (1 sc in 3 sts, 1 sc dec) x 3, turn
R34: (1 sc in 2 sts, 1 sc dec) x 3, turn
R35: (1 sc, 1 sc dec) x 3, turn
R36: 6 sc tog, fasten off, weave in ends (besides one of them)
Using the limeade yarn, crochet lines using the surface crochet stitch (chains through fabric) up and down 4 lines per shell (I did it in a zig-zag to have less yarn to weave in)
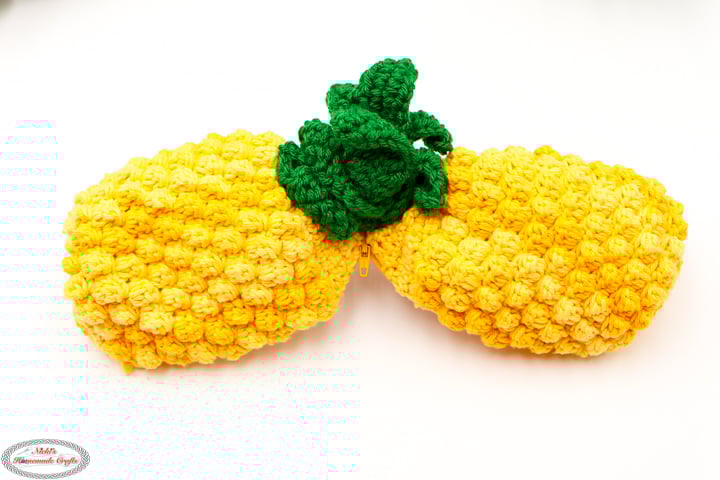
2 Pineapple Shells
Sunshine Multi
R1: MR, 6 sc, close the circle, turn
R2: (1 sc, 2 sc) x 3, turn
R3: (1 sc in 2 sts, 2 sc) x 3, turn
R4: (1 sc in 3 sts, 2 sc) x 3, turn
R5: (1 sc in 4 sts, 2 sc) x 3, turn
R6: (1 sc in 5 sts, 2 sc) x 3, turn
R7: (1 sc in 6 sts, 2 sc) x 3, turn
R8: *1 sc, 1 3-dc bobble, repeat from * till the end, turn
R9: 1 sc per st, turn
R10: *ch 1, 1 3-dc bobble, 1 sc, repeat from * till the end, turn
R11: 1 sc per st, turn
Repeat the R8-11 until R25
R26: (1 sc in 6 sts, 1 sc dec) x 3, turn
R27: (1 sc in 5 sts, 1 sc dec) x 3, turn
R28: (1 sc in 4 sts, 1 sc dec) x 3, turn
R29: (1 sc in 3 sts, 1 sc dec) x 3, turn
R30: (1 sc in 2 sts, 1 sc dec) x 3, turn
R31: (1 sc, 1 sc dec) x 3, turn
R32: 6 sc tog, fasten off, weave in ends (besides one of them)
Don’t forget to use the hashtag #LIVECALAPR26 and post your progress picture in the FB Group “Crocheting with Nicki” so you can qualify for the giveaway!
Part 3: Leaves, Accessories, and Assembly
LIVE Tutorial starts 12pm, PT on April 5th, 2026. The LIVE Tutorial Replay will be available after HERE on Youtube.
Written Pattern
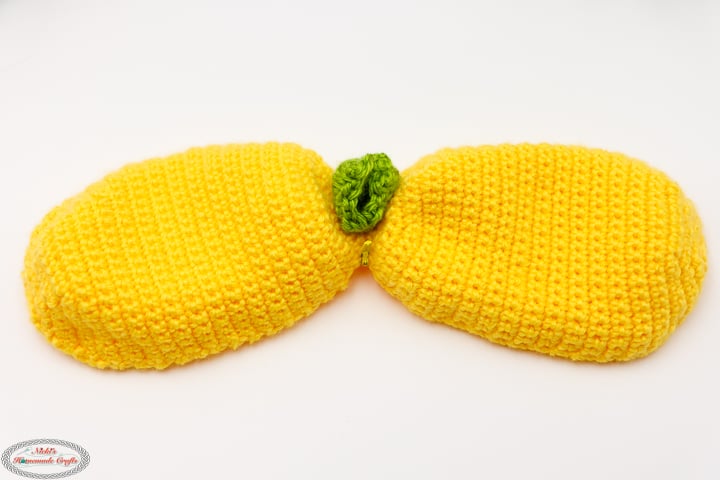
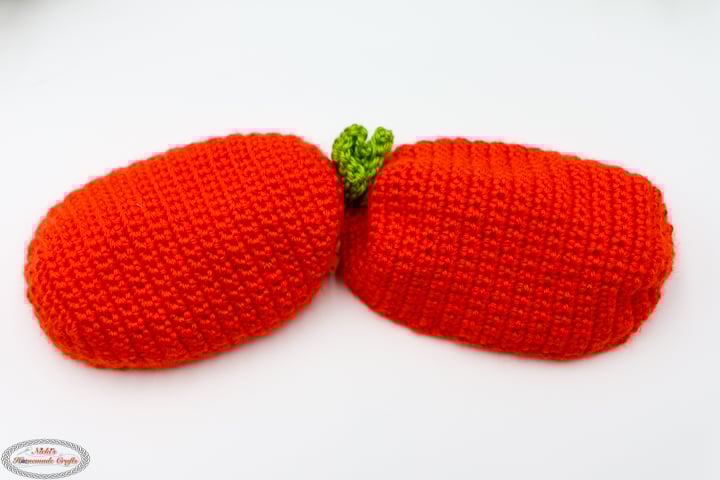
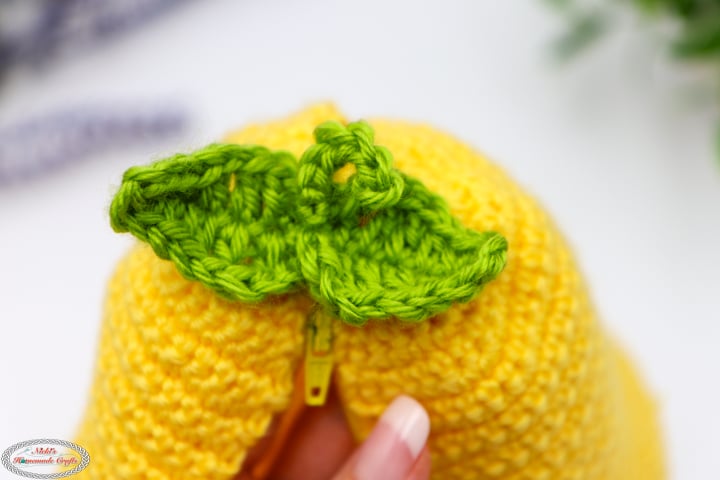
Assembly of the Lemon AND Orange
Hot glue or sew (with thread) the zipper to the edges of the 2 shells. Make sure you’re NOT too close to the crochet so the zipper won’t pull on the yarn, and make sure you don’t add hot glue to the zipper itself. Work in stages about 2 inches at a time (add hot glue, attach, repeat). I’ll show this process more up close in the LIVE video.
Then test out the zipper closes.
Next, sew the area of the shell that has the ends of the zipper touching together with the leftover yarn end (about ½ inch).
2 Leaves and an I-cord stem
Limeade
Leaf: R1: ch 7, start from the 2nd ch from the hook, 1 ATC (or ch 4, and count as 1 tr), 1 dc in 2 ch, 1 hdc in 2 ch, 1 sc, ch 1, turn 180 degrees and work on the other side of the ch, 1 sc, 1 hdc in 2 sts, 1 dc in 2 sts, 1 tr, ch 3, sl st to first ch
I-cord
Using the last method of the icord techniques in this video (https://youtu.be/5-OZiZcmqXw) crochet an i-cord that is 1.5 inches long.
Use the yarn ends to connect the 2 leaves (thickest area) and then sew on the 2 leaves with icord to the top of the outside of the shell (outside of the zipper area) where the ½ inch connection is.
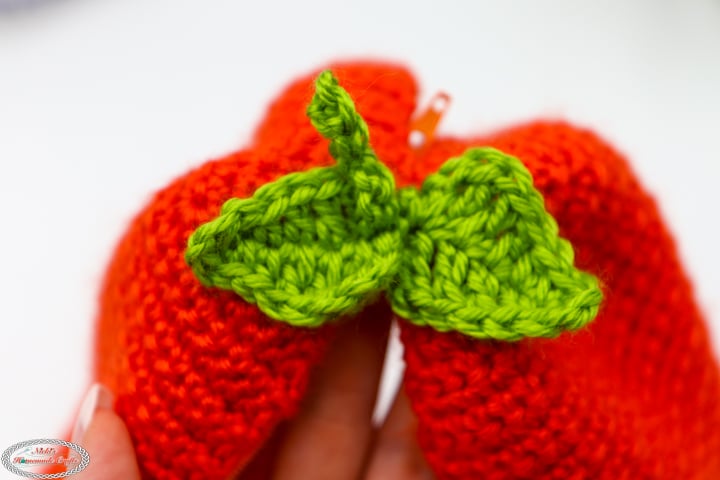
Assembly of the Strawberry
Hot glue or sew (with thread) the zipper to the edges of the 2 shells. Make sure you’re NOT too close to the crochet so the zipper won’t pull on the yarn, and make sure you don’t add hot glue to the zipper itself. Work in stages about 2 inches at a time (add hot glue, attach, repeat). I’ll show this process more up close in the LIVE video.
Then test out the zipper closes.
Next, sew the area of the shell that has the ends of the zipper touching together with the leftover yarn end (about ½ inch).
Leaves and Stem
Grass
R1: MR, 6 sc, close the ring, continuous rounds, so use a stitch marker
R2-7: 1 sc per st
R8: 2 sc per st
R9: (ch 7, start from the 2nd ch from the hook, 1 sc, 1 hdc, 1 dc in 2 sts, 1 tr in 2 sts, sk 1 st, sl st to the next st) x 6
Fasten off and sew the leaves with the stem to the top of the strawberry.
Assembly of the Watermelon
Hot glue or sew (with thread) the zipper to the edges of the 2 shells. Make sure you’re NOT too close to the crochet so the zipper won’t pull on the yarn, and make sure you don’t add hot glue to the zipper itself. Work in stages about 2 inches at a time (add hot glue, attach, repeat). I’ll show this process more up close in the LIVE video.
Then test out the zipper closes.
Next, sew the area of the shell that has the ends of the zipper touching together with the leftover yarn end (about ½ inch).
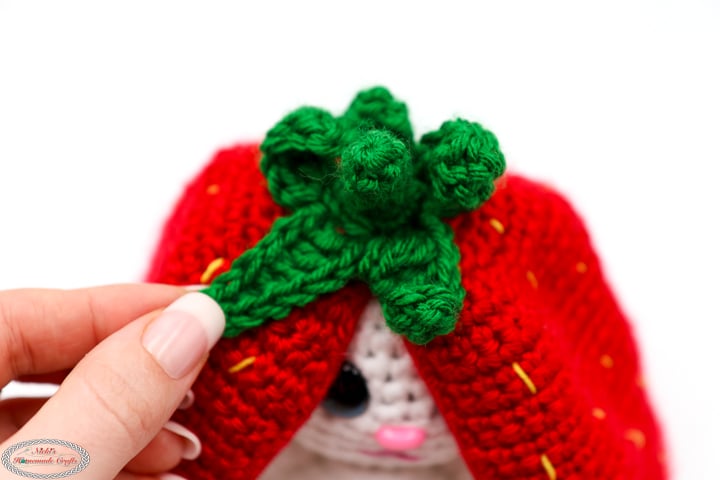
Assembly of the Dragonfruit
Hot glue or sew (with thread) the zipper to the edges of the 2 shells. Make sure you’re NOT too close to the crochet so the zipper won’t pull on the yarn, and make sure you don’t add hot glue to the zipper itself. Work in stages about 2 inches at a time (add hot glue, attach, repeat). I’ll show this process more up close in the LIVE video.
Then test out the zipper closes.
Next, sew the area of the shell that has the ends of the zipper touching together with the leftover yarn end (about ½ inch).
5 Leaves
Geranium and Limeade
Start with Limeade
R1: MR, 3 sc, close the circle, turn
R2-5: 2 sc, 1 sc per st, turn
R6-9: 1 sc per st, turn
Switch to Geranium
R10-11: 1 sc per st, turn
Sew the leaves to the top of the dragonfruit (in a circle if you like). Optionally block them if you don’t like the curl.
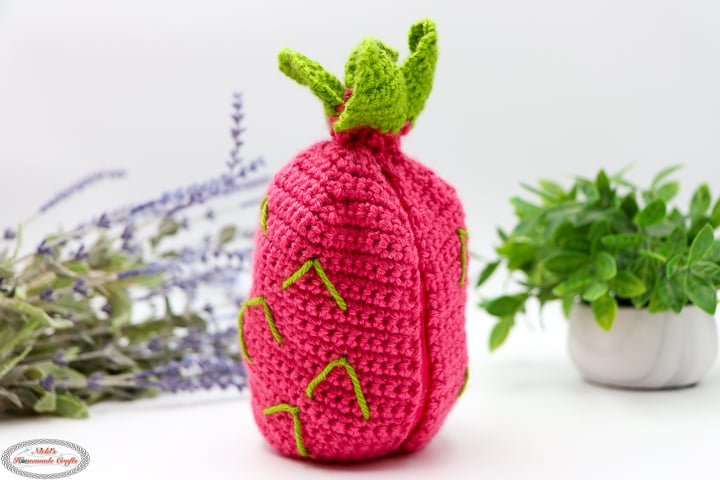
Assembly of the Pineapple
Hot glue or sew (with thread) the zipper to the edges of the 2 shells. Make sure you’re NOT too close to the crochet so the zipper won’t pull on the yarn, and make sure you don’t add hot glue to the zipper itself. Work in stages about 2 inches at a time (add hot glue, attach, repeat). I’ll show this process more up close in the LIVE video.
Then test out the zipper closes.
Next, sew the area of the shell that has the ends of the zipper touching together with the leftover yarn end (about ½ inch).
7 Leaves on 1 row (rolled)
Grass
R1: Ch 36, start from the 2nd ch from the hook, (1 sc in 2 st, ch 12, start from the 2nd ch from the hook, 1 sl st per ch, do no sk a ch, 1 sc in the next 3 sts) 7 times, turn
R2: 1 sc, sk 1 st, (work along the sl st extension the following ALL around: 1 tr in 3 sts, 1 dc in 3 sts, 1 hdc in 3 sts, 1 sc in 2 sts, ch 1, 1 sc in 2 sts, 1 hdc in 3 sts, 1 dc in 3 sts, 1 tr in 3 sts, sk 2 sc sts, 1 sc, sk 2 sts) 7 times, finish with 1 sc and no sk sts
Next, roll up the 7-leaf piece, weave yarn through the bottom to fold it all together, THEN sew to the top of the pineapple.

Add the Velcro to the shells
Let’s break this down. You’ll have the scratchy side of the velcro on the WHITE shells and the NON-scratchy side of the velcro on the fruit shells.
Depending on your tension, this measurement may be different for you, but you’ll need about 15 inches of Velcro. Cut the Velcro in half lengthwise, so you’ll have 2 long scratchy and 2 long non-scratchy pieces. Mine has very strong sticky glue on the velcro, so I simply took off the protective tape and then glued it on. But if you add hot glue, it will last longer, and sewing it on after will make it last even longer. Anyway, you’ll attach the velcro to the inside of the white shell (the inside is where the snap is located) around the edge. Now, do the same for the inside part of the fruit shell. Be aware you’ll need MORE non-scratchy velcro if you’ll only make one set of white ears/shells and more than 1 fruit set, as each fruit set has only non-scratchy velcro.
Optionally, you can also place the zipper between the white ears and the fruit shell and sew all 3 layers together, and you will not need any velcro, but you also NOT switch between fruits on the white ears.
Now, you can attach one of the fruit shells (velcro) to the white ears/shells. Then add the bunny snap to the white ears/shells snap. Zip up the zipper to hide the bunny OR flip the white ears outward to showcase the ears more over the fruit shells.

Remember to post your final images by 4/6/26, 10am, PT to our Facebook group using the hashtag #LIVECALAPR26 so we can celebrate you and you qualify for the giveaway. The Winners will be announced at the big Party on 4/6/26 at 12pm, PT HERE.
HUGE Crochet Party with Lots of Prizes
The LIVE PARTY with 12 PRIZE Winner Announcement starts on 4/6/26 at 12pm, PT HERE on Youtube.
The next LIVE CAL, after the current one finishes, will likely be in July/August 2026, as I am going to have them now every other month. Get ready for it 🙂 Just be on my Newsletter list and you will not miss it.


