How To Work Turkish Star Crochet Stitch
This post includes affiliate links.
This is a beginner friendly tutorial showing you how to work the Turkish star crochet stitch. This is a super versatile stitch you can use for various projects!
Recently, one of my Facebook followers asked me to help her understand the Turkish Star Crochet Stitch.
She actually did not call it that way, but I did. The reason for that is, that she initially send me a Facebook video link that was from a lady in Turkey, her name is Diyana Yün.
But because she does not speak English, it was hard to understand how this stitch is made.
Also, she calls it a star stitch. However, we already have a star stitch in the English/American Crochet language. That is why I called the stitch from Diyana Yün the Turkish Star Stitch.
However, if anyone happens to know the actually English version of this name, please let me know and I will update my post.
This stitch is actually very easy and looks incredibly beautiful. All it uses is single crochet.
To make it look different from a normal round of single crochet, it is placed in a different location than how it is normally done.

WANT TO MAKE THIS STITCH FLAT, CLICK HERE!
Turkish Star Crochet Stitch Tutorial
So let’s get started. Please keep in mind that I have a video tutorial on the bottom of this page.
It will help you understand more clearly if the pictures are not enough.
It is very hard to show on pictures where exactly to place the stitches. Even though it is easy once you know here they go.
First you will need a simple round (not row, it will not work for flat pieces unless you start from the right side on each row) of stitches.
I started with a round of single crochet (multiples of 2 is needed).
Round 1 of the Turkish Star Crochet Stitch:
- Ch1, *2 sc in the same st, sk 1 st, repeat from * until the end of the round, DO NOT SL ST, these are continuous rounds!
- Either continue with the same color or change colors like me (on the last stitch of this round)

Turkish Star Stitch Round 2:
- *place 2 sc between the 3rd and 4th line of the 2 sc of the previous round. Then go thru the skipped stitch from the previous round, repeat from * all around, change color on the last stitch


Round 3:
- *place 2 sc between the 3rd and 4th line of the 2 sc of the previous round. Then go thru the stitch right underneath from the previous round, repeat from * all around, change color on the last stitch


Continue round 3 as many times as needed for what you are creating.
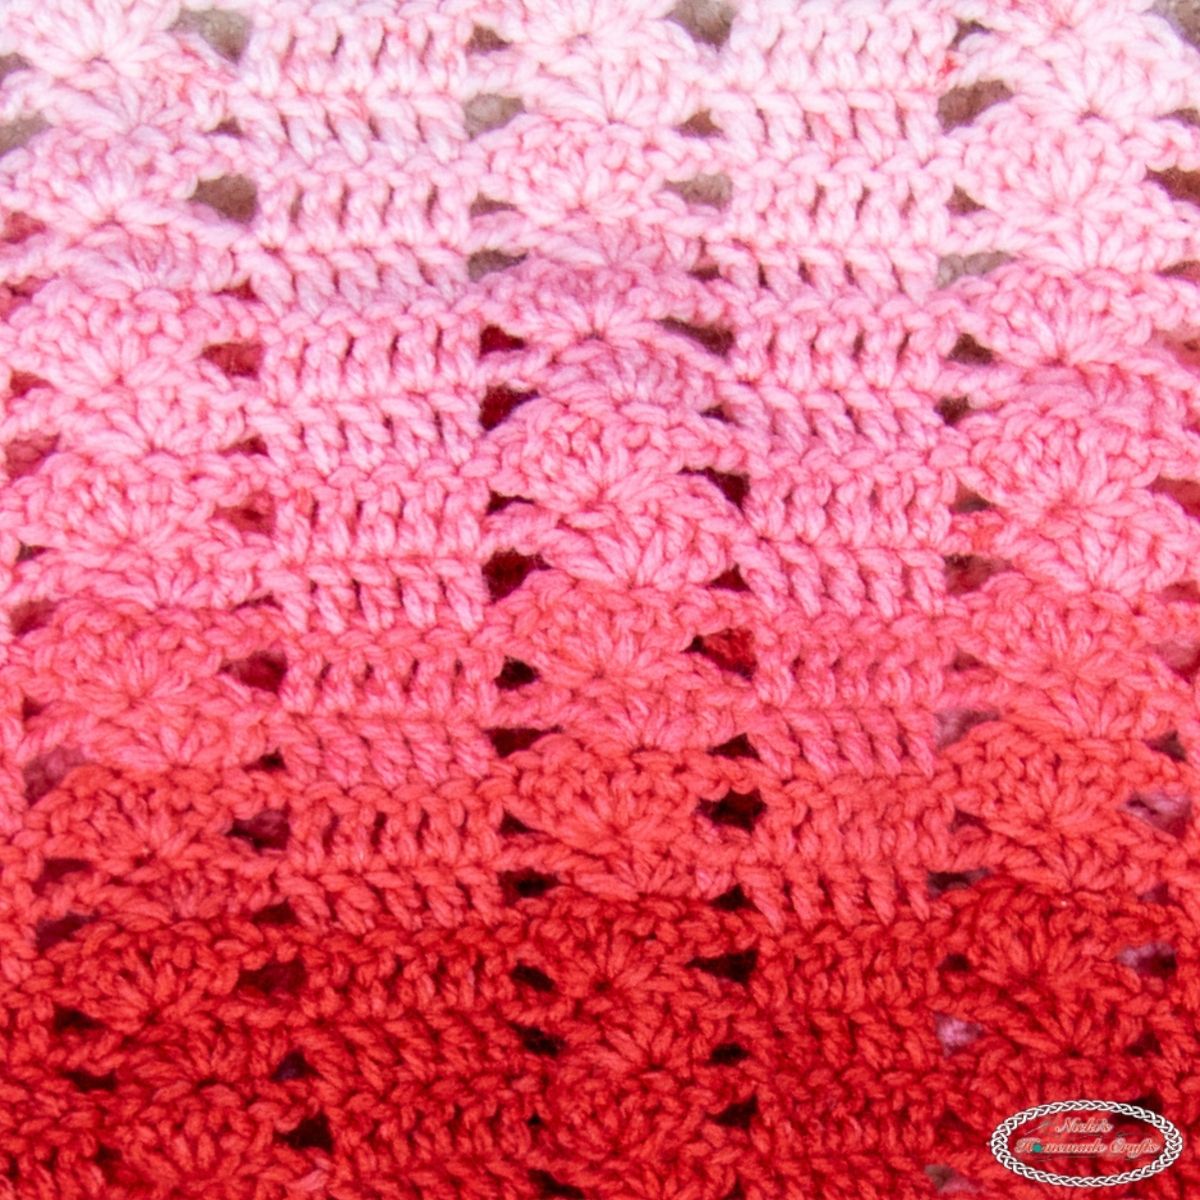
Here are some additional photos using this stitch but using different colors:


The right picture above shows how it looks from the inside/wrong side. I think it looks very pretty on the wrong side too!
Below is where the color changes happen. This is a view from the wrong side.

A close up of the stitch is seen below. Such an easy switch to hook placement and you can have a stitch that is so pretty.

I think this great crochet stitch would be perfect for a number of different crochet projects!
As it works best when you work in round, you can use it for projects like baskets, cowls, hats or a bag worked in round.
The colors will pop in small bursts if you use two contrasting ones.
However, you can also use a similar shades of the same color and create a subtle ombre effect.
Turkish Star Crochet Stitch Video Tutorial
Below, you can also watch a video on how to create this stitch from the beginning.
I hope you enjoy the video tutorial, while you are there please subscribe to my YouTube channel for more crochet videos and tutorials.
Subscribe to my Youtube Channel here:
I hope you enjoyed this Turkish star crochet stitch tutorial!
If you love it, please use the social media share buttons above or below and share it with the world and your friends.
Do not forget to pin it to your Pinterest Board so you can easily find it later.
That way you will find it easily again when you need it and also provide the world and your friends with the ability to gain extra crochet knowledge.
And to top it off, you help me as it allows me to create more content that you love already and want to see more of – free crochet patterns and tutorials. So, thank you for sharing.
THE CROCHET CLUB – CROCHET PATTERN, TIPS & TUTORIAL VAULT
You can have the most amazing pattern and yarn in the world, but if you don’t have the knowledge of how to crochet in a way that makes you proud, then all your work is for nothing.
Maybe you have a dream of having perfect straight seams or have less yarn to weave in?
Let me introduce you to THE CROCHET CLUB – AN ALL-ACCESS MEMBERSHIP! It is exactly what it says on the tin. If you sign up for the membership I will teach you different techniques and tips on how to improve your crochet projects!
You will get access to all my patterns in PDF formats and full support from me to guide you through the tricky bits. I will also teach you what YOU want to learn! Join me in THE CROCHET CLUB – AN ALL-ACCESS MEMBERSHIP!


Thank you for creating this tutorial! So helpful. I am still a novice and need detailed tutorials so thank you for the great explanation.
I am however very interested in this stitch for a blanket. I understand it would be heavy but that’s precisely what I’d like.
Will you be creating a tutorial on doing a flat peace….not one in the round? I can’t figure out how to do it as a flat. Help! Knowing the multiples would be very helpful too.
Thank you!!
Hi Cindy,
thank you for your comment and question. I actually got this question often since I publish this tutorial yesterday. I will make another video on how I would do this stitch flat. But here is my written explanation for it: For a right handed person, always start on the right side working towards the left, no turning ever. Sadly that also produces lots of ends and loads of weaving in at the end. As mentioned I will make a video and post I to this post once finished. If you subscribe to my youtube channel you will know right away when it was published 🙂 I hope that helps for right now. Thank you again
Nicole
Is this stitch not the waistcoat stitch, also called the split single crochet stitch ? Looks very similar.
No, it is not, It does have a similar technique. If you watch the video, you will see the difference. You are not slitting every single crochet here, also you are placing the stitches (2sc) not just in between 1 single crochet, also also into a stitch below it. The waistcoat stitch does not do that actually. Thanks for your comment 🙂
Thanks for the tutorial! I made a cellphone sleeve with this pattern (link in my name). It was a bit tough on the 2nd row, but you’re right in saying it gets easy after that.