How to Crochet a Bunny Tissue Box Cover Easily – Free Pattern
This post includes affiliate links.
Ths Bunny Tissue Box Cover is a free crochet pattern and made using the single crochet stitch with mainly one skein of yarn and some accent colors. This is an easy beginner-friendly pattern with video tutorials.
Mysteries are fun and exciting. Finding clues and then putting all the pieces together to solve it is so satisfying. Just like Easter when you find all the easter eggs and presents as a kid. So to make it really fun, I ran a Mystery Crochet Along right before Easter using this Bunny Tissue Box Cover. Now that the mystery is revealed and I’m republishing this pattern as a stand-alone pattern. But don’t worry. I will host more Mystery Crochet Alongs soon. In fact, I host them a few times a year all right here.
This Bunny Tissue Box Cover is not only cute but also designed such that you can add your own spin to it, beautify it or turn it into a “piggy bank”.

As I hosted the Mystery Crochet Along in my Facebook group Crocheting with Nicki (join us if you haven’t already), some of the video tutorials will only work if you joined the group. That is where the videos are hosted.
Get the PDF Pattern of the Bunny Tissue Box Cover
So, let me now give you the supplies you need in order to crochet this Bunny Tissue Box Cover pattern.

This pattern is also available as an ad-free, printer-friendly pdf pattern that can be purchased at the links below for only a small fee.


If you like this tissue box cover crochet pattern, you might like these also:


How to crochet the
Bunny Tissue Box Cover
You will need:
- ONE SPRING COLOR of bulky yarn (1-2 skeins) I used exactly 1 skein of WeCrochet’s Might Stitch Bulky (136yds/100g) (in color blush), but due to tension and gauge, I would recommend you have 2 skeins ready
- regarding the color: pick a pastel spring color to make the pattern look the best
- 1 skein of white yarn (any weight will do)
- 5.0mm hook -> I used Furls Crochet Odyssey Hook
- scissors
- tapestry needle
- 12mm eyes (I used blue) and a nose – all plastic, but you can also sew them on with yarn
- pom pom maker or something to make a pom pom
- a little bit of black yarn for the mouth
- optional: pink blush make up for the ears and cheeks
- optional: stuff with poly-fill
- tissue box: 4.5 x 4.5 x5 inches
Can I use a different yarn?
I used WeCrochet’s Might Stitch Bulky yarn which is on the thinner side of a bulky yarn when worked up. That means it looks bulky in a skein, but due to its twist, it may work up almost like a thicker worsted weighted yarn. Be aware of that important information, as that will be crucial during parts 1 and 2 of the pattern.
IF YOU DON’T HAVE BULKY YARN, you can also make it using multiple strands of thinner yarn. I have a tutorial HERE
IF you really want to use a different yarn, that’s fine. I talked about it in this video. You will need to adjust my pattern a little bit. But as long as you follow the MEASUREMENTS provided you can actually use any yarn you wish.
Gauge:
3 sc stitches x 4 rounds = 1 square inch
Size:
4.5 x 4.5 x 5 inches
Stitches used:
This pattern is in US Terms
Learn all the basic crochet stitches HERE
- sc = single crochet
- dec = decrease
- in = increase
- ch = chain
Written Pattern Bunny Tissue Box Cover:
Start with your MAIN COLOR (pink in my case)
This first thing you will need to know is that technically (as mentioned above) the yarn weight doesn’t matter AS LONG AS YOU HAVE THE SAME MEASUREMENTS as my pattern at the end.
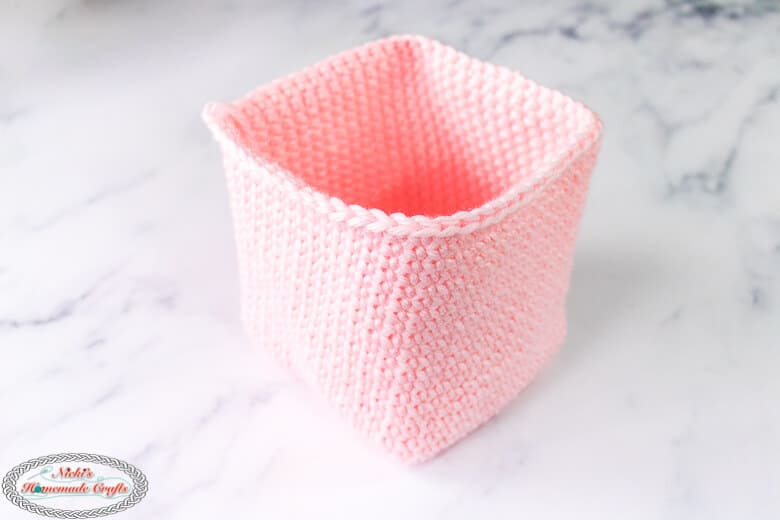
So if you have a different yarn weight, tighter or looser tension, add or use fewer chains in the beginning/rows at the end. Make sure the final square measures 4.5 x 4.5 inches with a center hole of 1.5×1.5 inches, positioned in the middle of the square. See my picture below for the final result. Then start the pattern below 🙂
Start with the Tissue Box itself

So here is my pattern using bulky yarn, you might need to adjust if using a different yarn.
If you have trouble with Part 1, I added a video into the group “Crocheting with Nicki” HERE
Ch 16
R1: 1 sc in the 2nd st from the hook and the rest of the chs (15 sts), turn
CHECK POINT: does your first row measure 4.5 inches? If not, adjust!
R2-4: 1 sc in each st, turn (click HERE if you wanna know why I don’t chain 1 at the beginning)
Now work on one side at the time, creating a hole. You will need to divide your stitch count by 3. So I have 5 stitches on each side and 5 stitches skipped in the middle to create the hole.


1st side:
R1: 1 sc in the next 5 sts, turn
R2-5: 1 sc in each st, turn
2nd side:
After the last row, cut your yarn and start on the other side, 5 sts skipped from the last st of row 1 (where you made 5 sts only). See picture 2 above.
R1: 1 sc in the next 5 sts, turn
R2-5: 1 sc in each st, turn
R6: 1 sc in the next 5 sts, ch 5, 1 sc in the next 5 sts (on the other side) – see picture 4
R7-10: 1 sc in each st (or chain for row 7), turn
Do NOT cut your yarn after the last row. You will continue here in Part 2. Feel free to weave in the other yarn ends tho.
Feel free to add 1-2 rows in case you don’t have 4.5 inches in height yet.

You will now simply crochet around the outside of the square in continuous circles. All in single crochet stitches. No increase or decreases.
Each side should have the same number of stitches – plus 1 in each corner. So my top and bottom have 15 stitches. So the other 2 sides will also get 15 even stitches. And each corner gets 1 stitch. That makes in total 64 single crochet stitches per round.
But do not be too picky with yourself. Watch this video in my group “Crocheting with Nicki” if you need more help 🙂

Crochet as many rounds as needed in order to have a height of 5.25 inches (measured from the square to the top of the last round crocheted). For me, that was 20 rounds.

You can now fasten off and weave in your ends.
Bunny Pom Pom:
Using your white yarn make a pom pom and sew it to the back (choose either side) of the tissue box cover. Here is a tutorial on how to make a pom pom

Bunny Ears (make 2):
R1: Using the main color, make a magic ring and add 8 sc’s, close the ring and use a stitch marker as you are crocheting in continuous rounds
R2-3: 1 sc in each st (8)
R4: *1 sc, 2 sc in the same st, repeat from * until the end of the round (12)
R5-6: 1 sc in each st (12)
R7: *1 sc, 2 sc in the same st, repeat from * until the end of the round (18)
R8-13: 1 sc in each st (18)
R14: *1 sc, 1 sc dec (invisible if possible, a tutorial is HERE), repeat from * until the end of the round (12)
R15-18: 1 sc in each st (12)
Fasten off

Optionally stuff both ears with a little bit of stuffing/poly-fill. Now sew the ears onto the side of each front top corner. If you want to have the ears stand up, use the ends (you used to sew the ears on) and pull them towards each other from the inside and tie them up.

Bunny Face
Add the eyes, nose, and mouth and a bit of makeup for the ears and cheeks (optional).
Although I don’t have a pattern for it, you could also add feet for the bunny 🙂

I hope you love this bunny tissue box cover pattern as much as I do. If you love this pattern and technique, please use the social media share buttons above or below and share this pattern link with the world and your friends.
That way you will find it easily again when you need it and you also provide the world and your friends with the ability to gain extra crochet knowledge as well. And to top it off, you help me as it allows me to create more content that you love already and want to see more of – free crochet patterns and tutorials. So, thank you for sharing.
If you love my crochet patterns and the way I teach, I would suggest subscribing to my newsletter below as I share new patterns, tutorials and special announcements often.