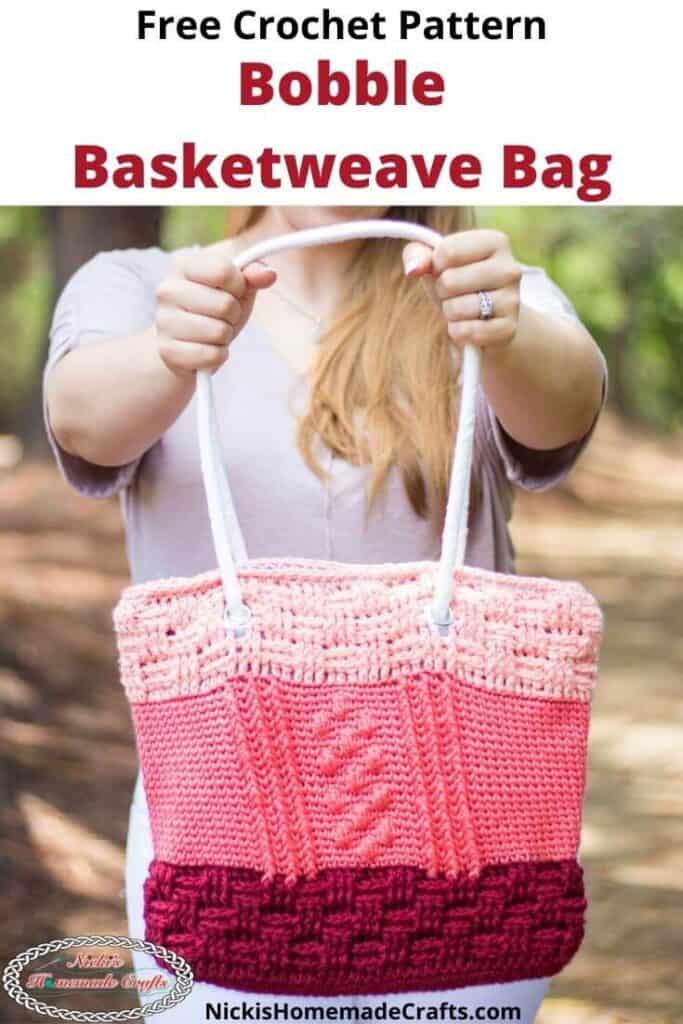
Bobble Basketweave Bag – Free Pattern as Crochet Along
This post includes affiliate links.
This is a free crochet along pattern for creating the Bobble Basketweave Bag. The complete pattern can be found below. Photos and a video tutorial are also included.
“I just love this bag. The colors are so bright and fun. It has this amazing mixtures of textures too which makes it really eye-catching. The size is also great. It’s not too big while still being big enough to hold everything I need!”
I eyed the bag dubiously. “But it looks so…well, complicated.”
“Not at all! The instructions were super easy to follow, and the instructor is always there to help.”
“Hmm,” I pondered. “I sure would like a bag like that…”
“Then you should try it! I know you can do it.”
Join in this crochet along to make your very own beautiful, textured bag. The crochet along is over, but the pattern is still available for free.
It’s been so long since I hosted an amazing Crochet Along. I believe my last one was the Snowman Advent Calendar. Oh, that was a fun one.
Well, now that we are heading into the Summer time, I feel like it’s the perfect time to crochet bags. I’m not sure why I love crocheting bags in spring/summer, but it makes me very happy.
This bag is actually much easier to crochet than you might think. I will have several video tutorial guiding you through certain stitches.
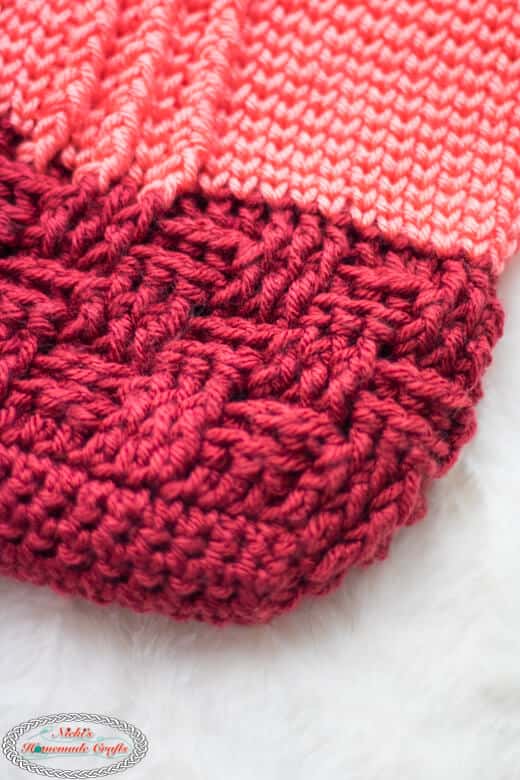
In fact, the stitches that are represented are the Thermal stitch, Waistcoat stitch, Basketweave stitch and the Bobble stitch which featuring a different part of the bag. I have video tutorials for all of those stitches.
I have a felted lining with a zipper added to the bag which is optional for you to add. I won’t have a video tutorial for it, but a lot of photos to guide you through it. Just in case you wised to add one.

Make sure you are signed up for my Newsletter. I will update you when we will start the Crochet Along, as well as when new parts of the Crochet Along are published. If you are already signed up, you are good to go.
All parts are now available for free below.
Be sure to join my Crochet group as well to get extra support through the Crochet Along and have fun in the group with like-minded crocheters.


If you also wanted a written pattern you can purchase the ad-free, printer-friendly pdf pattern already at the links below. But IF you will be joining the All-Access Membership you will automatically get this pattern.


Materials needed for the Bobble Basketweave Bag Crochet Along
- Premier Yarns Anti-Pilling worsted weighted yarn, 1 skein of each of these colors:
- Soft Peach
- Scarlet (was sadly discontinued), I would recommend red
- Coral
- 5.0mm hook
- scissors
- tapestry needle
- Fabric or Felt (I used the later) to cut (got from Joann):
- 2 pieces measuring 12×13 inches
- 2 pieces measuring 3×12 inches
- 1 piece measuring 3×13 inches
- Zipper measuring: 12 inches long
- fabric rotary cutter
- skip stitch rotary cutter
- cutting board
- sewing machine or sew it by hand
- 4 eyelet sets (11.1mm) plus tool (Joann has a pack for both) and hammer
- Cord as handles (from Joann): Wrights 3/8 in Polyester Filler Cord

Stitches used, in US terms:
Click HERE to learn these basic stitches
- sc = single crochet
- ch = chain
- wst = waistcoat stitch
- fpdc = front post double crochet
- bpdc = back post double crochet
- bobble stitch = 3 dc cluster in the same stitch
- basketweave stitch
- thermal stitch
Final Sizes:
12 (height) x 14 (width) inches
Gauge:
3 sc x 4 rows = 1 square inch
Instructions:
I crocheted the bag from the darkest color (scarlet) to the lightest color (soft peach).
Base:
Ch 41
R1: starting from the 2nd ch from the hook: 1 thermal stitch in each ch, turn (40 sts)
R2 – 16: 1 thermal stitch in each st, turn
You’ll now start crocheting in rounds.
Body:
R1: 1 sc in each stitch all around, such that you have 40 sts on the long sides each and 8 sts on the short sides each, sl st to the first st (96 sts)
R2: Ch 2 (doesn’t count as st), 1 dc in each st all around, sl st to the first st
You’ll now start with the Basketweave stitch.
R3 – R4: Ch 2, *1fpdc in the next 3 sts, 1 bpdc in the next 3 sts, repeat from * until the end, sl st to the first st
R5 – R6: Ch 2, *1bpdc in the next 3 sts, 1 fpdc in the next 3 sts, repeat from * until the end, sl st to the first st
R7 – R8: Ch 2, *1fpdc in the next 3 sts, 1 bpdc in the next 3 sts, repeat from * until the end, sl st to the first st
You will change colors and start with the middle section of the bag body which uses the Waistcoat stitch and the Bobble Stitch.
R9: 1sc in next 18 sts, *[1fpdc, 1 sc, 1 fpdc, 1 sc, 1 fpdc,], 1 sc in the next 11 sts, repeat from [ to ]**, 1 sc in the next 27 sts, repeat from * to **, 1 sc in the next 9 sts, sl st to the first st
R10: 1wst in next 18 sts, *[1fpdc, 1 wst, 1 fpdc, 1 wst, 1 fpdc,], 1 wst in the next 11 sts, repeat from [ to ]**, 1 wst in the next 27 sts, repeat from * to **, 1 wst in the next 9 sts, sl st to the first st
R11: 1wst in next 18 sts, *[1fpdc, 1 wst, 1 fpdc, 1 wst, 1 fpdc,], 1 wst in the next 5 sts, 1 bobble st, 1 wst in the next 5 sts, repeat from [ to ]**, 1 wst in the next 27 sts, repeat from * to **, 1 wst in the next 9 sts, sl st to the first st
R12: repeat R10
R13: 1wst in next 18 sts, *[1fpdc, 1 wst, 1 fpdc, 1 wst, 1 fpdc,], 1 wst in the next 3 sts, 1 bobble st, 1 wst in the next 3 sts, 1 bobble st, 1 wst in the next 3 sts, repeat from [ to ]**, 1 wst in the next 27 sts, repeat from * to **, 1 wst in the next 9 sts, sl st to the first st
R14: repeat R10
R15 – 26: repeat R11 – R14
R27: repeat R11
R28 – R29: repeat R10
You will change colors and start with the upper section of the bag body.
R30: Ch 2 (doesn’t count as st), 1 dc in each st all around, sl st to the first st

You’ll now start with the Basketweave stitch.
R31 – R32: Ch 2, *1fpdc in the next 3 sts, 1 bpdc in the next 3 sts, repeat from * until the end, sl st to the first st
R33 – R34: Ch 2, *1bpdc in the next 3 sts, 1 fpdc in the next 3 sts, repeat from * until the end, sl st to the first st
R35 – R36: Ch 2, *1fpdc in the next 3 sts, 1 bpdc in the next 3 sts, repeat from * until the end, sl st to the first st

If you wanted to add fabric or felt, do not cut the yarn now. If you don’t want to then you skip the lining section part and go to the next part where you’ll add 2 more rounds and the eyelets and the handles.
Lining of the bag (Fabric or Felt)
All visible seam allowances need to on the “outside” such that they are hidden when the lining is inserted into the bag
Once you cut the lining pieces (mentioned in the material list), you’ll need to sew the zipper to the 2 large pieces on one of the sides that has 13 inches.


Then you will use your skip stitches rotary blade and run it along the 2 sides of the zipper as well as ONE of the 3 inch sides of the 3×12 inch pieces.
Now sew the 3×12 inch pieces to the 12 inch sides of the large lining pieces having the skip stitch side on the top towards the zipper. Finally sew the bottom lining piece onto the bottom opening of the lining.


Finish crocheting the last 2 rounds onto the bag
If you didn’t add a lining, please do the following:
Add 2 rounds of single crochet after round 36, fasten off and weave in the ends.
If you added a lining, secure a piece of plastic to the bottom of the bag (I used some yarn and knotted it tight so it won’t move around) but it’s optional. You’ll now crochet a round of single crochet all around through 1 or 2 stitches (of the bag) and 1 hole created with the skip stitch rotary blade, all the way around.
Then add 1 more row of single crochets again. Fasten off and weave in the ends.

Now add the eyelets using the tool that it comes with it and a hammer. Make sure to cut a small hole into the lining first and stretch the stitches around the area where you want to add the eyelets. Then simply add the handle and you are done.
I hope you will join in the fun in the Crochet Along and created this beautiful Bobble Basketweave Bag with us together. Be sure to SHARE this announcement of the Crochet Along on social media using the buttons above.


NICE PATTERN. LOVE THE COLOR COMBINATION
I am really looking forward to this CAL!
Hi Nicki. I just love your group, your enthusiasm & love for crochet is just wonderful & I might even be able to say contagious. I love being a part of it. I am writing you to ask if I am signed up for your purse crochet along & if not could you please give me the details & sign me up. I haven’t taken part in any crochet alongs so don’t know how it works or what to expect. Thank you so much for helping me. I can’t wait for the fun.
One happy hooker,
Marilyn
I love these colors. I am excited to start this CAL my granddaughter really wants this.
Thanks for the opportunity.
Well, I hit up my stash and found some nice 4th of July colors (dark blue, burgundy, and off-white/cream yarn that I think will make a great looking bag. Printed the pattern and am ready to get started on part 1. I really should wait as I’m just about 10 rows (and endless weaving of ends) on my Ice & Embers Shawlette GoT KAL I started during the final season of Game of Thrones. But… ya know … can’t resist!!!