Free Crochet Fall Leaf Hat Pattern with Pinecone Pom Pom
This post includes affiliate links.
This is a free cute fall leaf hat crochet pattern made with leaf and fall-inspired stitches and accessories. This is a great beginner pattern to learn how to crochet a hat for any head size.
Crocheting a hat may sound difficult, but it actually is not. Once you tried it you are likely hooked – pun intended. But it’s also fall season right now, so to celebrate and embrace the fall let’s get in the mood with a fall-inspired hat with lots of fall stitches and accessories all on one hat.
This Fall Leaf Hat is actually much easier than you might think. You can even modify it as you can. Add more tiny leaf stitches, maybe even all around. Add or remove more leaf accessories. And even add a different pom pom or none at all. The pattern includes a few video tutorials as it’s broken up into many pieces as it used to be part of a mystery crochet along.
Ready to make this one?

Crochet Hat and Beanie Patterns
Well, this Fall Crochet Hat is certainly not my crochet hat pattern! I have written 54 other crochet hat and beanie patterns along with 9 tutorials and 57 videos!
Get the PDF of the Crochet Fall Leaf Hat Pattern

This pattern is also available as an ad-free, printer-friendly pdf pattern that can be purchased at the links below for only a small fee.


If you like thick crochet patterns, you might like these also:


So, let me now give you the supplies you need in order to crochet this cute pattern.
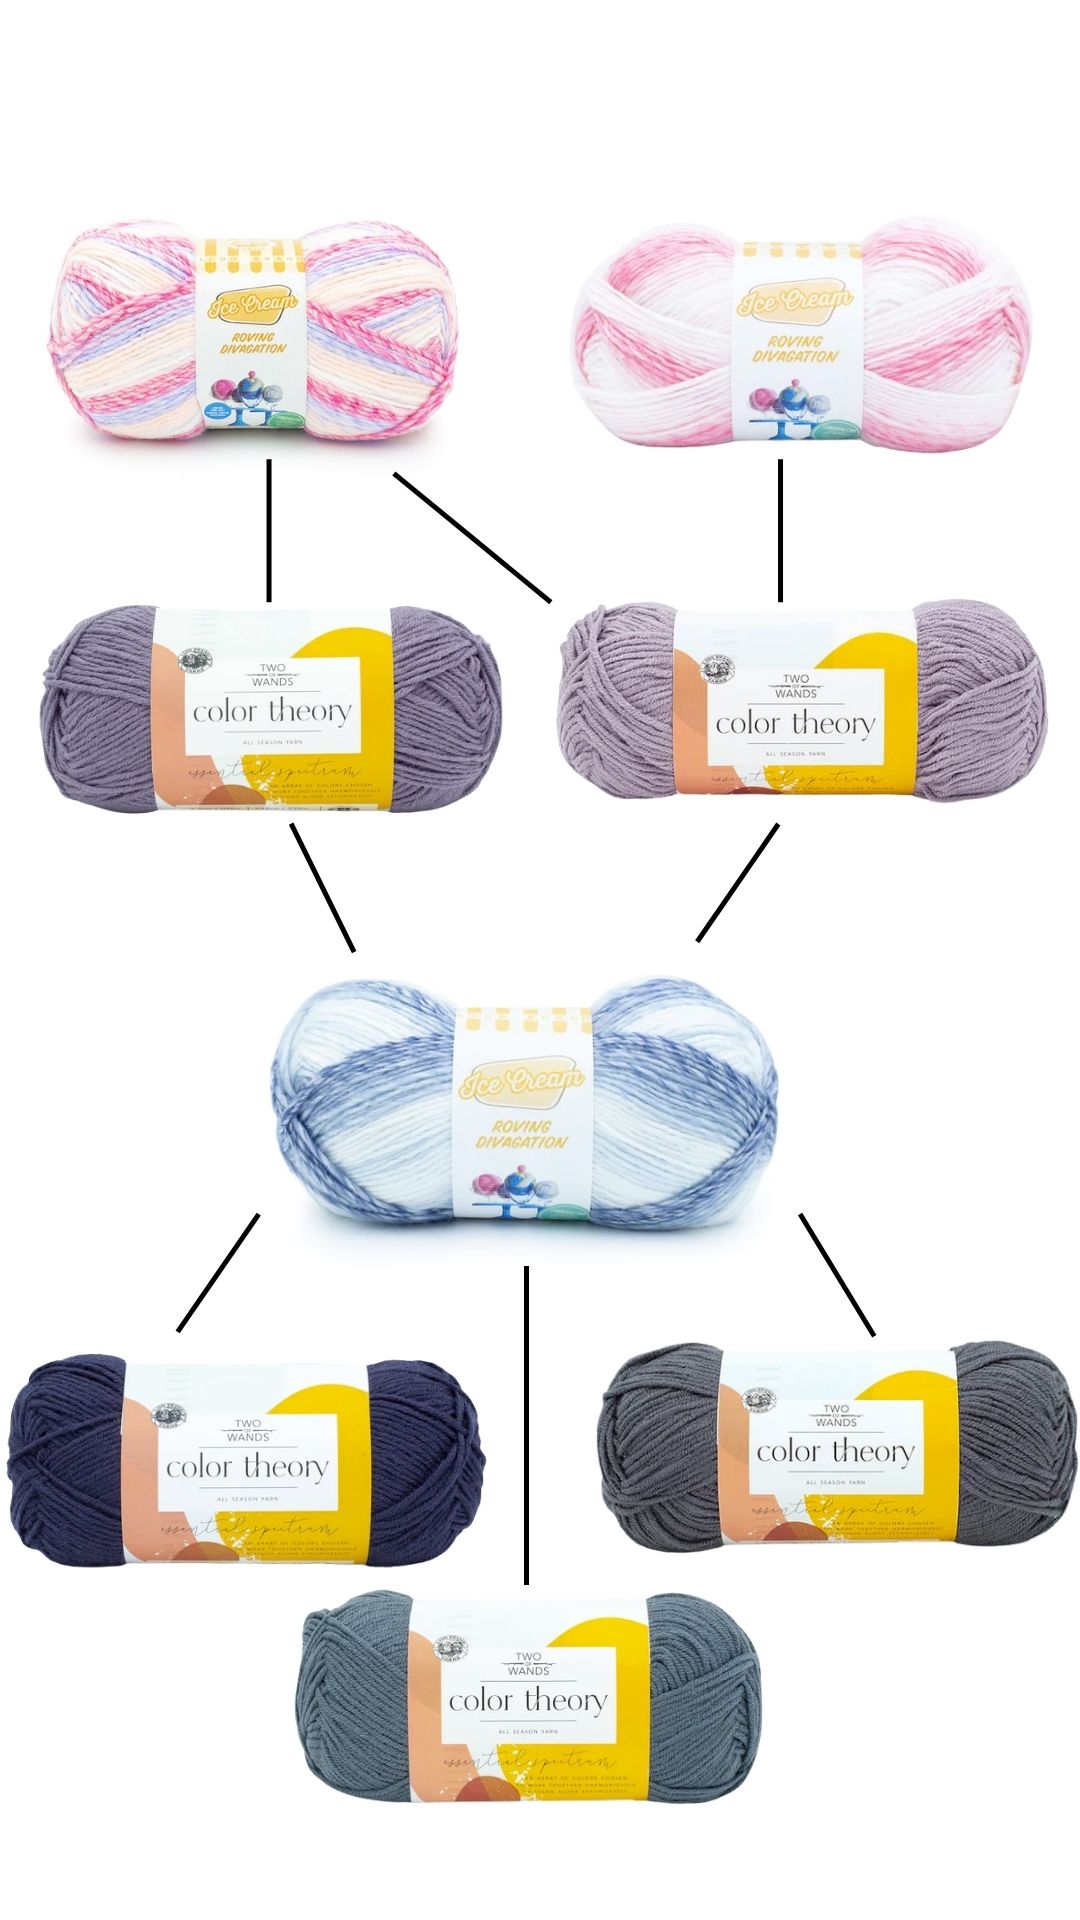
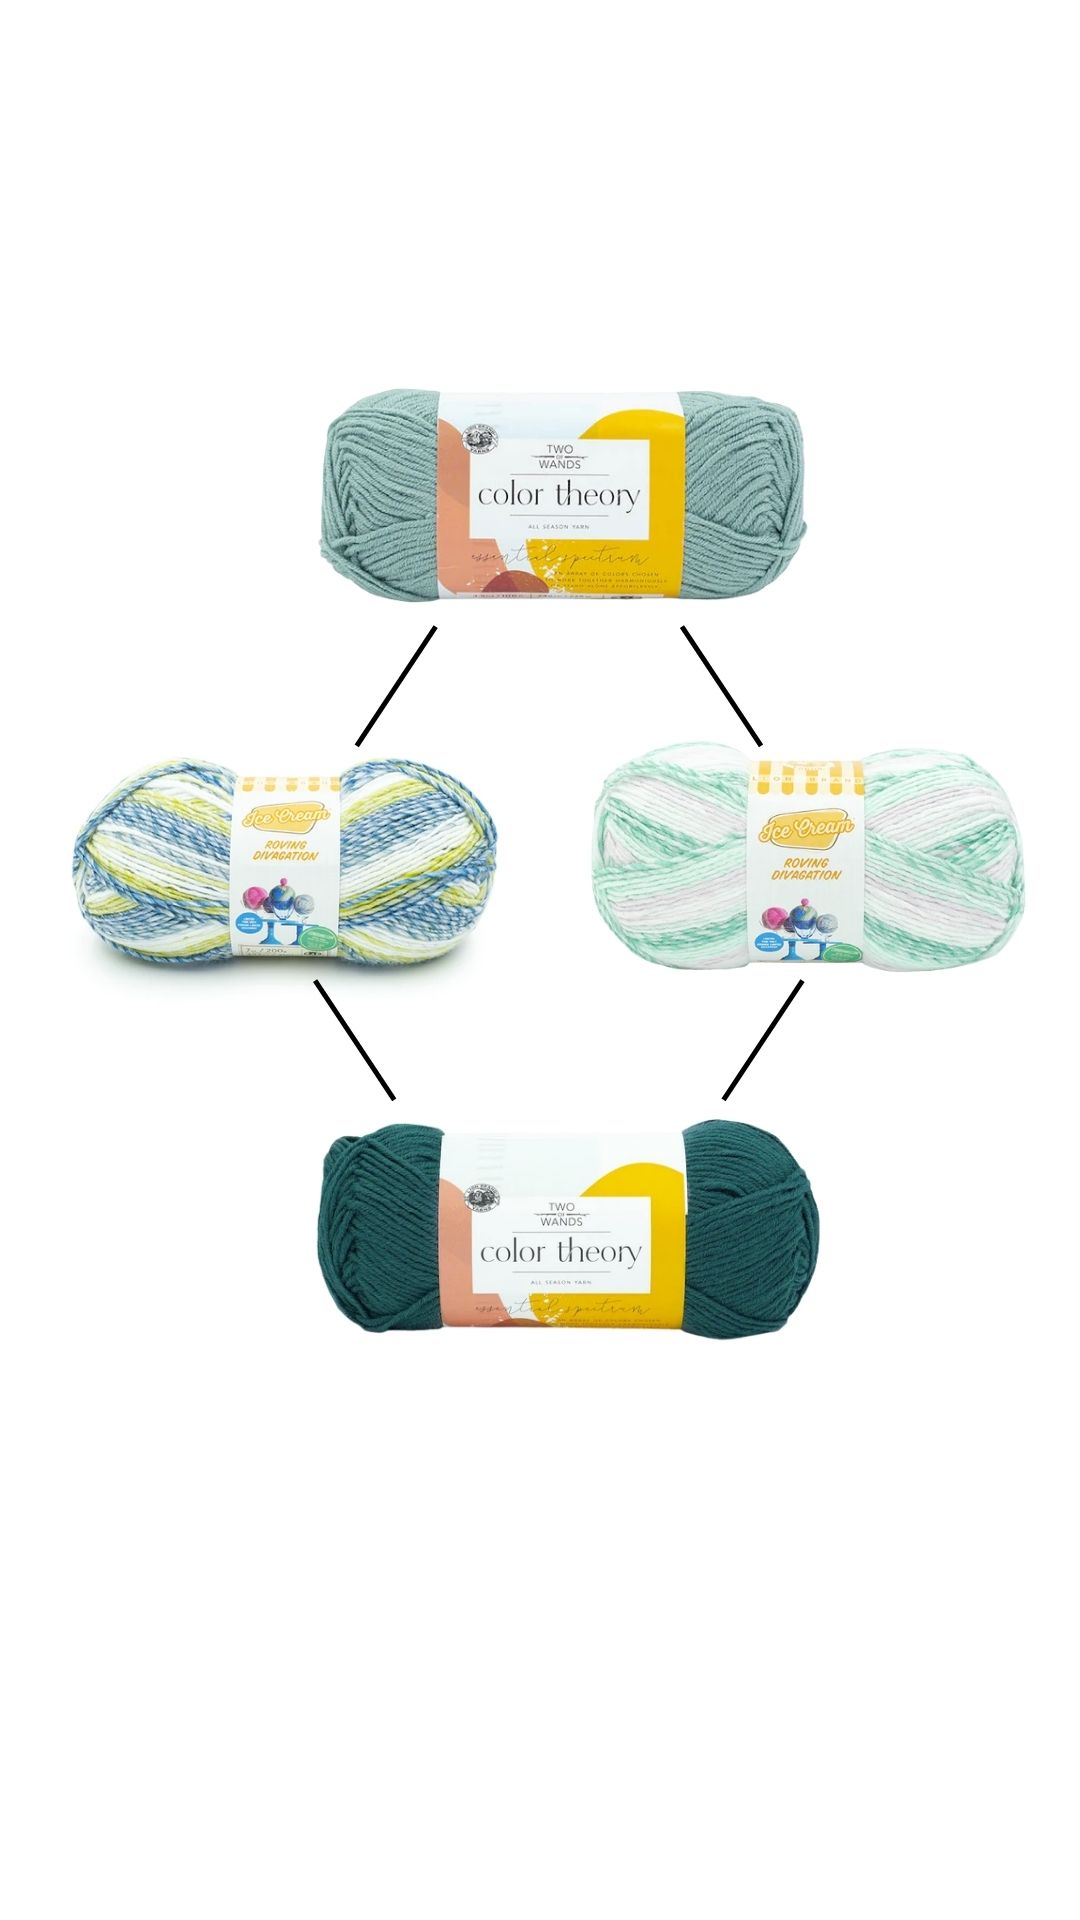
Yarn Color Combinations
You can totally switch to a different yarn brand, even a different fiber if you prefer for this hat pattern. I used only about 0.5 skeins of each Lion Brand Color Theory Yarn and Lion Brand Ice Cream Roving Yarn. It created a BEAUTIFUL FALL EFFECT! So I recommend colors that are FALL related.
But it’s an ideal project as a yarn stash buster. Use leftover yarn if you have any. I would recommend sticking with worsted yarn, but feel free to switch to a different fiber.
Here are some great color combinations for you using Lion Brand Color Theory Yarn and Lion Brand Ice Cream Roving Yarn. ❤️


How to Crochet the Fall Leaf Hat Pattern
Materials you will need
- Lion Brand Color Theory Yarn (100g) – worsted (#4) yarn – 1/2 SKEIN
- I used the color: canyon ❤️
- Lion Brand Ice Cream Roving Yarn (200g) – worsted (#4) yarn – 1/2 SKEIN
- I used the color: double bubble❤️
YARN LISTED IS FOR AN ADULT HAT SIZE ❤️
- 4.5 mm Crochet Hook (or pick your favorite size for the yarn you picked) -> I used Furls Crochet Streamline Resin Hook
- use NICKI15 for 15% off
- scissors
- tapestry needle
Gauge
4 sts x 2 rows = 1 square inch
Size
9 x 8.5 inches
Stitches used in the pattern
Learn all the basic crochet stitches HERE
- st/sts = stitch/stitches
- ch = chain
- sc = single crochet
- sk = skip
- hdc = half double crochet
- dc = double crochet
- tr = treble crochet
- sl st = slip stitch
- ATC= alternative turning chain
- yo sl st = yarn over slip stitch (or hdc sl st)
- leaf stitch (*yo, “front post way” around dc 2 rounds below, pull up loop, repeat from * one time, yo, pull through 4 loops, yo, pull through 2 loops)
Video Tutorials
Free Written Pattern for the Crochet Fall Leaf Hat
IF you would like the pattern ad-free you can join “The Crochet Club” membership as a full member and get access to the pattern ad-free and more than 200 patterns, even with interactive checkboxes to save your progress row by row.
You can join the “The Crochet Club” Membership here if you want to have the entire pattern ad-free.
Already a member? Login HERE to see the ad-free version
Pattern Notes
Quick note: The pattern is written such that you can make this pattern in a few different sizes, as long you follow the measurements of the attached reference table and the multiple count of the stitch pattern for the hat body.

Hat Ribbing
Start with the solid color!
Using the solid color, ch 20 (for a fold-over ribbing) or ch 10 (for a non-fold over ribbing). PICK ONE VERSION.
We’re using the yo sl st for the ribbing. It’s also known as the hdc sl st. Here is a stitch tutorial (with video) for the yo sl st (hdc sl st).
R1: starting from the 2nd ch from the hook, crochet 1 yo sl st per st, ch 1, turn
R2: 1 yo sl st in the blo per st, ch 1, turn
Repeat R2 until you have a multiple of 20 for the row count and the correct measurement for the ribbing.
*** See the reference table, and take the “head circumference” number and subtract about 2-3 inches which is your ribbing length.
For an adult size, you would have 80 rows and about 19 inches in length. It can be a bit shorter to make it fit a bit more snuggly, but I recommend not making it longer as it will stretch out.
Measurement is always MORE important than row count. Aim for 17-19 inches for an adult hat! You can make up the difference in stitches later ❤️

Now fold over your ribbing and slip stitch the first and last row together.

Fall Leaf Hat Body with Leaf Stitch
R1: 1 sc per row, such that you have a multiple of 20 (for an adult hat that would be 80 sts), sl st to the first st.
If you have LESS than 80 rows, just add a few extra sc’s evenly around to get to a 80 (or a multiple of 20).
*** I also added below a graph that can help you if you need to make it a multiple of 16 (written instructions not added) instead. Follow ONLY ONE of the two graphs! The graph with a multiple of 20 also has the written instructions below.
Fasten off this color and switch to the multi-colored yarn.

We’ll be using the falling LEAF STITCH – find the video tutorial for it HERE.
Now follow the graph below. You already crocheted round 1.

Every first dc stitch per round is made as an ATC or as a Ch 3 and counted as a stitch. For sc rounds, I skip the turning chain to prevent bulk, but optionally you can crochet it.
R2: 1 sc per st, sl st to the first st
R3: *1 dc in the next 3 sts, 1 leaf stitch around the st 2 rounds down, repeat from * until the end of the round
R4: repeat R2
R5: 1 dc, *1 leaf stitch around the st 2 rounds down, 1 dc in the next 3 sts, repeat from * until the end you have 2 sts left, 1 dc in each of the last 2 sts, sl st to the first st
R6: repeat R2
R7: ^ *1 dc in the next 3 sts, 1 leaf stitch around the st 2 rounds down, repeat from * 3 more times, 1 dc in the next 4 sts, repeat from ^ until the end of the round
R8: repeat R2
R9: ^ 1 dc in the next 2 sts, *1 dc in the next 3 sts, 1 leaf stitch around the st 2 rounds down, repeat from * 2 more times, 1 dc in the next 6 sts, repeat from ^ until the end of the round
R10: repeat R2
R11: ^ 1 dc in the next 7 sts, 1 leaf stitch around the st 2 rounds down, 1 dc in the next 3 sts, 1 leaf stitch around the st 2 rounds down, 1 dc in the next 8 sts, repeat from ^ until the end of the round
R12: repeat R2
R13: ^ 1 dc in the next 9 sts, 1 leaf stitch around the st 2 rounds down, 1 dc in the next 10 sts, repeat from ^ until the end of the round
R14: repeat R2
R15: 1 dc per st, sl st to the first stitch
R16: repeat R2
R17: repeat R15
R18: repeat R2
Check the reference table for the “hat height” as you may not crochet all the rounds mentioned.
The pattern is written for an adult hat so you would crochet 18 rounds if you are crocheting one.
Pattern Modification
Pattern Modification if you want to use a multiple of 16, instead of 20:

Crochet Leaves for the Fall Leaf Hat
Using the solid color, crochet the number of leaves that you have a multiple for that hat. An adult hat with 80 sts in a round has 4 multiples of 20, so there will be 4 leaves.
If you prefer a video tutorial, I got you covered. Here is the leaf tutorial in detail.
Ch 15
R1: crocheting into the back bump, starting from the 2nd ch from the hook, 1 sc in the first st, 1 hdc in the following st, 1 dc in the next 3 sts, 1 tr in the next 4 sts, 1 dc in the next 3 sts, 1 hdc, 1 sc, ch 3, turn and crochet on the opposite side of your chain now, 1 sc in the first st, 1 hdc in the following st, 1 dc in the next 3 sts, 1 tr in the next 4 sts, 1 dc in the next 3 sts, 1 hdc, 1 sc, ch 3, sl st to the first st
R2: *1 sc in the next 2 sts, ch 3, 1 sl st to the first ch, repeat from * until you reach the next ch-3 sp finishing with 1 sc into the ch-3 sp, ch 4, sl st to the 2nd ch, ch 1, 1 sc into the ch-2 space, ch 3, 1 sl st to the first ch, **1 sc in the next 2 sts, ch 3, 1 sl st to the first ch, repeat from ** until you reach the next ch-3 sp, sl st

Fasten off and sew each leaf in the area between the leaf stitches on the hat.
Weave your yarn every 2-4 stitches around the last round, synch and pull your yarn and close the top of the hat. Fasten off and weave in your ends.


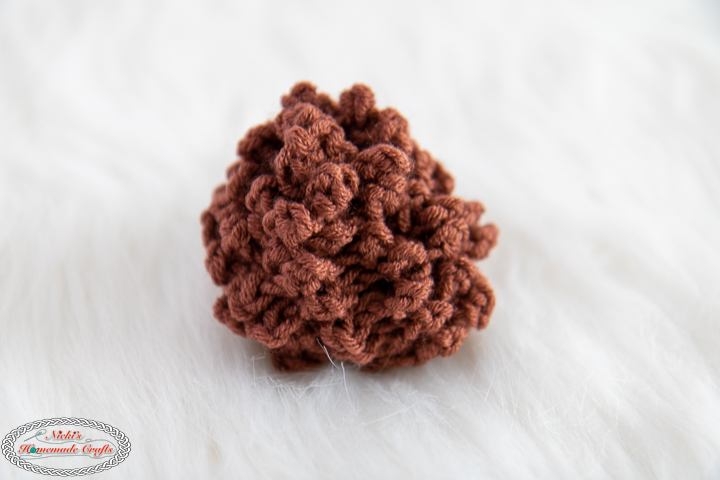
Pinecone Pom Pom for the Fall Leaf Hat
Of course, you can also use a faux fur pom pom, traditional yarn pom pom or no pom pom at all. But I used this one.
Ch 20
Sl st to the 3rd ch from the hook, then add the following repeat 4 times to the 3rd ch from the sl st: 1 dc, ch3, sl st to the 3rd ch.
Now into each ch of the rest of the long ch add this repeat 5 times: 1 dc, ch3, sl st to the 3rd ch.
After you finished, roll up the long piece in a spiral and sew it layer by layer together so it won’t get undone.
NEED a Pinecone Tutorial? No problem. The Pinecone tutorial is right here.
Fasten off and sew the pinecone pom pom to the top of the hat. Now enjoy your new fun fall hat!

Be sure to join my Crochet Facebook Group and show off your crochet creation. I would love to admire them and cheer you on as you’re working on creating it and after you finished it.
I’m also always here to support you through this and any other pattern and tutorial. Simply ask in my group and me and other amazing and kind crocheters will help you along.
If you love this pattern, please use the social media share buttons above or below and share this pattern link with the world and your friends.

That way you will find it easily again when you need it and you also provide the world and your friends with the ability to gain extra crochet knowledge as well. And to top it off, you help me as it allows me to create more content that you love already and want to see more of – free crochet patterns and tutorials. So, thank you for sharing.
If you love my crochet patterns and the way I teach, I would suggest subscribing to my newsletter below as I share new patterns, tutorials, and special announcements often.