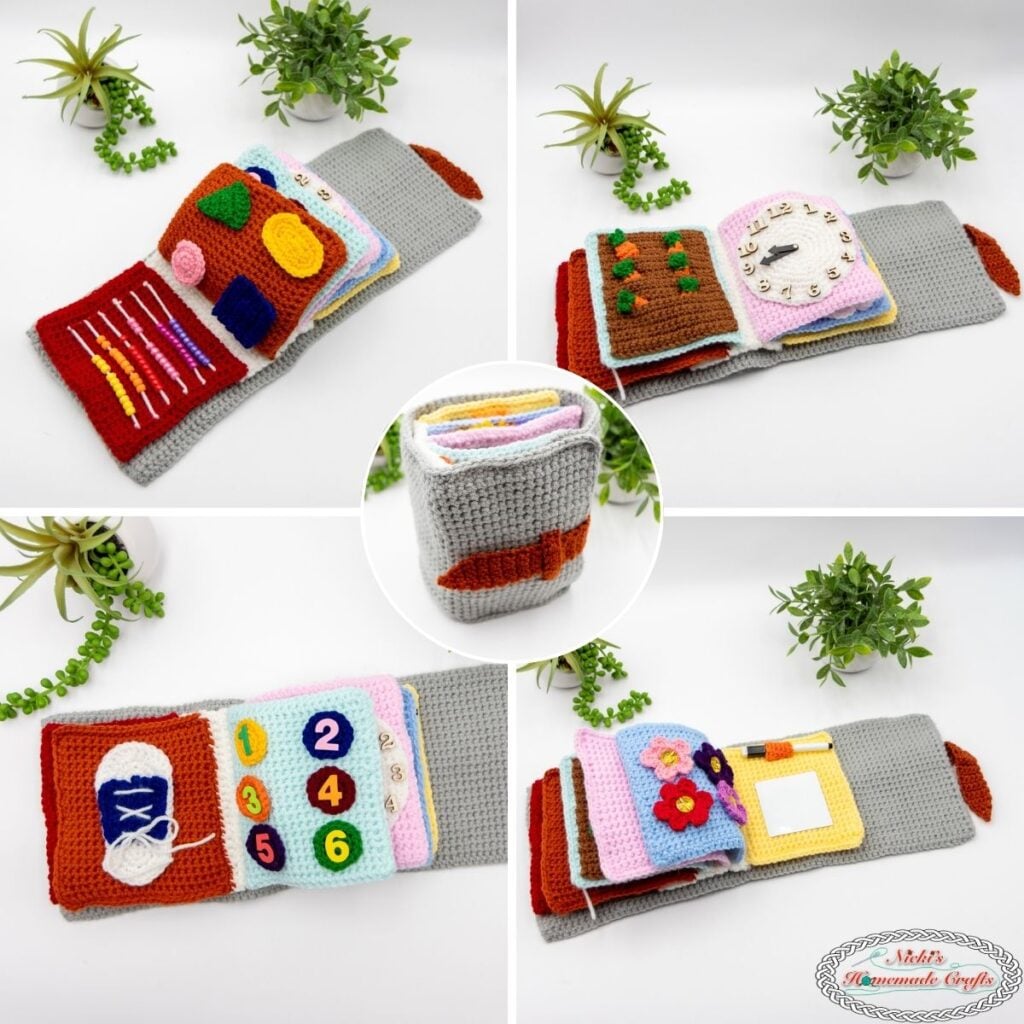
Free Crochet Sensory Quiet Book Pattern 1 of the Kids’ Toy LIVE Mystery CAL
This post includes affiliate links.
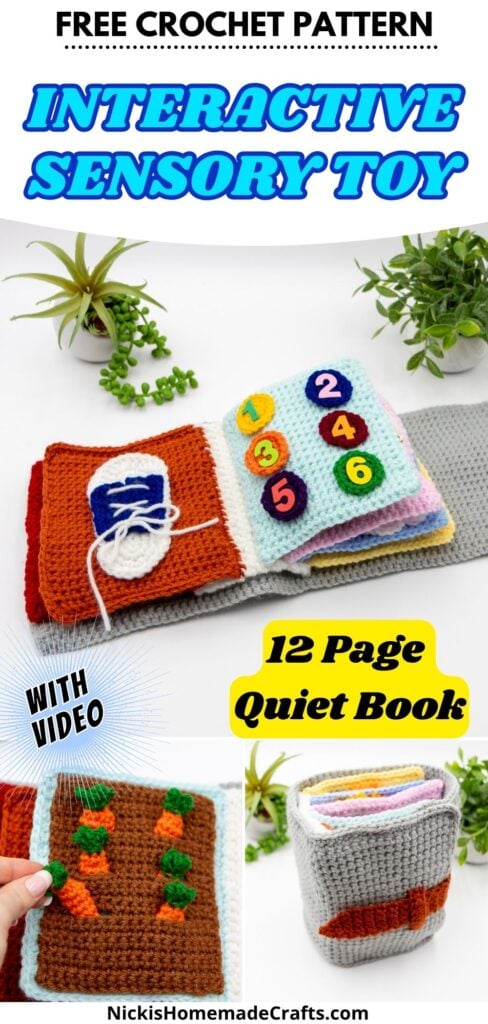
Delight little ones with this charming crochet sensory book pattern, featuring interactive pages, colorful textures, and engaging activities that make learning through play even more fun.
Welcome to my very first Crochet Kids’ Toys MCAL! Over the course of the crochet-along, I’ll be releasing a collection of free crochet patterns featuring fun, interactive toys that little ones will love. Each pattern will include a live tutorial, making it easy to crochet along while creating handmade toys that inspire play, learning, and imagination.
The first free pattern is a crochet sensory book, designed with interactive pages, playful textures, and engaging activities for curious little hands. Whether you’re crocheting for your own child, a grandchild, or a special gift, this sensory book is a fun and rewarding project that creates lasting memories through handmade play.
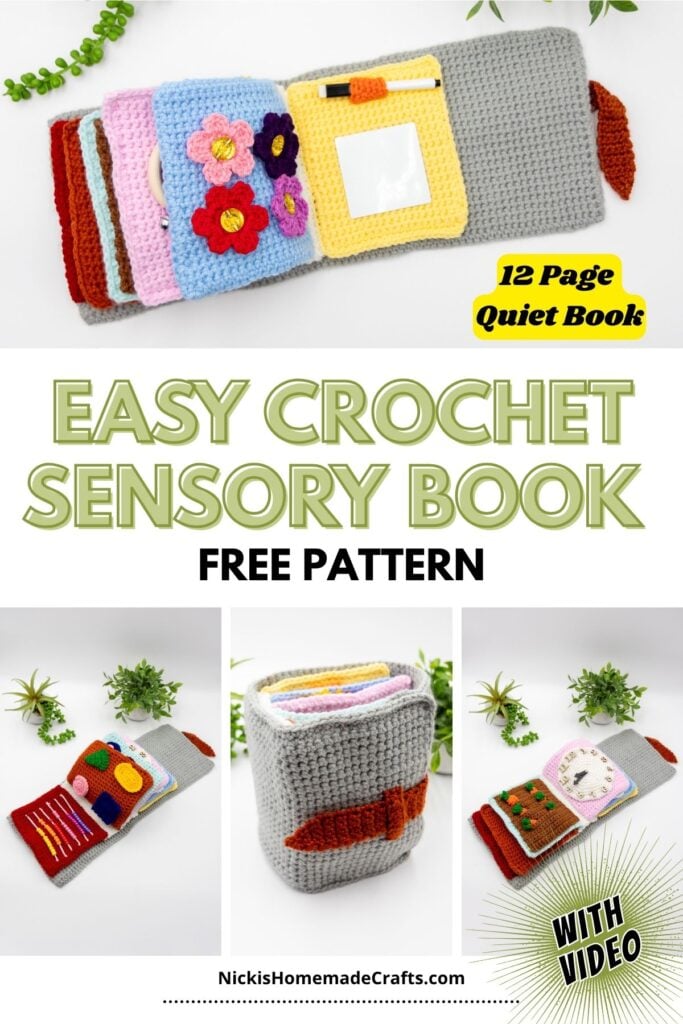
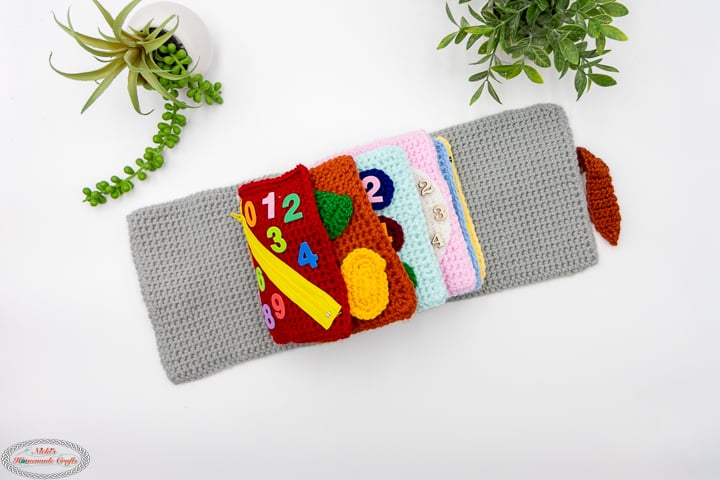
This crochet sensory quiet book will be so fun to make and something you will be immensely proud of. A perfect heirloom gift for a young loved one. It is completely customizable with color or which pages to include for your very crochet own sensory book.
Whether you’re looking to crochet meaningful handmade toys, create a special gift for a little one, or simply enjoy crafting alongside a community of crocheters, the Crochet Kid’s Toy MCAL is the perfect opportunity.
Ready to start stitching your very first sensory book page?
Play BINGO – Crochet Kid’s Toy LIVE Mystery CAL
Whether you join the FREE Crochet Kids’ Toy Mystery MCAL or get the Crochet Kids’ Toys Made Easy with 40 Patterns, you can play BINGO with us and win prizes between August 3rd and 15th, 2026. Just sign up for 1 of the 2 options to access the BINGO sheet!
Get All 40 Kids’ Toy Crochet Patterns in my Ebook
If you love learning new crochet techniques, you don’t want to miss out this ebook! Full of 40 fun and unique kids’ toy crochet projects that showcase the versatility of this timeless crochet technique.
When you get the Ebook, you get ALL 40 Crochet Kids’ Toy Patterns adfree and printable with 65+ Videos INSTANTLY AND also get access to the 6 LIVE Tutorials with Prizes at the end of each one.
One picture can’t capture ALL the patterns, so it’s best to TAP HERE and see them all, one by one. The code TOYS15 will save you $15 between August 3rd and 15th, 2026!
Get the PDF of the Crochet Sensory Quiet Book Pattern

This pattern is also available as an ad-free, printer-friendly pdf pattern that can be purchased at the links below on Ravelry and Etsy for only a small fee.



So, let me now give you the supplies you need in order to crochet this fun project.
Free Crochet Sensory Quiet Book Pattern
Materials you will need
- Lion Brand Pound of Love (worsted acrylic, 454g/1020yd)
- Pastel Blue
- Pastel Green
- Pastel Pink
- Pumpkin Spice
- Honey Bee
- Cherry
- Steel grey (cover)
- White (binding)
- WeCrochet Brava Yarn (Worsted Weight, 100% Acrylic, 218yd/100g)
- Grass
- Canary
- Orange
- Wine
- Celestial
- Eggplant
- Brown
- 5.5 mm hook for the pages/cover (WeCrochet Dots hook)
- 4mm hook (WeCrochet Dots hook)
- Hot glue
- 2.5 cm Foam Numbers
- Pony Beads
- 6 inch zipper
- Magnetic snaps
- Velcro circles
- Wooden numbers
- Clock plastic hands
- 3 inch Wooden ring
- Jingle bells
- 2 Squeaker
- 4 yellow buttons (~2 cm)
- White board + white board marker
- 3 inch Acrylic mirror
Gauge
4 sts x 4 rows = 1 square inch
Size
6 x 7.5 inches (as book), 5 inch thick book
Stitches used in the pattern
Learn all the basic crochet stitches HERE (US crochet terms and abbreviations)
- MR = magic ring
- sc = single crochet
- sts = stitches
- ch = chain
- inc = increase
- dec = decrease (inv = invisible through 2 front loops – shown in video)
- tr = treble crochet
- ATC = Alternative Turning Chain
- dc = double crochet
- Thermal sc st
Live Video Tutorial
The live video tutorial for the crochet sensory book pattern will be on 8/3/2026 at 12 pm PT. The replay will be available after the event, but you will want to be there for the live if you can, because it will be a ton of fun.
The video tutorial will not only provide instructions for how to make the pattern but we’ll also be playing bingo and giving away prizes during the live video, so you don’t want to miss out!
Free Crochet Sensory Quiet Book Pattern – Written Instructions
Do NOT like ADS? No worries! I have got a solution for you!
You can also get THIS pattern plus 39 other Kids’ Toy Crochet Patterns, in 1 ebook with NO ADS and it’s printer-friendly too!
Get the “Crochet Kids’ Toys Made Easy” Ebook HERE
Instructions
6 Color Pages (Pound of Love)
Ch 21
R1: 1 sc per st (20 st)
R2-40: thermal sc across, turn (remember half of the rows is on each side, count both sides for a total number of rows)
R41: thermal sc over 3 loops to finish, turn
Crochet around the rectangle, evenly around sc sts, besides the corners will have 3 sc, sl st, fasten off
Book Cover (grey Pound of Love)
Ch 75
R1: 1 sc per st (74 st)
R2-48: thermal sc across, turn (remember half of the rows is on each side, count both sides for a total number of rows)
R49: thermal sc over 3 loops to finish, turn
Crochet around the rectangle, evenly around sc sts, besides the corners will have 3 sc, sl st, fasten off
Book Binding (white Pound of Love)
Ch 24 (to reach height of page, measure after R2)
R1: 1 sc per st (23 st)
R2-24: thermal sc across, turn (remember half of the rows is on each side, count both sides for a total number of rows)
R25: thermal sc over 3 loops to finish, fasten off
You’ll sew it ALL together AFTER adding the activities to each page.
12 Activity Pages
(pick the colors and order you want, I’ll go by what I did, aka Page 1-12).
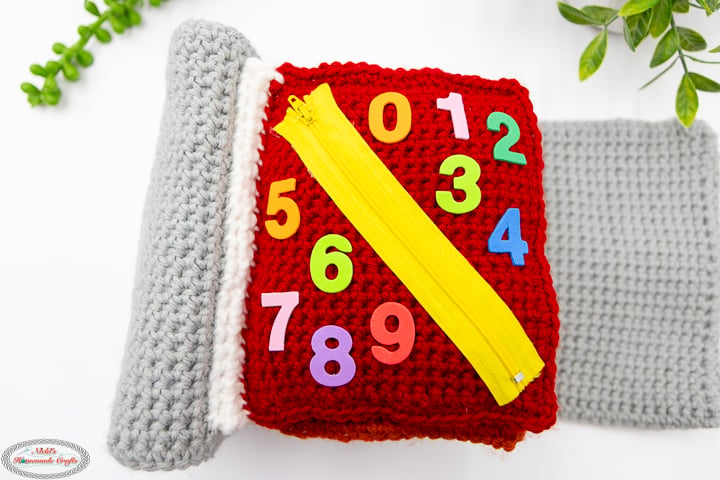
Page 1 (red page)
Hot glue on the zipper and the foam numbers 0-9
Page 2 (red page)
Cut a long piece of white yarn, weave on 10 colored pony beads at the time, and tie off each end of the yarn to the page, weave yarn over 2-3 sts and add the next row of colored beads until you have 6 rows of beads.
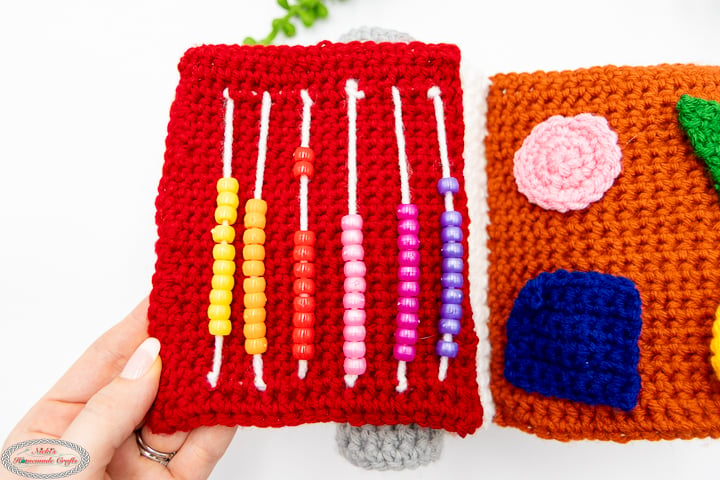
Page 3 (pumpkin spice page)
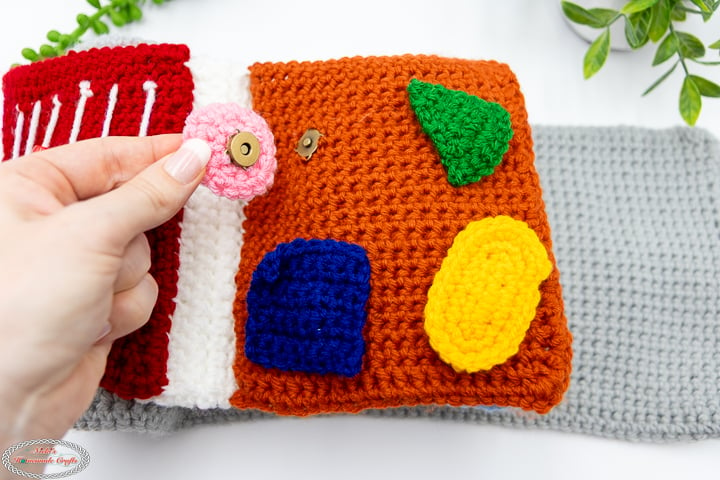
Crochet the geometric shapes:
Circle:
R1: MR, 6 sc, sl st
R2: 2 sc per st, sl st
R3: (1 sc, 2 sc) x 6, sl st
Fasten off and sew on the magnetic snap to the circle and page
Square:
Ch 9, start from 2nd ch from the hook
R1-8: 1 sc per st
Fasten off and sew on the magnetic snap to the square and page
Triangle:
Ch 9, start from 2nd ch from the hook
R1: 1 sc per st, turn
R2: 1 sc dec, 1 sc per st till the end, turn
Repeat R2 until the 2 sts left, 1 sc dec
Fasten off and sew on the magnetic snap to the triangle and page
Oval:
Ch 7, start from 2nd ch from the hook
R1: 3 sc, 1 sc in 4 sts, 3 sc, now turn and crochet on the opposite side of the chain, 1 sc in 4 sts, sl st
R2: (2 sc in 3 sts, 1 sc in 4 sts) x 2, sl st
R3: ((1 sc, 2 sc) x 3, 1 sc in 4 sts) x 2, sl st
Fasten off and sew on the magnetic snap to the oval and page
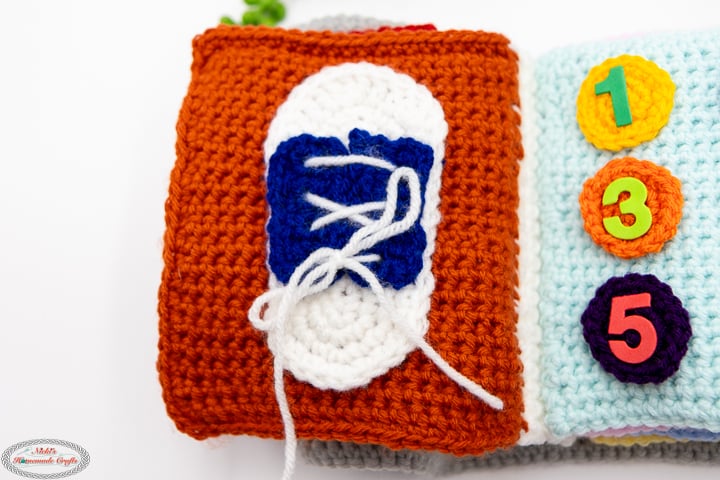
Page 4 (pumpkin spice page)
Shoe bottom (white)
Ch 11, start from the 2nd ch from the hook
R1: 3 sc, 1 sc in 8 sts, 3 sc, now turn and crochet on the opposite side of the chain, 1 sc in 8 sts, sl st
R2: (2 sc in 3 sts, 1 sc in 8 sts) x 2, sl st
R3: ((1 sc, 2 sc) x 3, 1 sc in 8 sts) x 2, sl st
R4: (1 sc in 2 sts, 2 sc) x 3, 1 sc in 4 sts, 1 hdc in 4 sts, (1 dc in 2 sts, 3 dc) x 3, 1 hdc in 4 sts, 1 sc in 4 sts, fasten off
2 Shoe tops (blue)
Ch 10, start from the 2nd ch from the hook
R1: 1 sc per st, turn
R1: ( 1 sc, sk 1, ch 1) x 4, 1 sc, turn
R2: 1 sc in 3 sts, 1 hdc in 3 sts, 1 dc in 3 sts, fasten off
Sew to R1 of each top to the center outside of the shoe.
Then use a long piece of white yarn and weave it through the created ch-1 spaces to tie the shoe. Glue/sew on the shoe to the page.
Page 5 (pastel green page)
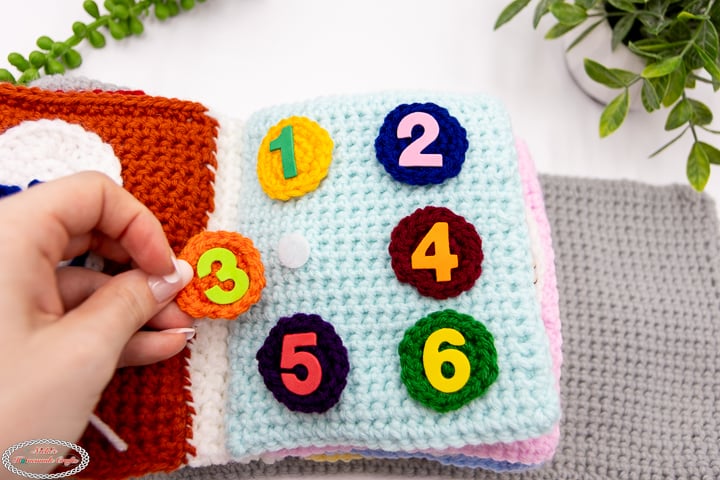
6 Colored Circles:
R1: MR, 6 sc, sl st
R2: 2 sc per st, sl st
R3: (1 sc, 2 sc) x 6, sl st
Fasten off and glue on the velcro circles to the circle and page. Glue on the numbers
Page 6 (pastel green page)
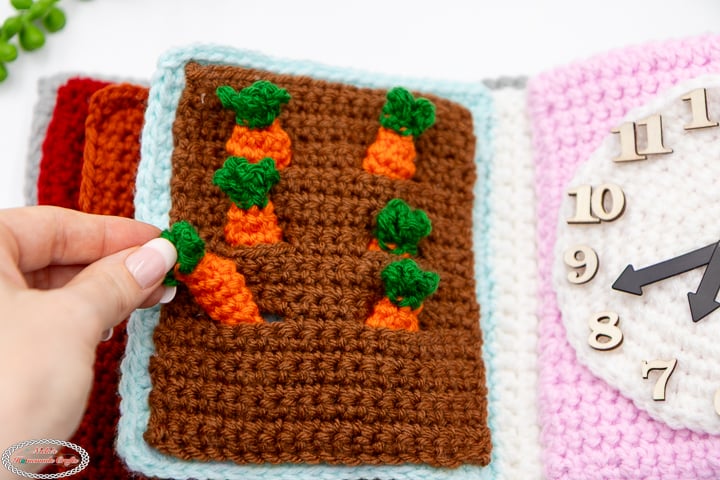
Brown “Dirt” for the Garden
Ch 19, start from the 2nd ch from the hook
R1-7: 1 sc per st, turn
R8: 1 sc in 3 sts, (ch 4, sk 4, 1 sc in 4 sts) x2, 1 sc in 3 sts
R9-12: 1 sc per st, turn
Repeat R8-12 two more times
Finish with 2 more rows of 1 sc per st, turn
6 Carrots (orange and grass):
R1: MR, 3 sc, continuous rounds, use stitch marker, close ring
R2: 1 sc in 2 sts, 2 sc
R2: 1 sc, 2 sc, 1 sc in 2 sts
R3: 1 sc in 2 sts, 2 sc, 1 sc in 2 sts
R4: 1 sc, 2 sc, 1 sc in 4 sts
R5: 1 sc in 2 sts, 2 sc, 1 sc in 4 sts
R6: inv sc dec all around fasten of orange, start grass
R7: crochet from the inside out (so back loop to front loop), (ch 3, 1 sl st in 2 chs, sl st to the next st) x 4, sl st, fasten off
Sew or glue on the outside of the “dirt” to the page, then tuck in the carrots.
Page 7 (pastel pink page)
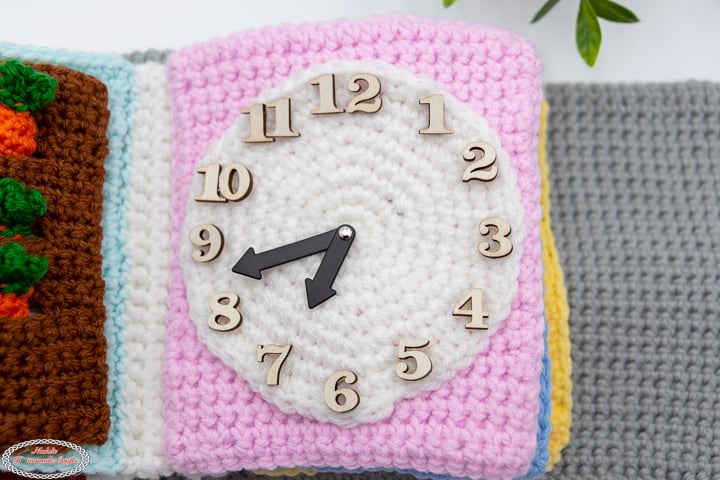
Clock circle – white
R1: MR, 6 sc, sl st
R2: 2 sc per st, sl st
R3: (1 sc, 2 sc) x 6, sl st
R4: (1 sc in 2 sts, 2 sc) x 6, sl st
R5: (1 sc in 3 sts, 2 sc) x 6, sl st
R6: (1 sc in 4 sts, 2 sc) x 6, sl st
R7: (1 sc in 5 sts, 2 sc) x 6, sl st
R8: (1 sc in 6 sts, 2 sc) x 6, sl st
R9: (2 sc, 1 sc in 7 sts) x 6, sl st
Hot glue on the wooden numbers
Connect the clock hands with its silver mechanism, then use thread to sew/connect it to the center of the clock.
Make sure the hands still spin.
Sew or glue the clock to the page.
Page 9 (pastel pink page)
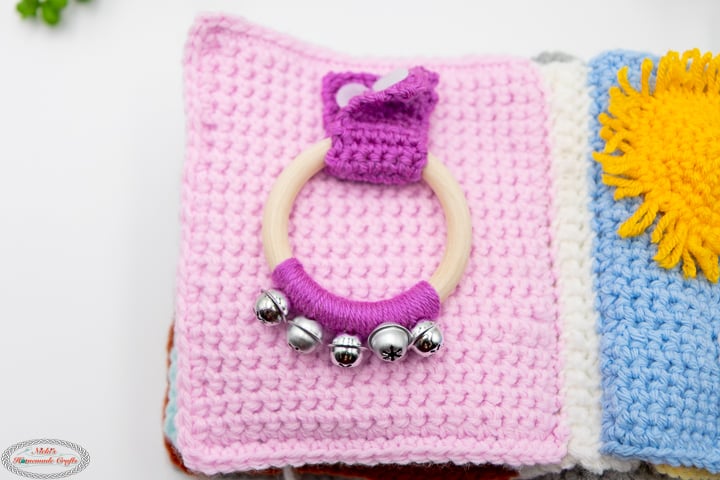
Cut a long piece of yarn and weave it around the wooden ring, add the jingle bells evenly as you do.
Now you have a rattle.
Using the same yarn, ch 7, start from the 2nd ch from the hook
R1-18: 1 sc per st, turn
Fasten off, glue on the velcro circles, such that the rectangle turns into a closure to hold the rattle.
Glue or sew the closure to the page.
Page 10 (pastel blue page)
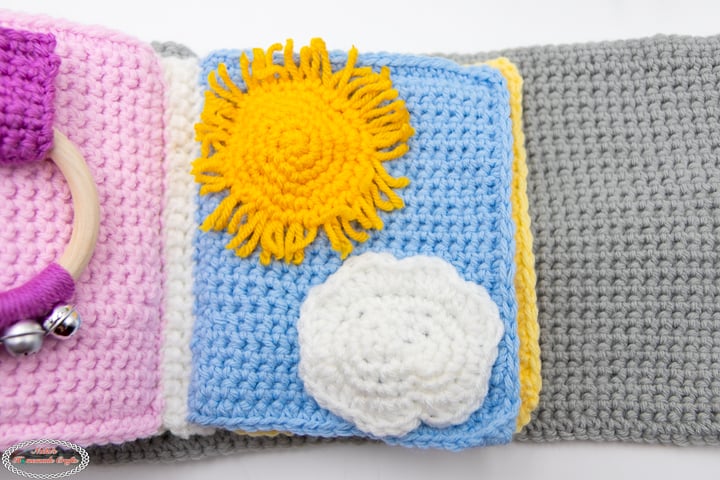
Sun (yellow)
R1: MR, 6 sc, sl st
R2: 2 sc per st, sl st
R3: (1 sc, 2 sc) x 6, sl st
R4: (1 sc in 2 sts, 2 sc) x 6, sl st
R5: (1 sc in 3 sts, 2 sc) x 6, sl st
Use the latch hook method, add yarn pieces in each stitch all around, trim to size.
Sew on the sun with a squeaker underneath to the page.
Cloud (white)
Ch 5, start from 2nd ch from the hook
R1: 3 sc, 1 sc in 2 sts, 3 sc, now turn and crochet on the opposite side of the chain, 1 sc in 2 sts, sl st
R2: (2 sc in 3 sts, 1 sc in 2 sts) x 2, sl st
R3: ((1 sc, 2 sc) x 3, 1 sc in 2 sts) x 2, sl st
R4: *1 sc, 3 dc, 1 hdc, repeat from * all around, sl st, fasten off
Sew on the cloud with a squeaker underneath to the page.
Page 11 (pastel blue page)
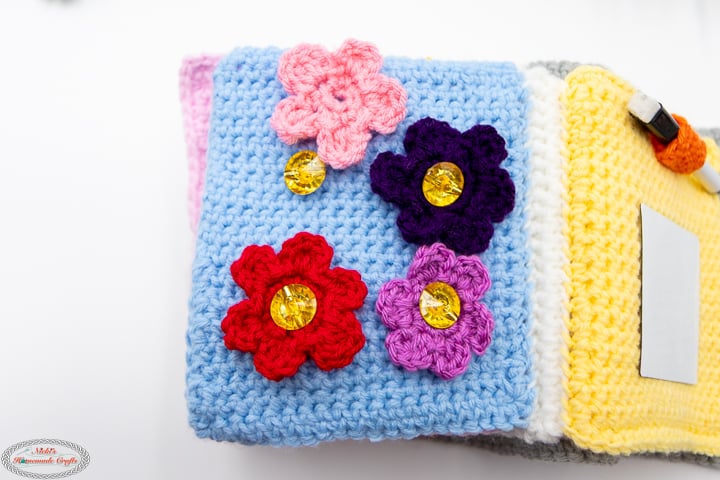
Sew on 4 yellow buttons evenly onto the page. We’ll add the flowers around it after.
4 Flowers
R1: ch 6, sl st first to last ch such that you still have 6 sts
R2: 2 sc per st (or 12 sc into the loop), sl st
R3: (ch 2, 2 dc, ch 2, sl st to the same st, sk 1, sl st to the next st) x 6, sl st, fasten off
Add the flowers around the buttons.
Page 11 (Honey bee page)
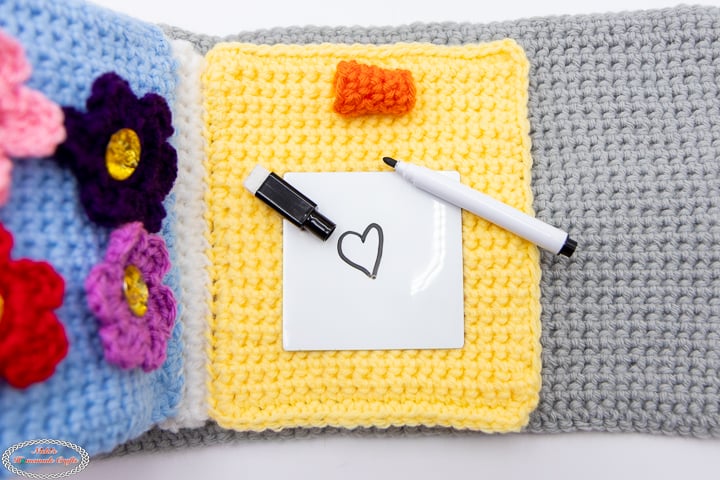
R1: ch 6, sl st first to last ch such that you still have 6 sts
R2-5: 1 sc per st, sl st, fasten off
Sew or glue the pen holder to the top of the page. Add the white board pen
Glue the 3 inch white board underneath.
Page 12 (honey bee page)
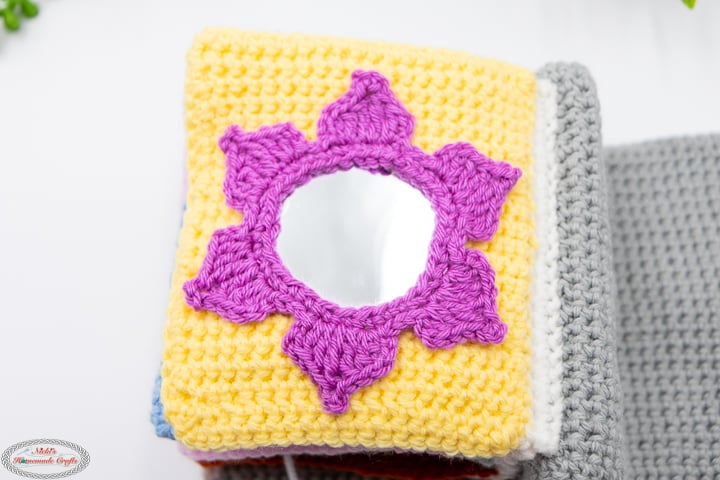
R1: ch 30, sl st first to last ch such that you still have 30 sts
R2: 1 sc per st, sl st
R3: (1 sl st, ch 2, 1 dc, [1 tr, ch 2, sl st to the first ch, 1 tr] in the same st, 1 dc, ch 2, sl st to the same st, sl st in the next st) x 6, fasten off
Glue the acrylic mirror to the page, then glue the flower around the mirror to the mirror and page as well.
Flap and Closure for the book cover
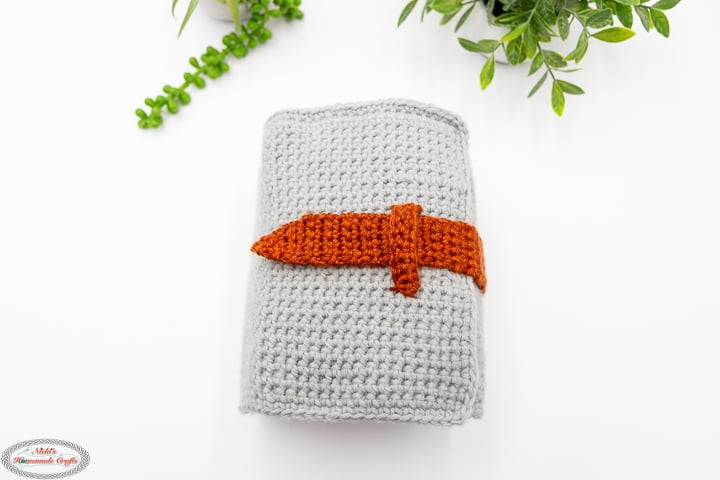
Closure:
ch 9, start from the 2nd ch from the hook, 2 rows of 1 sc per st, turn
Fasten off and sew to the front of the cover (AT THE END – when you’re pretty much done with the book).
Flap:
Ch 6, start from the 2nd ch from the hook
R1-41: 1 sc per st, turn
R42: 1 sc dec, 1 sc per st, turn
Repeat R42 until 2 sts left, 1 sc dec, fasten off
Sew to the back of the cover (AT THE END – when you’re pretty much done with the book).
Assembly
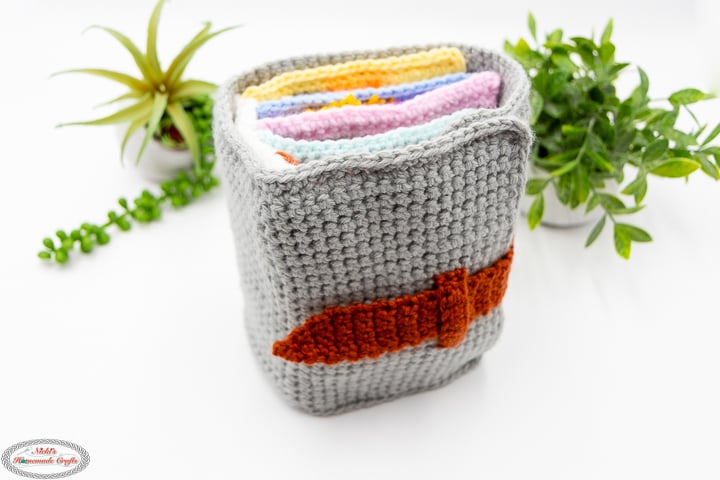
Sew each page to the binding – in the order you like – but make sure there is enough space in between such that the page lay evenly. I left ~ 2-3 rows of white (binding) between each page.
Then I sewed the LAST and FIRST row of the binding to the cover such that the FRONT of the cover, lays evenly with the first page.
Then at the end fold it all together, like a tri-fold journal, And sew on the flap and closure to hold it all in place how you like it. I also added a velcro circle below the closure and onto the flap for more security to hold everything to together and the falp to stay in place.
Be sure to join my Crochet Facebook Group and show off your completed crochet creation. I would love to admire them and cheer you on as you’re working on creating it and after you finish it.
I’m also always here to support you through this and any other pattern and tutorial. Simply ask in my group and me and other amazing and kind crocheters will help you along.
If you loved this free crochet pattern feel free to use the social media share buttons above or below and share this pattern link with the world and your friends.
You might like these other popular free patterns for kid’s toys:


That way you will find it easily again when you need it and you also provide the world and your friends with the ability to gain extra crochet knowledge as well. And to top it off, you help me as it allows me to create more content that you love already and want to see more of – free crochet patterns and tutorials. So, thank you for sharing.
If you love my crochet patterns and the way I teach, I would suggest subscribing to my newsletter below as I share new patterns, tutorials, and special announcements often.