Easy Free Crochet Christmas Stocking Pattern using Fair Isle
This post includes affiliate links.
This adorable and fun crochet Christmas Stocking features reindeers, a Christmas tree, light, and ornament garland as well as snowflakes and stars. This free crochet pattern is made with a knit-like crochet stitch and worsted weight yarn.
It’s the time of the year to get ready for the Holiday Season with Christmas decor around the house. Besides a decorated Christmas Tree, the most iconic holiday decor we know every home has, especially in the US, is Christmas Stockings which are usually hung by the fireplace kids and adults empty on Christmas Morning after Santa stuffed them. However, we hang our Stockings on the railing by our staircase with 2 more small Christmas Trees and a garland around.
All of our stockings are handmade, either crocheted or quilted with the names on top of the ribbing of the stocking. I personally have used a sewing machine to add names or glitter glue, but one could also embroider the names onto their Christmas Stocking which make great gifts with toys, a gift card, and more surprises inside of the stocking depending on your own family traditions.
Free Crochet Christmas Stocking Pattern
This crochet stocking pattern features the knit-like waistcoat stitch which makes color changes the easiest and smoothes – using tapestry crochet to carry the unused yarn with you. This technique is also known as fair isle which you will hear me say a few times in the video tutorials of the pattern. That means we didn’t use any half double crochet (hdc) or double crochet stitches (dc) or special stitches for this pattern, but instead only basic stitches for an advanced beginner skill level.
The stocking itself is made with a pixel graph to show off snowflakes, stars a light and ornament garland, a beautiful spiral Christmas tree, and flying reindeers on top. I designed this pattern with 2 colors – red and white – but you could totally add more colors and highlight each image with different colors, as many crocheters have done before to make your own Christmas stockings.
And if you are a visual learner, I also added a few video tutorials to learn the stitches needed to help you along with the written free pattern as well. This pattern used to be a mystery crochet along and is broken up like that accordingly.
It’s time to get creative, so let’s get started!

Crochet Color Changes Made Easy
If you ever struggled with color changes or yarn tangles, then this Crochet Color Changes Made Easy Video Ebook is for you. It includes 9 color changing techniques, 30 patterns and over 58 video tutorials on over 202 pages.
Plus this Christmas Stocking is also included in this ebook to learn Crochet Color Changes Made Easy for more crochet projects which all make a great gift. Some of the patterns included a very detailed video tutorial.
Get the PDF of the Crochet Christmas Stocking Pattern

This pattern is also available as an ad-free, printer-friendly pdf pattern that can be purchased at the links below for only a small fee on Ravelry or Etsy.


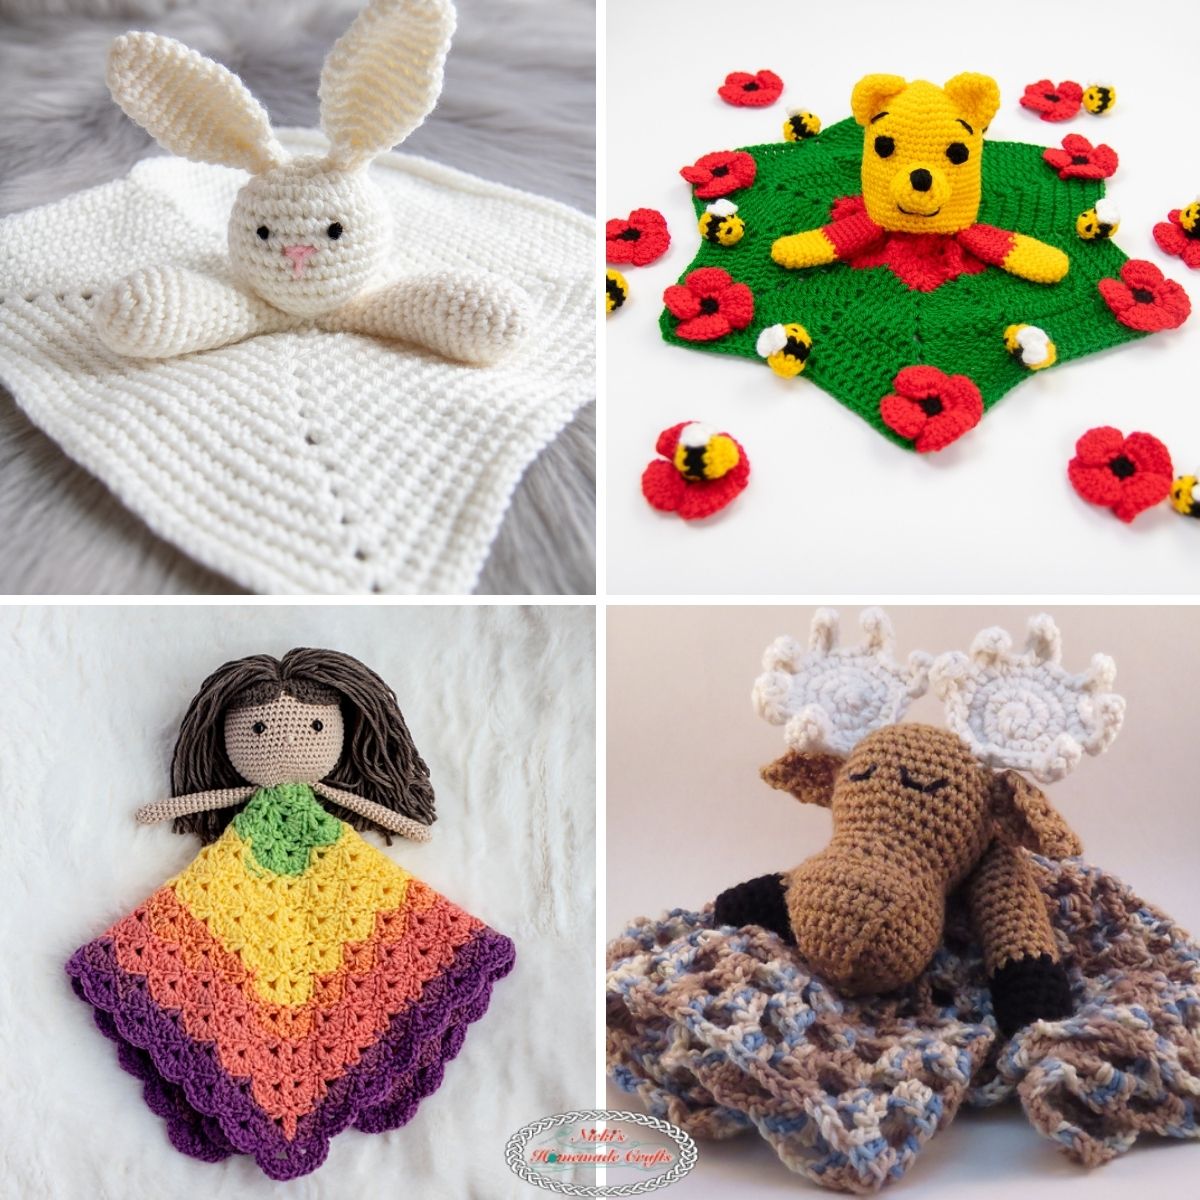
More Free Crochet Christmas Stocking Patterns and Christmas Decor
If you like more Crochet Christmas free patterns, you might also like to try one of these:


- Chevron Waves Christmas Stocking
- Faux Fur Christmas Stocking with Faux Fur Yarn
- Spiral Christmas Tree Skirt
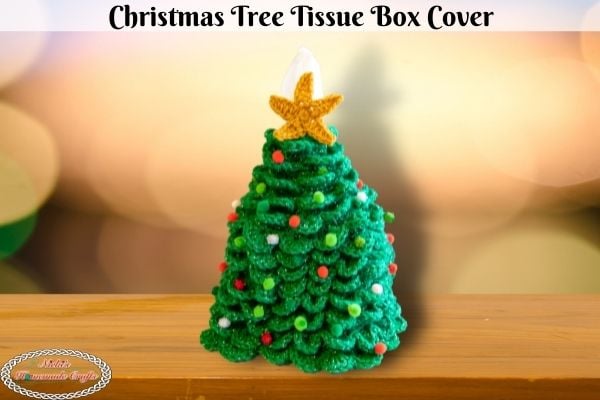
- Christmas Tree Tissue Box Cover
So, let me now give you the supplies you need in order to crochet this cute pattern.
How to Crochet an Easy Crochet Christmas Stocking Pattern with Fair Isle
Materials you will need
- Premier Yarns Anti-Pilling Yarn (100% Acrylic, Worsted, 180 yds/100g):
- White yarn (1 skein)
- Red yarn (2 skeins)
- 4.50 mm crochet hook → WeCrochet Dots Hook
- Scissors
- tapestry needle or yarn needle
Gauge
4 sts x 5 rounds = 1 square inch
Size
6 (width) x 19 inches
Stitches used in the pattern (US Terms)
Learn all the basic crochet stitches HERE
- st/sts = stitch/stitches
- ch = chain
- sc = single crochet
- wst = waistcoat stitch (knit crochet stitch)
- sl st = slip stitch
- inc = increase
- dec = decrease
- inv sc dec = invisible single crochet decrease
- Magic ring
- blo = back loop only
- invisible join
Free Written Crochet Christmas Stocking Pattern with Videos
IF you would like the pattern ad-free you can join “The Crochet Club” membership as a trial or as a full member and get access to the Mystery CAL pattern ad-free and more than 300 patterns, even with interactive checkboxes to save your progress row by row.
You can join the “The Crochet Club” Membership here if you want to have the entire Mystery CAL pattern ad-free.
Already a member? Login HERE to see the ad-free version
Written Pattern Notes
First, you’ll crochet the foot, then the leg of the stocking, and finish it with the heel, toes, and ribbing. Although I prefer to use the waistcoat stitch, you could also use the single crochet stitch, but it may look a bit differently after.
Crochet Stocking Foot
Let’s get started with the foot of the Christmas Stocking. Be sure to watch the full video below to understand the entire pattern and the choices you have as there are 3 ways to change colors here, although I will stick with only one option for this pattern: waistcoat stitch. We’ll only use white and red as a solid color, as variegated yarn can be too much with the images.
If you pick the single crochet version, there are more color-changing tips here.
Subscribe to my Youtube Channel here:
[youtube-subscriber channelID=”UCSI4OeQQnxVQEAwMGeTCn1Q” layout=”full” subscribers=”default”]
3 ways to follow the pattern (each one showing only 1 pattern repeat that needs to be repeated once to have 56 sts per round):
- Graph
- Written
- Colored Blocks
Ch 56, connect the first with the last ch with a slip stitch
The first round is just sc stitches (loosely), starting the following round, crochet wst (waistcoat) stitches (explained in the video).
Crochet each pattern repeat TWICE per round, and SLIP STITCH the 1st to the last st at the end of each round (I used the invisible sl st – see video).
Crochet each Pattern Repeat on the Graph TWICE per Round (56 sts per round) all in wst or sc stitches:

Crochet each Pattern Repeat TWICE per round (56 sts per round)all in wst or sc stitches:
Each Round finishes with a SLIP STITCH to the 1st (I used the invisible sl st – see video).
R1: (r) x 28
R2: (r) x 4, (w) x 1, (r) x 13, (w) x 1, (r) x 9
R3: (r) x 2, (w) x 1, (r) x 3, (w) x 1, (r) x 4, (w) x 1, (r) x 4, (w) x 1, (r) x 3, (w) x 1, (r) x 4, (w) x 1, (r) x 2
R4: (r) x 1, (w) x 2, (r) x 1, (w) x 1, (r) x 1, (w) x 2, (r) x 7, (w) x 2, (r) x 1, (w) x 1, (r) x 1, (w) x 2, (r) x 6
R5: (r) x 3, (w) x 3, (r) x 5, (w) x 1, (r) x 5, (w) x 3, (r) x 5, (w) x 1, (r) x 2
R6: (w) x 1, (r) x 1, (w) x 2, (r) x 1, (w) x 2, (r) x 1, (w) x 1, (r) x 1, (w) x 3, (r) x 1, (w) x 1, (r) x 1, (w) x 2, (r) x 1, (w) x 2, (r) x 1, (w) x 1, (r) x 1, (w) x 3, (r) x 1
R7: (r) x 3, (w) x 3, (r) x 5, (w) x 1, (r) x 5, (w) x 3, (r) x 5, (w) x 1, (r) x 2
R8: (r) x 1, (w) x 2, (r) x 1, (w) x 1, (r) x 1, (w) x 2, (r) x 7, (w) x 2, (r) x 1, (w) x 1, (r) x 1, (w) x 2, (r) x 6
R9: (r) x 2, (w) x 1, (r) x 3, (w) x 1, (r) x 4, (w) x 1, (r) x 4, (w) x 1, (r) x 3, (w) x 1, (r) x 4, (w) x 1, (r) x 2
R10: (r) x 4, (w) x 1, (r) x 13, (w) x 1, (r) x 9
R11: (r) x 28
R12: (r) x 28
R13: (r) x 3, (w) x 1, (r) x 6, (w) x 1, (r) x 6, (w) x 1, (r) x 6, (w) x 1, (r) x 3
R14: (r) x 2, (w) x 3, (r) x 4, (w) x 3, (r) x 4, (w) x 3, (r) x 4, (w) x 3, (r) x 2
R15: (r) x 1, (w) x 5, (r) x 2, (w) x 5, (r) x 2, (w) x 5, (r) x 2, (w) x 5, (r) x 1
R16: (r) x 1, (w) x 5, (r) x 2, (w) x 5, (r) x 2, (w) x 5, (r) x 2, (w) x 5, (r) x 1
R17: (r) x 1, (w) x 5, (r) x 2, (w) x 5, (r) x 2, (w) x 5, (r) x 2, (w) x 5, (r) x 1
R18: (r) x 2, (w) x 3, (r) x 4, (w) x 3, (r) x 4, (w) x 3, (r) x 4, (w) x 3, (r) x 2
R19: (r) x 3, (w) x 1, (r) x 6, (w) x 1, (r) x 6, (w) x 1, (r) x 6, (w) x 1, (r) x 3
R20: (r) x 3, (w) x 1, (r) x 6, (w) x 1, (r) x 6, (w) x 1, (r) x 6, (w) x 1, (r) x 3
R21: (r) x 2, (w) x 1, (r) x 1, (w) x 1, (r) x 4, (w) x 1, (r) x 1, (w) x 1, (r) x 4, (w) x 1, (r) x 1, (w) x 1, (r) x 4, (w) x 1, (r) x 1, (w) x 1, (r) x 2
R22: (r) x 1, (w) x 1, (r) x 3, (w) x 1, (r) x 2, (w) x 1, (r) x 3, (w) x 1, (r) x 2, (w) x 1, (r) x 3, (w) x 1, (r) x 2, (w) x 1, (r) x 3, (w) x 1, (r) x 1
R23: (w) x 1, (r) x 5, (w) x 2, (r) x 5, (w) x 2, (r) x 5, (w) x 2, (r) x 5, (w) x 1
R24: (r) x 28
R25: (r) x 28
Crochet each COLORED Pattern Repeat TWICE per round (56 sts per round) all in wst or sc stitches:
Each Round finishes with a SLIP STITCH to the 1st (I used the invisible sl st – see video).

Do NOT cut your yarn. Continue below.

Crochet Stocking Body
Let’s continue with Christmas Stocking. First, you’ll make a small transition and then you’ll continue with the stocking leg.
Subscribe to my Youtube Channel here:
[youtube-subscriber channelID=”UCSI4OeQQnxVQEAwMGeTCn1Q” layout=”full” subscribers=”default”]
Crochet Transition:
R1: 1 wst in the next 14 sts, ch 28, sk 28, 1 wst in the next 14 sts
Now follow the graph again (new R1). Remember that each ch is counted as a stitch.
Crochet each Pattern Repeat on the Graph TWICE per Round (56 sts per round) all in wst or sc stitches:

Crochet each Pattern Repeat TWICE per round (56 sts per round)all in wst or sc stitches:
Each Round finishes with a SLIP STITCH to the 1st (I used the invisible sl st – see video).
R1: (r) x 28
R2: (r) x 11, (w) x 3, (r) x 14
R3: (r) x 11, (w) x 3, (r) x 14
R4: (r) x 11, (w) x 3, (r) x 14
R5: (r) x 4, (w) x 8, (r) x 2, (w) x 7, (r) x 7
R6: (r) x 4, (w) x 6, (r) x 2, (w) x 9, (r) x 7
R7: (r) x 5, (w) x 3, (r) x 2, (w) x 8, (r) x 10
R8: (r) x 5, (w) x 1, (r) x 2, (w) x 8, (r) x 2, (w) x 2, (r) x 8
R9: (r) x 6, (w) x 8, (r) x 2, (w) x 4, (r) x 8
R10: (r) x 6, (w) x 6, (r) x 2, (w) x 5, (r) x 9
R11: (r) x 1, (w) x 1, (r) x 4, (w) x 4, (r) x 2, (w) x 7, (r) x 9
R12: (w) x 3, (r) x 3, (w) x 2, (r) x 2, (w) x 9, (r) x 4, (w) x 1, (r) x 4
R13: (r) x 1, (w) x 1, (r) x 6, (w) x 8, (r) x 6, (w) x 3, (r) x 3
R14: (r) x 7, (w) x 7, (r) x 2, (w) x 2, (r) x 5, (w) x 1, (r) x 4
R15: (r) x 7, (w) x 5, (r) x 2, (w) x 4, (r) x 10
R16: (r) x 8, (w) x 2, (r) x 2, (w) x 5, (r) x 11
R17: (r) x 10, (w) x 7, (r) x 11
R18: (r) x 3, (w) x 1, (r) x 4, (w) x 9, (r) x 2, (w) x 1, (r) x 1, (w) x 1, (r) x 1, (w) x 1, (r) x 4
R19: (r) x 2, (w) x 3, (r) x 4, (w) x 5, (r) x 7, (w) x 1, (r) x 6
R20: (r) x 3, (w) x 1, (r) x 5, (w) x 3, (r) x 2, (w) x 2, (r) x 3, (w) x 5, (r) x 4
R21: (r) x 9, (w) x 1, (r) x 2, (w) x 4, (r) x 5, (w) x 1, (r) x 6
R22: (r) x 10, (w) x 5, (r) x 4, (w) x 1, (r) x 1, (w) x 1, (r) x 1, (w) x 1, (r) x 4
R23: (r) x 10, (w) x 5, (r) x 13
R24: (r) x 10, (w) x 2, (r) x 16
R25: (r) x 12, (w) x 2, (r) x 14
R26: (r) x 3, (w) x 1, (r) x 1, (w) x 1, (r) x 1, (w) x 1, (r) x 3, (w) x 3, (r) x 14
R27: (r) x 5, (w) x 1, (r) x 5, (w) x 3, (r) x 6, (w) x 1, (r) x 7
R28: (r) x 3, (w) x 5, (r) x 4, (w) x 1, (r) x 6, (w) x 3, (r) x 6
R29: (r) x 5, (w) x 1, (r) x 5, (w) x 1, (r) x 1, (w) x 1, (r) x 6, (w) x 1, (r) x 7
R30: (r) x 3, (w) x 1, (r) x 1, (w) x 1, (r) x 1, (w) x 1, (r) x 3, (w) x 3, (r) x 14
R31: (r) x 10, (w) x 5, (r) x 13
R32: (r) x 12, (w) x 1, (r) x 15
R33: (w) x 1, (r) x 11, (w) x 1, (r) x 11, (w) x 1, (r) x 3
R34: (r) x 1, (w) x 1, (r) x 7, (w) x 1, (r) x 5, (w) x 1, (r) x 7, (w) x 1, (r) x 4
R35: (r) x 1, (w) x 3, (r) x 6, (w) x 1, (r) x 3, (w) x 1, (r) x 6, (w) x 3, (r) x 4
R36: (r) x 3, (w) x 2, (r) x 5, (w) x 1, (r) x 3, (w) x 1, (r) x 5, (w) x 2, (r) x 6
R37: (r) x 3, (w) x 8, (r) x 3, (w) x 8, (r) x 6
R38: (r) x 2, (w) x 8, (r) x 5, (w) x 8, (r) x 5
R39: (r) x 2, (w) x 1, (r) x 4, (w) x 3, (r) x 5, (w) x 3, (r) x 4, (w) x 1, (r) x 5
R40: (r) x 8, (w) x 2, (r) x 5, (w) x 2, (r) x 11
R41: (r) x 8, (w) x 3, (r) x 3, (w) x 3, (r) x 11
R42: (r) x 8, (w) x 4, (r) x 1, (w) x 4, (r) x 11
R43: (r) x 6, (w) x 4, (r) x 5, (w) x 4, (r) x 9
R44: (r) x 5, (w) x 1, (r) x 2, (w) x 1, (r) x 7, (w) x 1, (r) x 2, (w) x 1, (r) x 8
R45: (r) x 5, (w) x 1, (r) x 2, (w) x 1, (r) x 7, (w) x 1, (r) x 2, (w) x 1, (r) x 8
R46: (r) x 7, (w) x 1, (r) x 9, (w) x 1, (r) x 10
R47: (r) x 28
Crochet each COLORED Pattern Repeat TWICE per round (56 sts per round) all in wst or sc stitches:
Each Round finishes with a SLIP STITCH to the 1st (I used the invisible sl st – see video).

Do NOT cut your yarn. Take a picture of your progress and post it into my Facebook Group “Crocheting with Nicki” with the hashtag #OCT23MCAL

Crocheting the Heel, Toes, and Ribbing Cuff
Subscribe to my Youtube Channel here:
[youtube-subscriber channelID=”UCSI4OeQQnxVQEAwMGeTCn1Q” layout=”full” subscribers=”default”]
Crochet the Cuff on Top of the Stocking
Using white
R1: Ch 18, starting from the 2nd ch from the hook, 1 sc per ch, sl st to the next st in the last round (R47), turn
R2: 1 sl st to the next st from R47, 1 sc in the blo in each st, turn
R3: 1 sc in the blo in each st, 1 sl st to the next st from R47, turn
Repeat R2 and R3 all around for the cuff.
Once finished, sl st the first and last row together, fasten off and weave in your ends.
Fold cuff in half and add a hanger (I used and sewed on a leather piece).
Crochet the Toe Area of the Stocking
Reattach the red yarn below the chain of R1 of the bottom center section.
R1: 1 sc per st, all around, sl st to the first st
R2: *1 sc in the next 5 sts, 1 inv sc dec, repeat from * until the end of the round, sl st to the first st
R3: repeat R1
R4: *1 sc in the next 4 sts, 1 inv sc dec, repeat from * until the end of the round, sl st to the first st
R5: repeat R1
R6: *1 sc in the next 3 sts, 1 inv sc dec, repeat from * until the end of the round, sl st to the first st
R7: repeat R1
R8: *1 sc in the next 2 sts, 1 inv sc dec, repeat from * until the end of the round, sl st to the first st
R9: repeat R1
R10: *1 sc in the next st, 1 inv sc dec, repeat from * until the end of the round, sl st to the first st
R11: repeat R1
R12: inv sc dec all around
Weave yarn through the front loops of all stitches, pull and close the hole, fasten off and weave in your ends
Crochet the Heel of the Stocking
Use a stitch marker!
Reattach the red yarn to one of the corners
R1: 1 sc per st, all around
R2: *1 sc in the next 12 sts, 1 inv sc dec, repeat from * until the end of the round
R3: *1 sc in the next 11 sts, 1 inv sc dec, repeat from * until the end of the round
R4: *1 sc in the next 10 sts, 1 inv sc dec, repeat from * until the end of the round
R5: *1 sc in the next 9 sts, 1 inv sc dec, repeat from * until the end of the round
R6: *1 sc in the next 8 sts, 1 inv sc dec, repeat from * until the end of the round
R7: *1 sc in the next 7 sts, 1 inv sc dec, repeat from * until the end of the round
R8: *1 sc in the next 6 sts, 1 inv sc dec, repeat from * until the end of the round
R9: *1 sc in the next 5 sts, 1 inv sc dec, repeat from * until the end of the round
R10: *1 sc in the next 4 sts, 1 inv sc dec, repeat from * until the end of the round
R11: inv sc dec all around
Weave yarn through the front loops of all stitches, pull and close the hole, fasten off and weave in your ends

Be sure to join my Crochet Facebook Group and show off your crochet creation. I would love to admire them and cheer you on as you’re working on creating it and after you finished it.
I’m also always here to support you through this and any other pattern and tutorial. Simply ask in my group and me and other amazing and kind crocheters will help you along.
If you love this pattern, please use the social media share buttons above or below and share this pattern link with the world and your friends.

That way you will find it easily again when you need it and you also provide the world and your friends with the ability to gain extra crochet knowledge as well. And to top it off, you help me as it allows me to create more content that you love already and want to see more of – free crochet patterns and tutorials. So, thank you for sharing.
If you love my crochet patterns and the way I teach, I would suggest subscribing to my newsletter below as I share new patterns, tutorials, and special announcements often.