Free Tunisian Crochet BOW PILLOW Pattern
This post includes affiliate links.
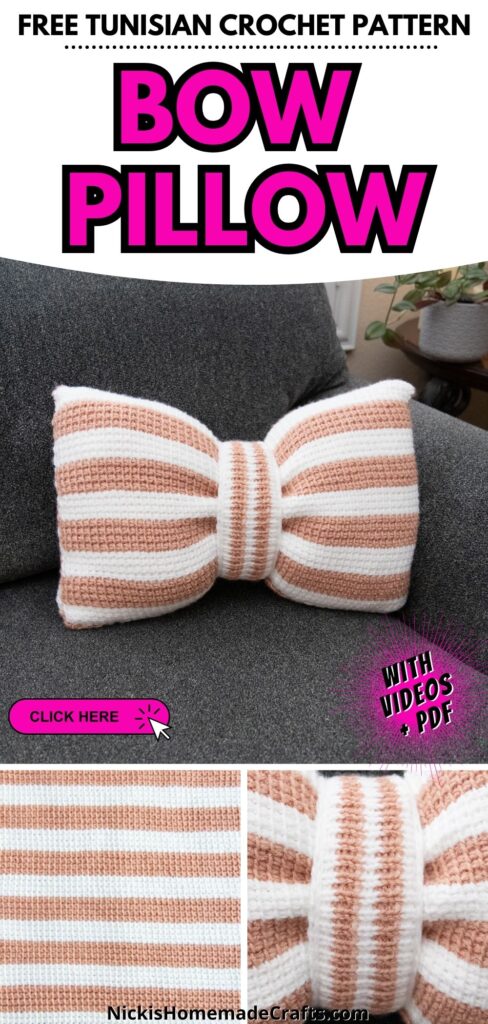
This bow pillow free crochet pattern features basic Tunisian Crochet stitches and tips, such that even a beginner can crochet it. This free crochet pattern is made with acrylic worsted-weight yarn and includes 3 detailed video tutorials.
Everyone has regular decor pillows at home. But to make your home feel extra special, you just need to add a bow pillow into the mix. Add this adorable bow pillow in front of all your pillows on your bed or add them to your sofa – like I did.
This pillow is not only cute but also elegant. The stripes and colors for this bow pillow really make it stand out in your home decor. Furthermore, this pillow is designed such that you can remove the center bow loop to turn this bow pillow into a regular pillow.

Tunisian Crochet Bow Pillow
The Tunisian Crochet Bow Pillow was designed with a Tunisian Crochet Beginner in mind. I used only basic Tunisian Crochet Stitches, such as the Tunisian Simple Stitch and the Tunisian Knit Stitch to really make this bow pillow easy to crochet.
Although this pattern was made with worsted yarn, you can easily also make it in bulky or super bulky yarn. This pattern was designed with acrylic yarn, but it can also be made in polyester or even cotton yarn.
I designed this bow pillow to be striped but you can of course make it all in one color if you prefer.
This pattern used to be a mystery crochet along and is broken up like that accordingly.
It’s time to get creative, so let’s get started!
Tunisian Crochet Patterns
Did you know…this Tunisian Crochet Bow Pillow Pattern is not my first Tunisian Crochet Pattern? It’s actually my 40th! Wanna see them all and learn more Tunisian Crochet stitches?
Great news! I just published a new Tunisian Crochet Ebook called “Tunisian Crochet Made Easy” which includes this pattern and 39 more, plus lots of details stitch tutorials and many video tutorials.
The Crochet Club
This pattern is also part of the mega “The Crochet Club” which hosts over 400 ad-free patterns with check-off boxes as well as a vault of videos, plus weekly new tutorials and patterns as well as monthly meetups.
Get the PDF of the Tunisian Crochet Bow Pillow Pattern

This pattern is also available as an ad-free, printer-friendly pdf pattern that can be purchased at the links below for only a small fee on Ravelry or Etsy.


More Free Crochet Bow or Pillow Patterns
If you like more free patterns, you might also like to try one of these:
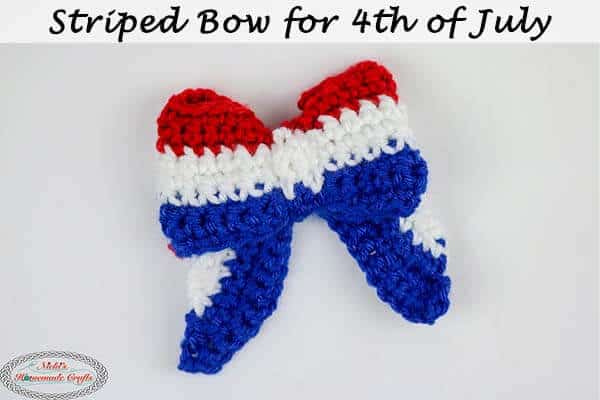


- Striped Bow Great for 4th of July
- Pull String Bow for Christmas Presents
- Present Pillow with a Bow
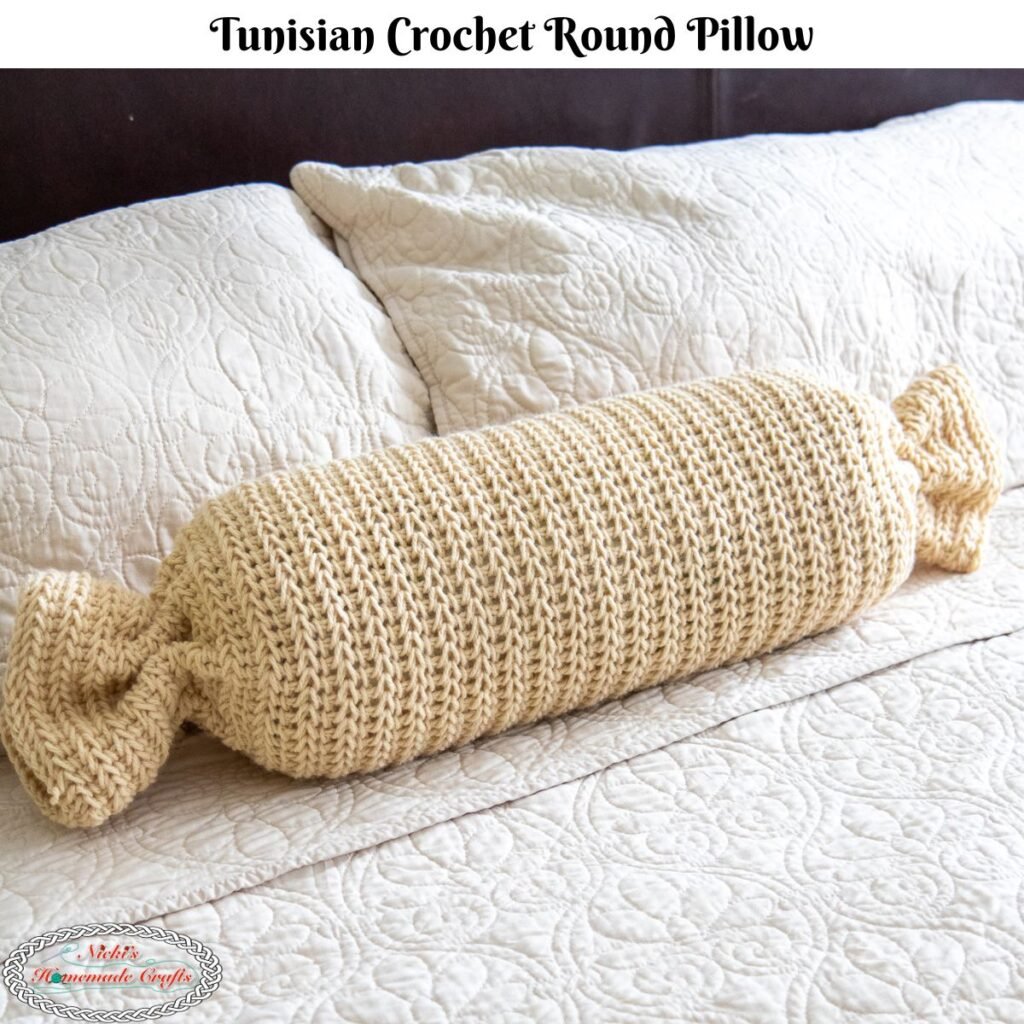
- Tunisian Crochet Round Pillow
So, let me now give you the supplies you need in order to crochet this cute pattern.
How to Tunisian Crochet a Bow Pillow – Free Pattern
Materials you will need
- Mary Maxim GLIMMER Yarn (100% Acrylic, Worsted, 191 yds/100g):
- Salmon – I used 1 FULL skein – I recommend 2 skeins due to tension differences
- Mary Maxim STARLETTE Yarn (100% Acrylic, Worsted, 180 yds/100g):
- White – I used 1 FULL skein – I recommend 2 skeins due to tension differences
- 6.5mm TUNISIAN CROCHET hook with 9 inch cord
- scissors
- tapestry needle
- Blocking materials:
- Pillow Insert that is 12×20 inches (click to see)
- NOTE for those who don’t have 20 inches in width, you can also use the following pillow inserts if you also want to make a cute bow pillow:
Gauge
3 sts x 3 rows = 1 square inch (after assembly)
Size
12 x 20 inches
Stitches used in the pattern (US Terms)
Learn all the basic crochet stitches HERE
- st/sts = stitch/stitches
- ch = chain
- sk = skip
- sl st = slip stitch (or invisible sl st – see video)
- TSS = Tunisian Simple Stitch
- TKS = Tunisian Knit Stitch
- Mattress Stitch
Free Written Tunisian Crochet Bow Pillow Pattern with Videos
IF you would like the pattern ad-free you can join “The Crochet Club” membership as a trial or as a full member and get access to this pattern ad-free and more than 400 patterns, even with interactive checkboxes to save your progress row by row.
You can join the “The Crochet Club” Membership here if you want to have the entire pattern ad-free.
Already a member? Login HERE to see the ad-free version
Written Pattern Notes
Keep in mind, that this pattern used to be a Mystery CAL, and therefore the pattern is broken up as such.
First you’ll crochet the body of the pillow. Then sew the the sides together. Then you’ll crochet the center strap of the bow, sew the short ends together and then add it onto the pillow.
NOTE for If you don’t have 20 inches in width, you can also use the following pillow inserts to make a cute bow pillow:
Quick note: Please be aware that regardless of what your width is, make sure your height is 2×12 inches (as it’s folded in half for the pillow).
Bow Pillow Body
Subscribe to my Youtube Channel here:
[youtube-subscriber channelID=”UCSI4OeQQnxVQEAwMGeTCn1Q” layout=”full” subscribers=”default”]
Written Pattern for Bow Pillow Body
TSS = Tunisian Simple Stitch
F = Forward Pass
R = Reverse Pass
F+R = 1 row
Start with Salmon
Chain 53, starting from the 2nd ch from the hook
R1 F: 1 TSS per st
R1 R: work stitches off the hook (reverse pass)
Repeat R1 until you have 36 rows
You’ll continue this part in Part 3 to 72 rows in total! Check there so you won’t have to cut your yarn!
*4 rows in salmon, 4 rows in white, repeat from * until you have 36 rows (or 72 if you finish part 3 here already)
No need to cut the yarn during transitions, just drop it and pick it back up later (that saves you yarn and prevents you from having to weave in too many ends).
Part 1’s piece should be roughly 20 x 12 inches (+/- 1 inch is ok). If you can’t do 20 inches wide, you can also make it 14, 16 or 18 inches (I have a solution for you in Part 3) to make sure it will all work out for you.
After the last row (after all 9 or 18 stripes are made), cut yarn (both colors) about a foot or so, DO NOT finish the last row with slip stitches. IGNORE the curl (that’s normal for Tunisian Crochet) for now.
Now, don’t forget to join Facebook Group “Crocheting with Nicki” and use the hashtag #JUNE24MCAL when posting/commenting about this fun MCAL!

Bow Pillow Center Loop
Subscribe to my Youtube Channel here:
[youtube-subscriber channelID=”UCSI4OeQQnxVQEAwMGeTCn1Q” layout=”full” subscribers=”default”]
Written Pattern for Tunisian Crochet Bow Pillow Center Loop:
TSS = Tunisian Simple Stitch
TKS = Tunisian Knit Stitch
F = Forward Pass
R = Reverse Pass
F+R = 1 row
Start with White
Ch 41, starting from the 2nd ch from the hook
R1 F: 1 TSS per st
R1 R: work stitches off the hook (reverse pass)
R2 F: 1 TKS per st
R2 R: work stitches off the hook (reverse pass)
Repeat R2 until you have 15 rows
*3 rows in white, 3 rows in salmon, repeat from * until you have 15 rows
No need to cut the yarn during transitions, just drop it and pick it back up later (that saves you yarn and prevents you from having to weave in too many ends).
Part 2’s piece should be roughly 12 x 3 inches (+/- 1 inch is ok). For this piece make sure your width is between 11 and 14 inches so Part 3 will work out for you.
Finish the piece by slip stitching into each stitch after the last row (binding off). You can block this piece now. BUT leave about 1 foot as a yarn end (one of the colors only).
I used these blocking materials in case you want to use the same in the future:
Don’t forget to join Facebook Group “Crocheting with Nicki” and use the hashtag #JUNE24MCAL when posting/commenting about this fun MCAL!

Finishing the Pillow Body and Assembly
Subscribe to my Youtube Channel here:
[youtube-subscriber channelID=”UCSI4OeQQnxVQEAwMGeTCn1Q” layout=”full” subscribers=”default”]
Written Pattern to finish the Bow Pillow Body:
Here is now how to finish the cute bow pillow.
Reattach your yarn (2nd color first, then the next stripe is the other color) and continue on the piece from Part 1, and add the same amount of rows again such that you end up with 72 rows in total. You should finish with the 2nd color. Bind off after the last row.
I used This Pillow Insert that is 12×20 inches (click to see)
NOTE for those who didn’t have 20 inches in width, you can also use the following pillow inserts if you also want to make a cute bow pillow:
Quick note: Please be aware that regardless of what your width is, make sure your height is 2×12 inches (as it’s folded in half for the pillow).
By the way, if you want to make it into a bow pillow and don’t have the right pillow insert (or can’t get it on time) you can always stuff it temporarily with polyfill and then add the actual insert later. I mentioned that in the video above, too!

Now, fold the big piece in half and then sew the last and first row together (I used the mattress stitch).

Next, sew one of the short sides together the same way. Insert the pillow insert, and sew the last short side together.

For the small piece, crochet slip stitches along the FIRST row to make it even (especially the stretch) to the last row where you bound off.
Then fold the small piece in half such that the short sides touch, sew them together tightly.
Finally, push the pillow halfway through the small (now loop) piece which is the center bow strap.
Don’t forget to join Facebook Group “Crocheting with Nicki” and use the hashtag #JUNE24MCAL when posting/commenting about this fun MCAL!

Wanna learn more about Tunisian Crochet and get Patterns? Watch this Video here
Be sure to join my Crochet Facebook Group and show off your crochet creation. I would love to admire them and cheer you on as you’re working on creating it and after you finished it.
I’m also always here to support you through this and any other pattern and tutorial. Simply ask in my group and me and other amazing and kind crocheters will help you along.
If you love this pattern, please use the social media share buttons above or below and share this pattern link with the world and your friends.
That way you will find it easily again when you need it and you also provide the world and your friends with the ability to gain extra crochet knowledge as well. And to top it off, you help me as it allows me to create more content that you love already and want to see more of – free crochet patterns and tutorials. So, thank you for sharing.
If you love my crochet patterns and the way I teach, I would suggest subscribing to my newsletter below as I share new patterns, tutorials, and special announcements often.